3. Taking care not to touch module components, pins, leads, or solder connections, remove the uplink
module from its bag.
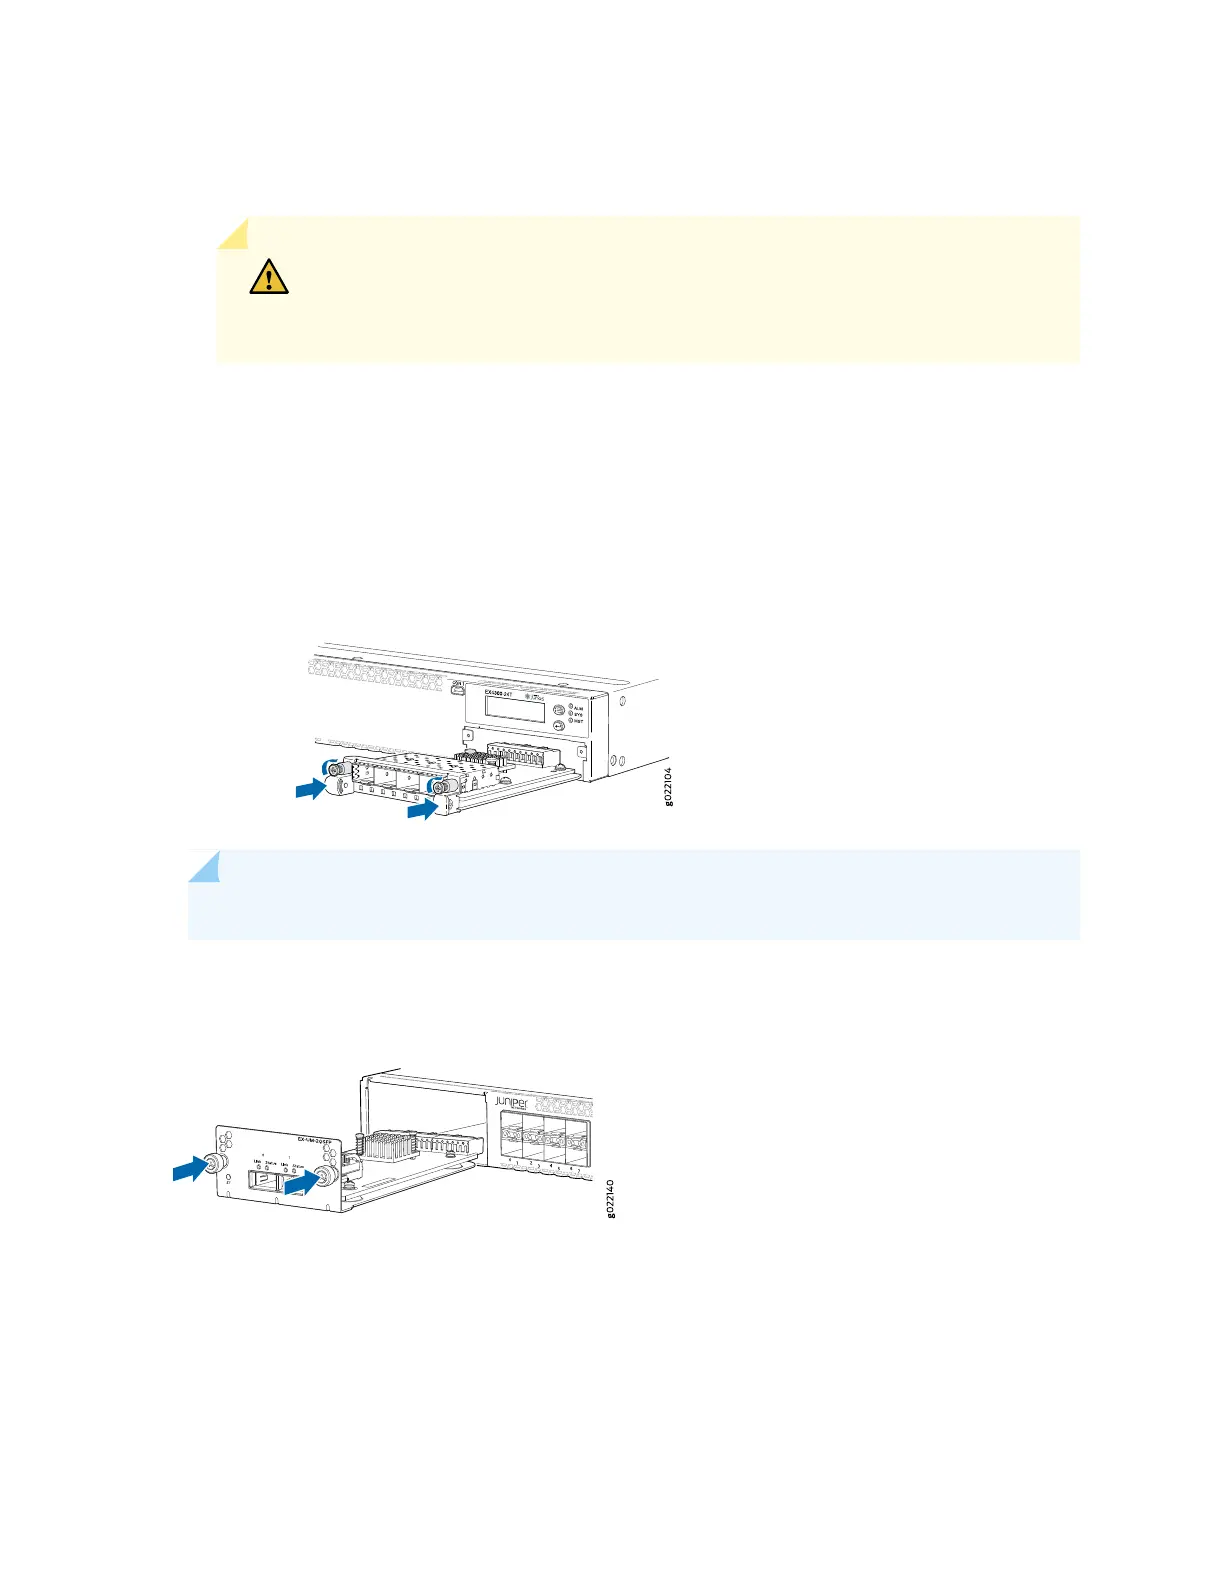
CAUTION: Before you slide the uplink module into the slot on the switch chassis,
ensure the uplink module is aligned correctly. Misalignment might cause the pins
to bend, making the uplink module unusable.
4. Using both hands, place the module in the empty slot and slide it in gently until it is fully seated.
5. Tighten both the captive screws by using your fingers or the screwdriver.
Figure 169: Installing a 4-Port 1-Gigabit Ethernet/10-Gigabit Ethernet SFP+ Uplink Module in a 24-Port
or 48-Port EX4300 Switch Except EX4300-48MP and EX4300-48MP-S Switches
NOTE: The procedure is the same for EX4300-48MP and EX4300-48MP-S switches.
Figure 170: Installing a 2-Port 40-Gigabit Ethernet QSFP+ Uplink Module in a 32-Port EX4300 Switch
472

 Loading...


