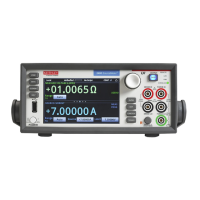
3: Functions and features Model 2450 Interactive SourceMeter® Instrument
3-20 2450-901-01 Rev. B/September 2013
Heading Description
Provides an identifier for each reading
Measured value for each reading
Indicates the unit of measure for the reading; values may be any of the
following: V (Volts), A (Amps), O (Ohms)
Range Digits Positive full-scale value of the measurement range that the instrument is
presently using; values may be any of the following:
".000000001", ".00000001", ".0000001", ".000001",
".00001", ".0001", ".001", ".01", ".1", "1",
"10", "100", "1000", "10000", "100000", "1000000",
"10000000", "100000000", "1000000000",
"10000000000", "100000000000"
The number of digits that are displayed for measurements on the front
panel. Values may be 3.5, 4.5, 5.5, or 6.5
T when Math is ON; F when Math is off
Specifies that the upper limit for limit 1 has been exceeded
Specifies that the lower limit for limit 1 has been exceeded
Specifies that the upper limit for limit 2 has been exceeded
Specifies that the lower limit for limit 2 has been exceeded
Specifies which set of input and output terminals the instrument was
using when the measurements were made; values may be any of the
Origin The A/D converter from which the reading originated; for the Model
2450, this will always be Main.
Value is the source value when the reading was taken; if readback is
ON, it is the measured source value; otherwise, it is the programmed
Units of measure of the source; values may be any of the following: V
(Volts), A (Amps), O (Ohms), W (Watts).
Sense 2W or 4W
Source Limit T indicates that the source limit was exceeded; F indicates that the
source limit was not exceeded
T indicates that the instrument is in over temperature; F indicates that
the instrument is not in over temperature
Date the readings were made
Time the readings were made
Fractional Seconds Fractional portion of the timestamp (in seconds) when each reading was
Using the front panel to view the contents of a reading buffer:
1. Press the MENU key.
2. Under Views, select Sheet.
3. Next to Buffer, select the buffer you want to view. The data is displayed.
4. If you want to view the DATA SHEET window for a different buffer, select the Buffer button to
display the Select Buffer to View menu.
5. To view a specific data point, select Jump To and enter the number of the data point.
6. Press the HOME key to return to the HOME screen.
 Loading...

