4-80 Service Manual
4062-XXX
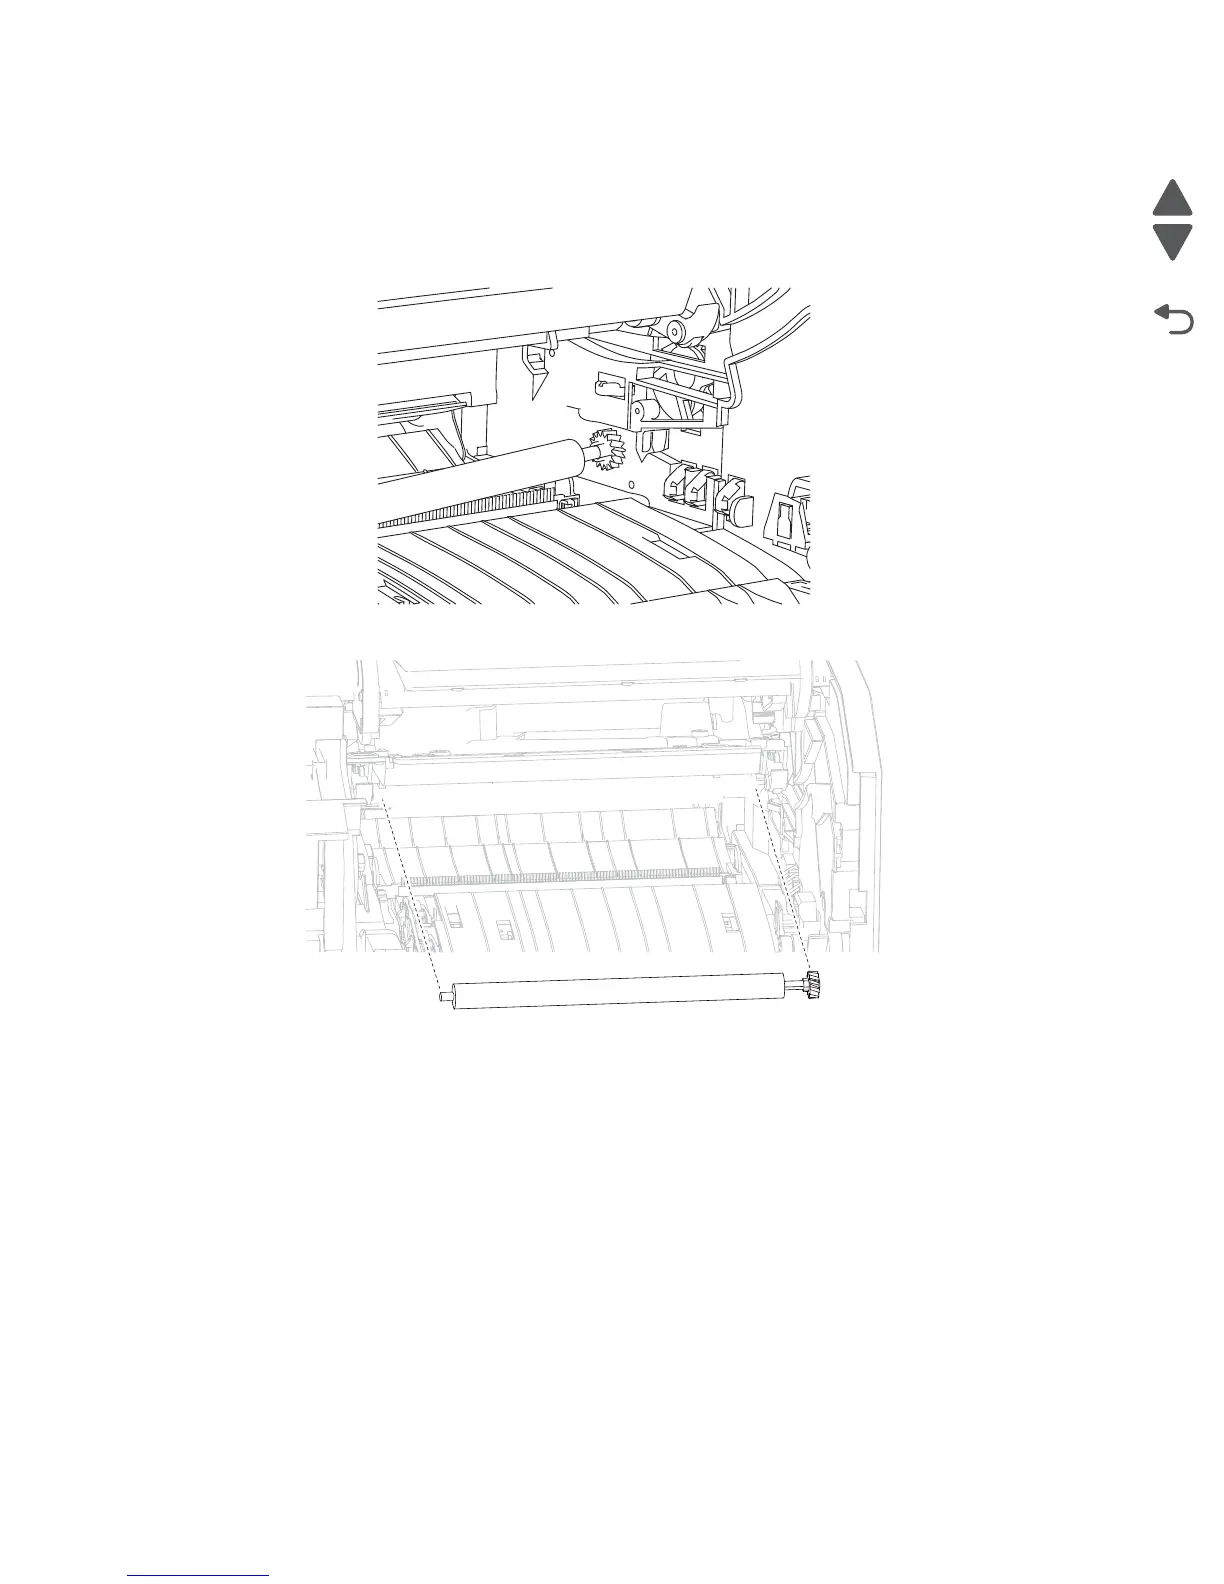
Transfer roll assembly removal
1. Open the operator panel door assembly.
2. Remove the print cartridge.
3. Gently unsnap the transfer roll assembly from the machine.
4. Remove the transfer roll assembly.
Replacement Warning: When replacing the transfer roll assembly, do not touch the foam surface.
Transfer roll bracket assembly, left removal
1. Remove the transfer roll assembly. Go to “Transfer roll assembly removal” on page 4-80.
2. Remove the inner deflector. Go to “Inner deflector removal” on page 4-24.
3. Remove the screw (A) securing the transfer roll bracket assembly, left to the machine.
4. Remove the transfer roll bracket assembly, left.
5. Remove the roll clamp (B) from the transfer roll bracket assembly, left.
6. Remove the bushing (C).
7. Remove the spring (D).
8. Remove the screw (E).

 Loading...


