214323 224 Revision B
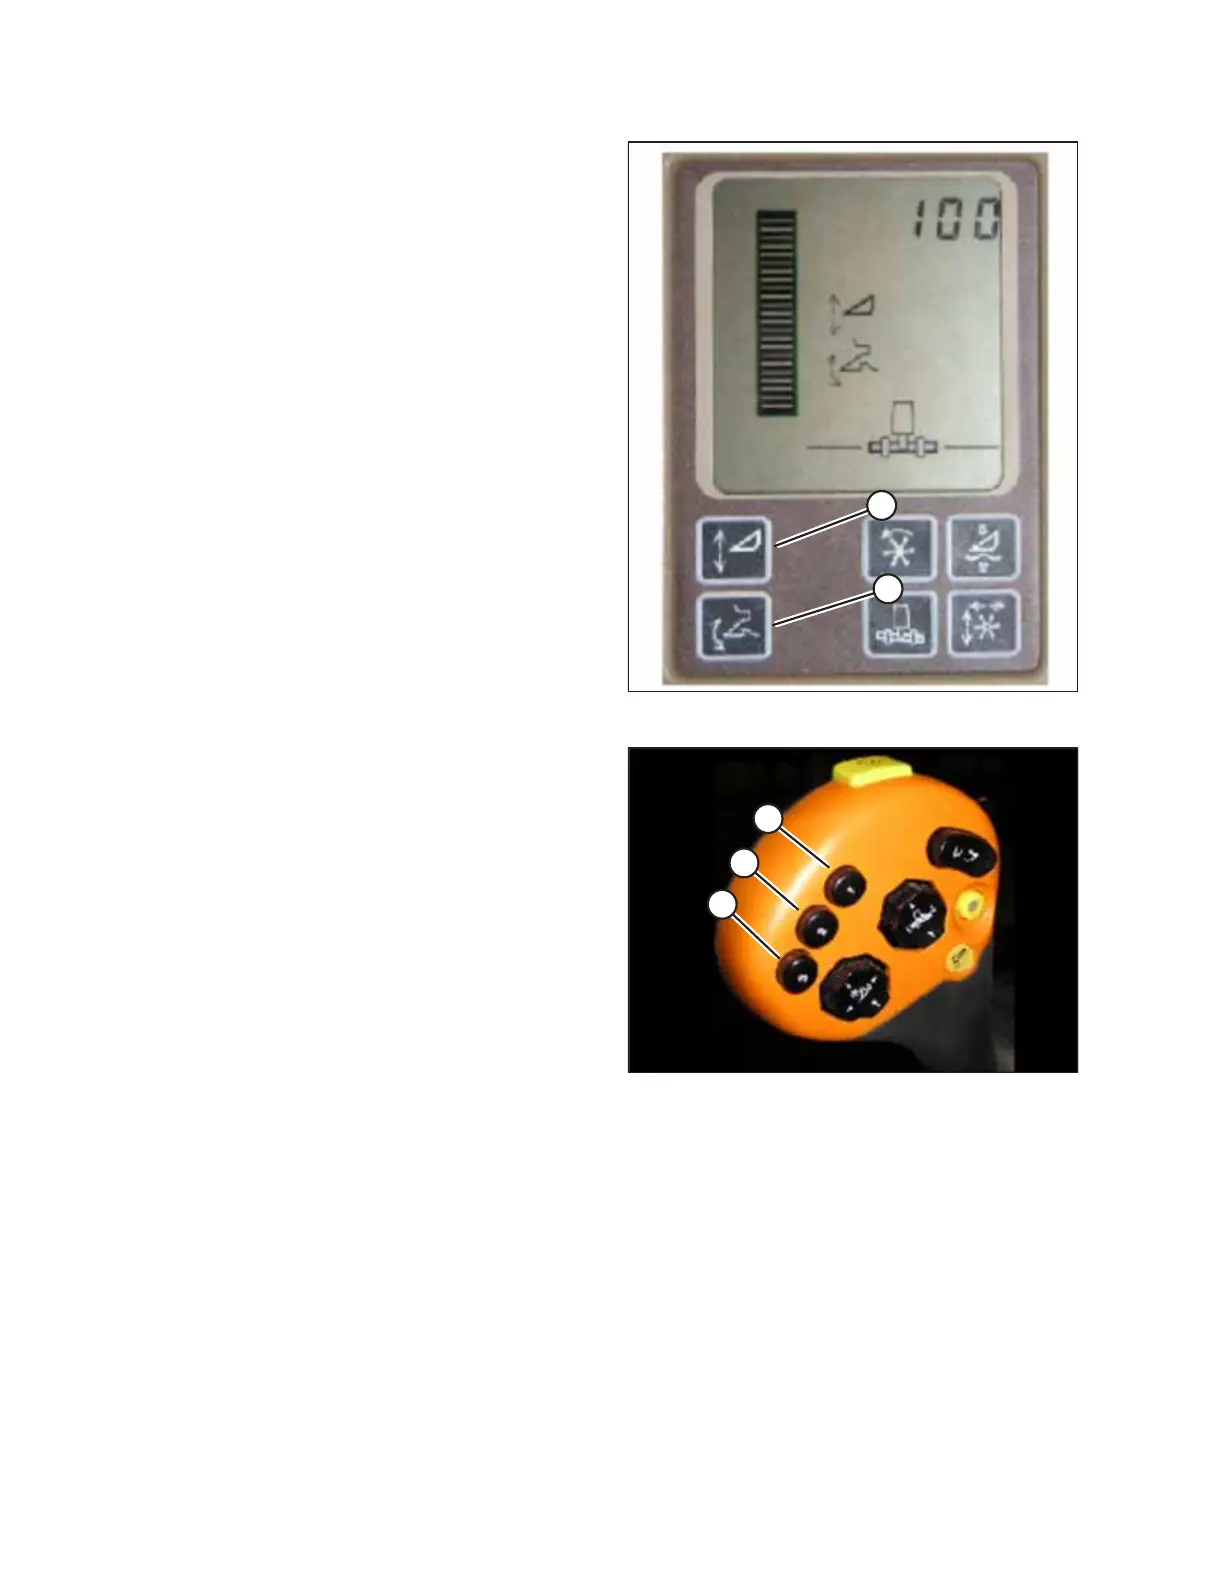
Figure 4.186: Active Header Control Display
1. Ensure HEADER HEIGHT RESUME and ACTIVE HEADER
CONTROL functions are ON by pressing the buttons on the
monitor. Icons will appear on the monitor with the same
picture that is displayed on the buttons. This indicates that
your auto header height, resume, and active header control
are turned ON.
• ACTIVE HEADER HEIGHT (A) is indicated with an arrow
going up and down in front of it.
• HEADER HEIGHT RESUME (B) is indicated with a header
diagram with a curved arrow in front of it.
Figure 4.187: Hydrostatic Lever
2. Once HEADER HEIGHT RESUME and AUTO HEADER
CONTROL are turned ON, use buttons 2 (B) and 3 (C) on
your hydrostatic lever for active header control.
NOTE:
Button 1 (A) is reserved for AUTO HEIGHT RESUME which
will return the header to a certain height, but will not
automatically compensate for ground variation.
NOTE:
To use the buttons, the combine must be running, AUTO
HEADER HEIGHT SENSING must be ON, and the header
switch and the feeder house must be engaged.
3. Push the button that you would like to use, and the header
will position itself at the default height.
AUTO HEADER HEIGHT CONTROL