302
5. From list <Variable> chose variable type „4 Date and time” and press
, then the variable is placed in the table of variables
show below.
6. Confirm it by pressing , then the variable is automatically
placed on the label.
7. Place the rest of variables and constant texts on the label in the same way.
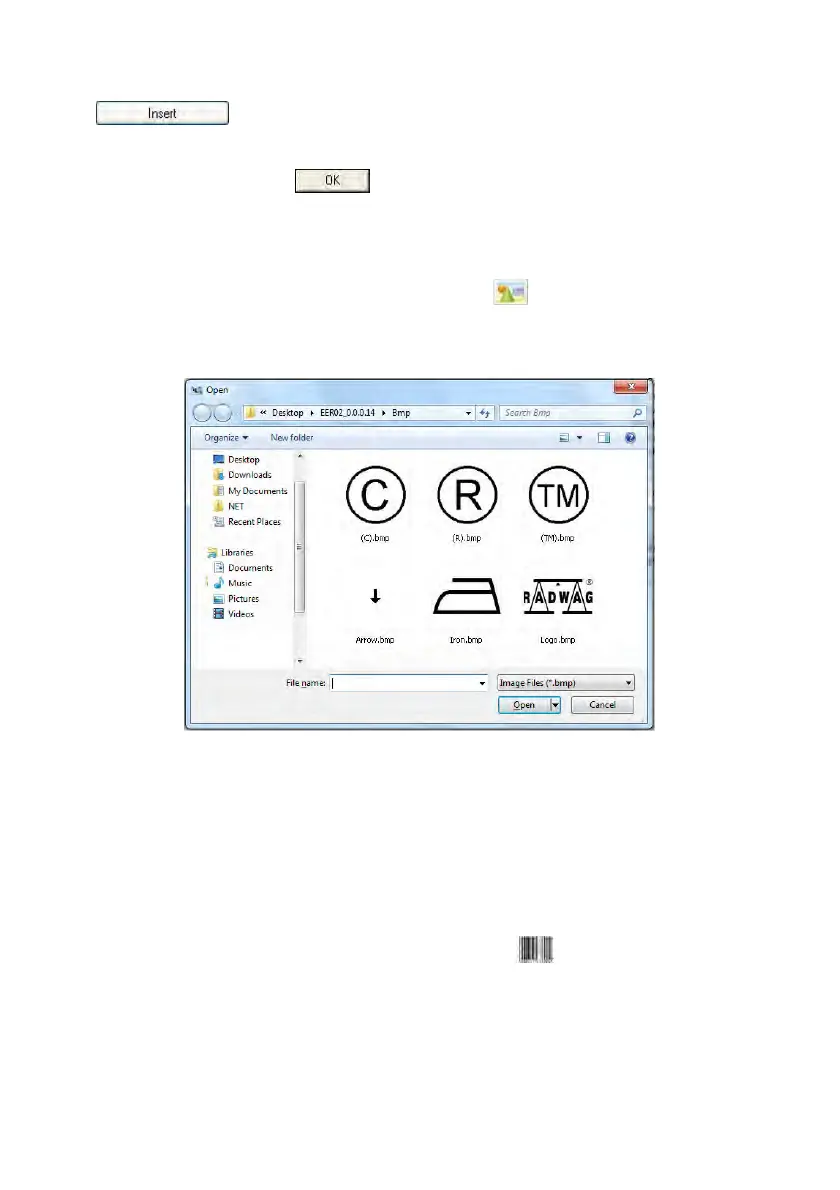
8. In order to put an image on the label chose < Image> from the list
of objects and then click on the workspace of label, then window
<Open> opens:
9. Chose one and press <Open>, then the image is placed on the label.
Caution:
Graphic images placed on the label can be printed only when they
are downloaded to the printer memory. It is described in the instruction
manual „Label Editor R02” accessible in the program menu on the
overlap: „Info / User manual”.
10. In order to add a barcode to the label chose <
Barcode> and then
click on the workspace of label, then window <Barcode settings> opens:
 Loading...