Removes the QoS priority attribute for the default zone and reverts to default low priority.
Configuring Default Zone QoS Priority Attributes Using Fabric Manager
To configure the QoS priority attributes for a default zone using Fabric Manager, follow these steps:
Step 1 Choose Zone > Edit Local Full Zone Database.
You see the Select VSAN dialog box.
Step 2 Select a VSAN and click OK.
You see the Edit Local Full Zone Database dialog box for the selected VSAN.
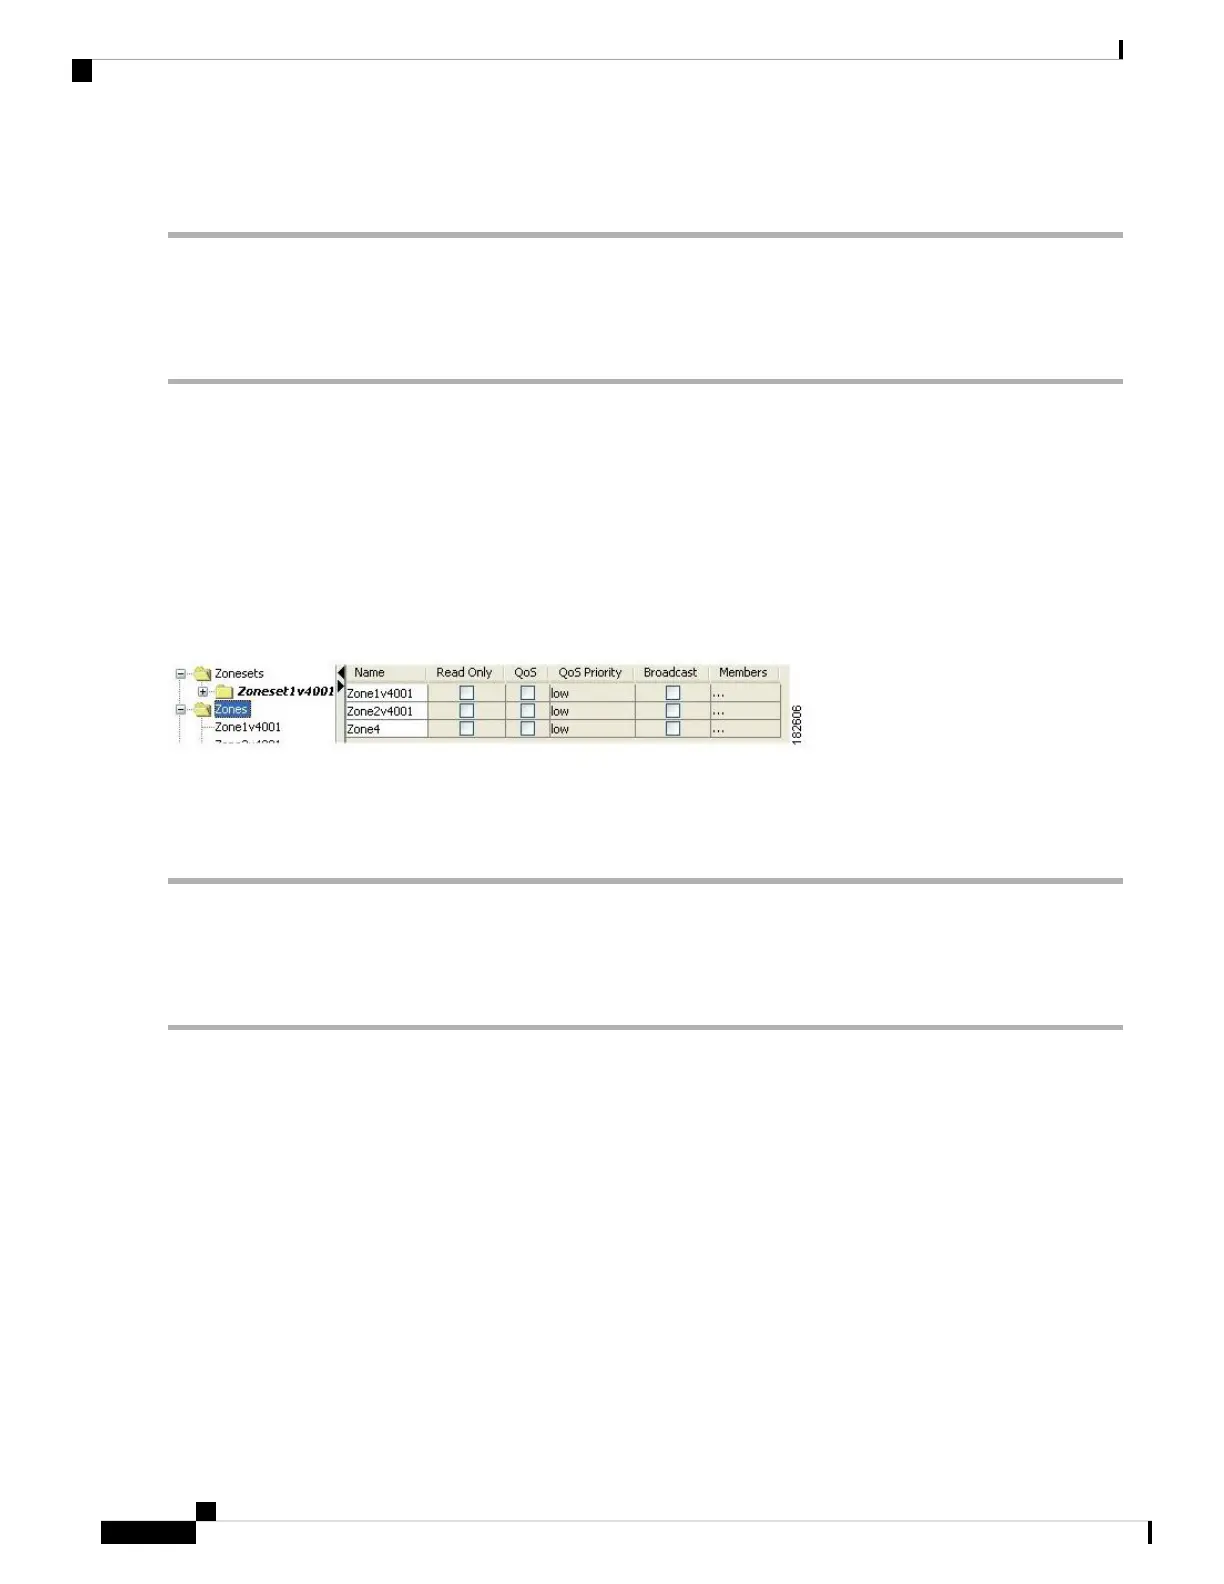
Step 3 Choose Edit > Edit Default Zone Attributes to configure the default zone QoS priority attributes (see Figure 39: QoS
Priority Attributes, on page 92).
Figure 39: QoS Priority Attributes
Step 4 Check the Permit QoS Traffic with Priority check box and set the Qos Priority drop-down menu to low, medium, or
high.
Step 5 Click OK to save these changes.
Configuring the Default Zone Policy
To permit or deny traffic in the default zone using Fabric Manager, follow these steps:
Step 1 Choose Zone > Edit Local Full Zone Database.
You see the Select VSAN dialog box.
Step 2 Select a VSAN and click OK.
You see the Edit Local Full Zone Database dialog box for the selected VSAN.
Step 3 Choose Edit > Edit Default Zone Attributes to configure the default zone QoS priority attributes.
You see the Modify Default Zone Properties dialog box (see Figure 40: Modify Default Zone Properties Dialog Box, on
page 93).
Cisco MDS 9000 Series Fabric Configuration Guide, Release 8.x
92
Configuring and Managing Zones
Configuring Default Zone QoS Priority Attributes Using Fabric Manager

 Loading...