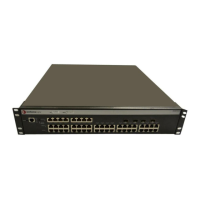
Configuring a Stack of New Switches
1-8 Setting Up a Switch for the First Time
1. Save the running configuration.
C5(su)save config
Saving Configuration to stacking members
Configuration saved
C5(su)->
2. Optionally, save the configuration to a backup file named “myconfig” in the configs directory
and copy the file to your computer using TFTP. You can use this backup configuration file to
quickly restore the configuration if you need to replace the switch or change to a different
firmware version.
C5(su)->show config outfile configs/myconfig
C5(su)->copy configs/myconfig tftp://192.168.1.2/myconfig
3. Connect the switch ports to the network or to user devices, following the instructions in the
Installation Guide for your switch.
Configuring a Stack of New Switches
For more information about configuring a stack of switches, refer to Chapter 2, Configuring
Switches in a Stack.
To set up multiple new stackable switches in a stack:
1. Before applying power to the switches, connect the stacking cables, as described in your
products’ Installation Guide.
2. Power on the switches one at a time, starting with the switch you want to be the manager
switch.
3. Connect to the console port of the manager unit, as described in “Before You Begin” on
page 1-1, and “Connecting to the Switch” on page 1-2 and log in to the CLI.
4. Check that the stacking process has completed as you expected it to, using the show switch
command.
5. If necessary, renumber the stack units, as described in Chapter 2, Configuring Switches in a
Stack.
6. Set the IP address of the stack as described in “Connecting to the Switch” on page 1-2.
7. Connect the network port on your computer to a front panel port on the manager unit with an
Ethernet cable (described in Connecting to the Switch) and use TFTP to download the
firmware to the manager unit, as described in “Downloading New Firmware” on page 1-3.
The manager unit copies the new firmware to the members of the stack automatically as part
of the download process.
8. Set the new firmware to be active and reboot the entire system with the set boot system
command. When the command asks if you want to reset the system now, reply y.
9. After the switches in the stack reboot, log back in and confirm that the new firmware has been
applied, using the show switch command.
10. Apply any advanced feature licenses, if required. Refer to “Licensing Advanced Features” on
page 4-8 for more information.
11. Refer to “Additional Configuration Tasks” on page 1-5.
 Loading...
