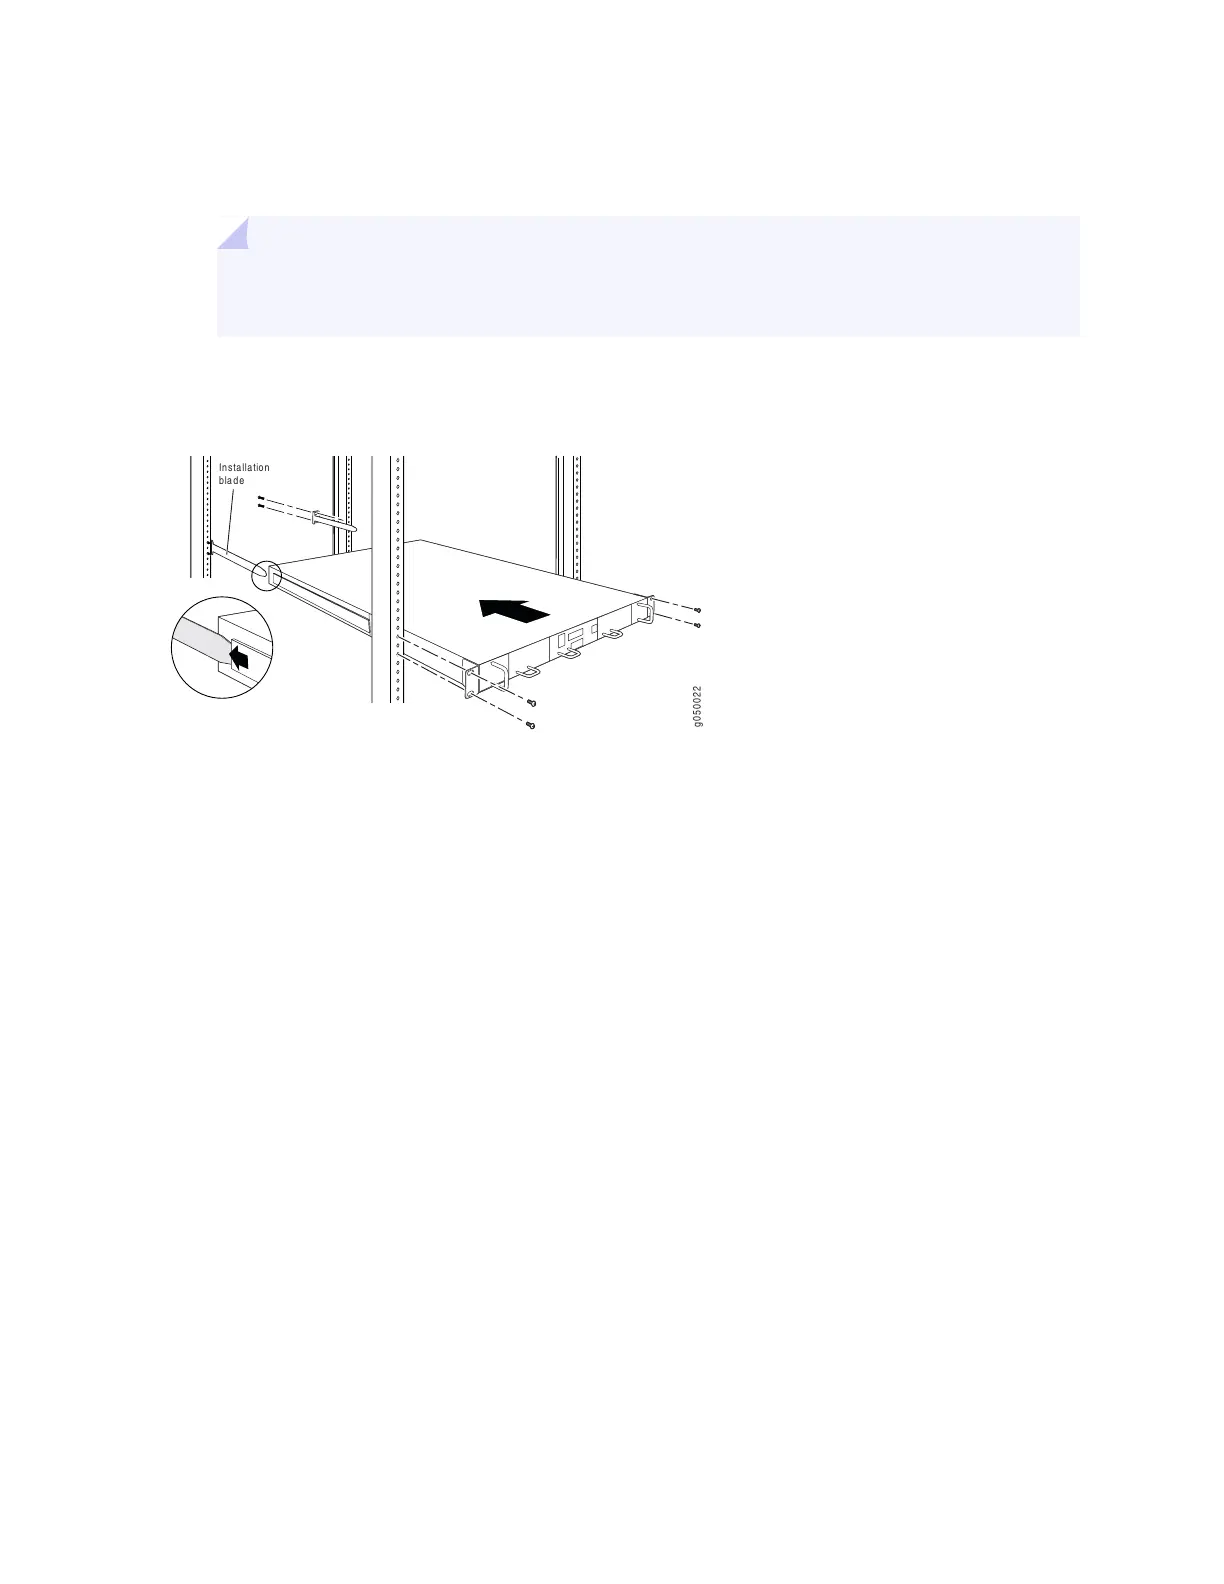
3. Grasp both sides of the device, lift it, and position it in the rack so that the blade receptacle at the rear
of the chassis catches and slides onto the installation blade. See Figure 102 on page 331.
TIP: If someone is assisting you, have one person stand at the rear of the rack where the
installation blade is installed, to help guide the device onto the installation blade.
Figure 102: Mounting the QFX3500 Device on Four Posts in a Rack Using a Two-Rail Kit
4. Align the holes in the front brackets on the chassis with the holes in the rack. Ensure that the chassis
is level.
5. With four mounting screws—and cage nuts and washers if your rack requires them—secure the front
of the device to the rack. Insert the first screw on the opposite corner from the rear installation blade
you installed. Tighten the screws.
6. Ensure that the device chassis is level by verifying that all the screws on the front of the rack are aligned
with the screws at the back of the rack.
7. With two mounting screws—and cage nuts and washers if your rack requires them—slide the second
rear mounting blade into the blade receptacle on the chassis, and secure it to the rear of the rack by
tightening the screws. You might need to loosen and adjust the first mounting blade to install the second
blade.
331

 Loading...


