TOS93 Series User’s Manual 221
Auto Test | Setting Steps
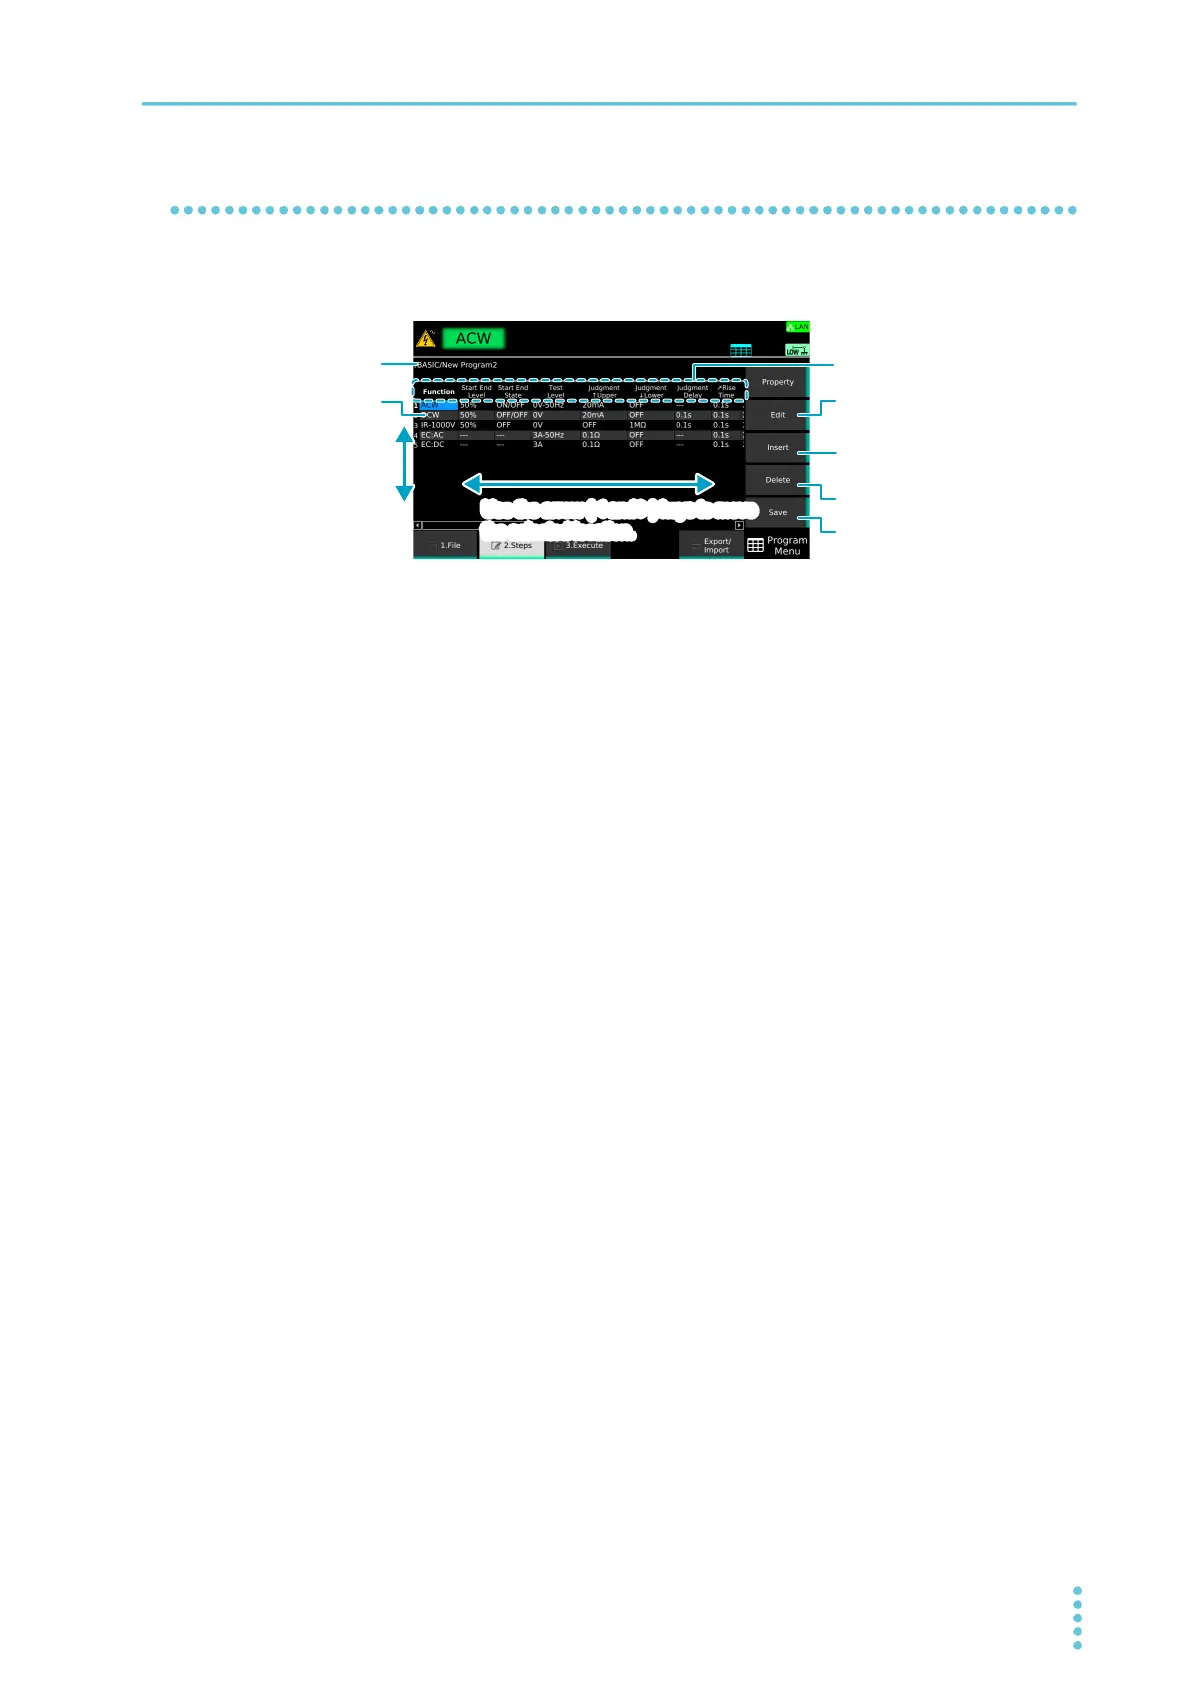
Editing steps
On the step editing screen (p.220), you can edit, add, delete, and save steps.
The basic operation on the step editing screen is provided below.
1
On the step editing screen, add and delete steps.
2
Use the rotary knob and the arrow (←/→) keys to select the Function column of a
step of your choice, and then press Edit.
3
Use the sub-function keys to select the test mode, and press Edit.
The test mode is set for the selected step.
4
Use the arrow (←/→) keys to select a test condition, and press Edit.
You can set test conditions similar to those you set when running tests individually, with a few
exceptions
(p.216). For test conditions that can be set to on or off or those that have options,
items are displayed in a sub-function area.
5
Use the numeric keypad, rotary knob, or sub-function keys to set the test
conditions of the step, and press ENTER.
The test conditions are set for the selected step.
6
Repeat Step 1 to Step 5 until all the steps have been registered.
7
Press Save.
The steps are registered to the program.
Use the rotary knob to
move between steps.
Use the arrow (
←
and
→
) keys to move
the selected location.
Edit the selected cell or confirms
Deletes the selected step
Saves the edited step
Test condition
Name of the
selected program
Adds a copy of the selected step