Sequencer mode
276
Auto Sampling Setup
This command automatically makes various parameter
settings for Sequencer mode (e.g., in-track sampling) and
two-channel mixdown. You will find it convenient to use
this command when resampling a song, or when using the
song as a guide while sampling an external audio source.
When you execute this operation, the relevant
parameters will be set automatically. You cannot use the
COMPARE switch to revert to the prior settings.
The settings are automatically made for the most
typical applications. After executing the auto setup
operation, you can further adjust any of the parameters
as described in the paragraphs for each item.
1. Select “Auto Sampling Setup” to open the dialog box.
2. Use the radio buttons to select the type of settings you
want to be made automatically.
Initialize: Set parameters related to sampling to their
default values.
Resample SEQ Play: Make settings so that you can
resample your keyboard playing in Sequencer mode.
In-Track Sampling: Make settings to sample only an
external audio signal using the In-Track Sampling function.
2ch Mix to Media: Make the appropriate settings for
resampling a completed song to create a stereo two-channel
WAVE file on an external USB storage device (such as a hard
disk). (After creating the WAVE file, you can use the Media
mode Make Audio CD page to create an audio CD on an
external USB CD-R/RW drive.)
3. The settings for the rest of the procedure will depend
on what you selected in step 2. (For details, please see
the explanations below.)
If you selected Initialize:
1. Refer to Auto Sampling Setup steps 1 and 2, and select
Initialize.
2. Press the OK button to execute the command. If you
decide not to execute, press the Cancel button.
For the parameters and values that will be set, please see
page 278.
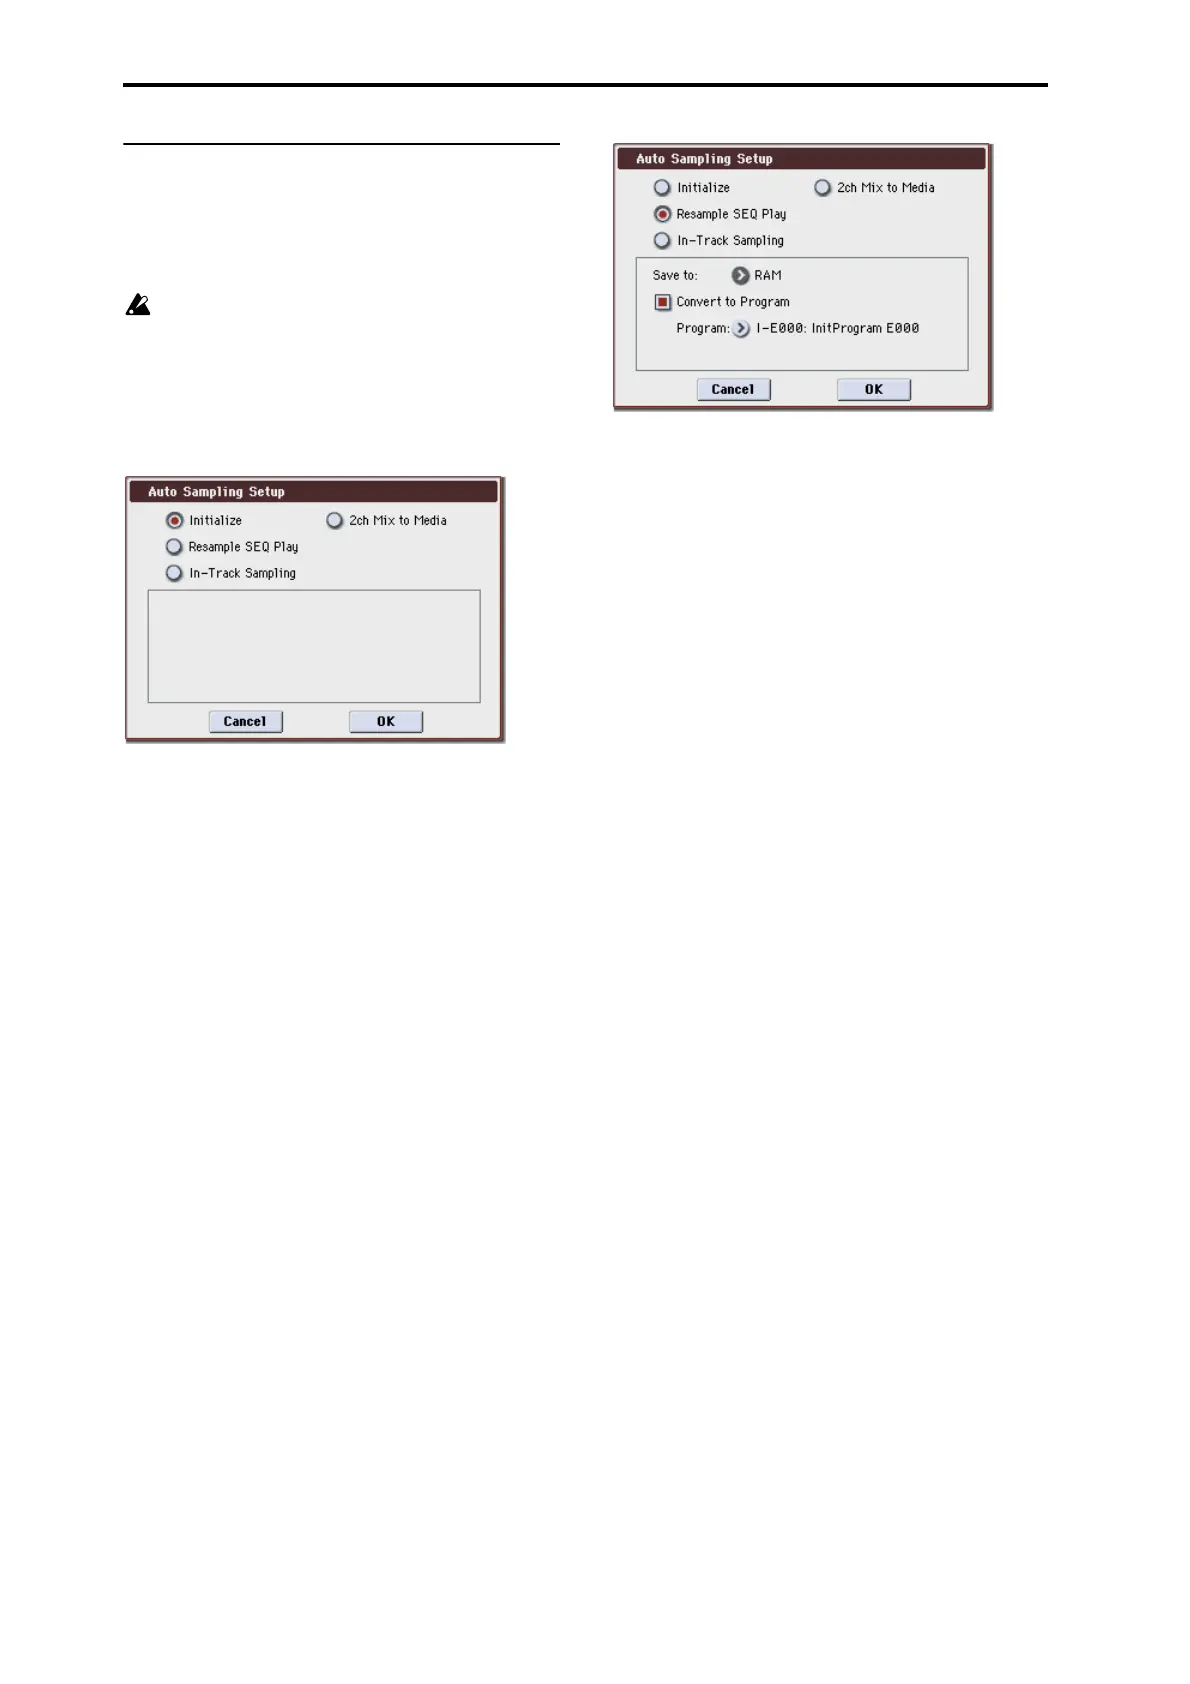
If you selected Resample SEQ Play:
1. Refer to Auto Sampling Setup steps 1 and 2, and select
Resample SEQ Play.
2. Use “Save to” to select either RAM or MEDIA as the
destination to which the resampled data will be writ-
ten.
If you select RAM, the data will be written to sample
memory (RAM). If this is set to MEDIA, the sampled data
will be used to create a WAVE file, which will then be saved
on an external USB storage device (such as a hard disk). For
more information, please see “Save to” on page 12.
3. If you selected Save to RAM, you can specify whether
the data will be automatically converted to a program
after sampling.
If you want the data to be converted, check Convert to
Program and use the Program field to specify the convert-
destination program.
4. Press the OK button to execute Resample SEQ Play, or
press the Cancel button if you decide to cancel.
For the parameters and values that will be set, please see
page 278.
Execute the command, and then resample
1. Press the SAMPLING REC switch and then the SAM-
PLING START/STOP switch, and then play a note on
the keyboard etc.
Since Trigger (Seq 0–1–7b) is set to Note On, sampling will
begin at the first note-on.
2. When you’ve finished performing, press the SAM-
PLING START/STOP switch to stop resampling.
Note: If Save to was set to RAM and Convert to Program
was checked when you executed Resample SEQ Play, and
you continue sampling without changing the settings, the
samples will automatically be assigned to C#2, D2 ... etc.
When you execute Resample SEQ Play once again and
sample, a new multisample will be created.
Auditioning the sampled data
• If Save to was set to RAM and Convert to Program was
checked when you executed, you can select the program
you specified as the conversion-destination, and play the
C2 note to hear the result.
If Convert to Program was not checked, select the
sample in Sampling mode and audition it.
• If Save to was set to MEDIA when you executed, use the
menu command Select Directory to audition the result.
Note: If you want to change the sample number to be
sampled (when Save to is RAM), use the menu command
Select Bank & Sample No. to change it.
Changing the writing destination
If you want to change the destination to which the WAVE
file will be saved (when Save to is MEDIA), use the menu
command Select Directory to make the change.
Changing the way in which sampling begins
If you want to change the way in which sampling begins,
change the Trigger setting (Seq 0–1–7b).