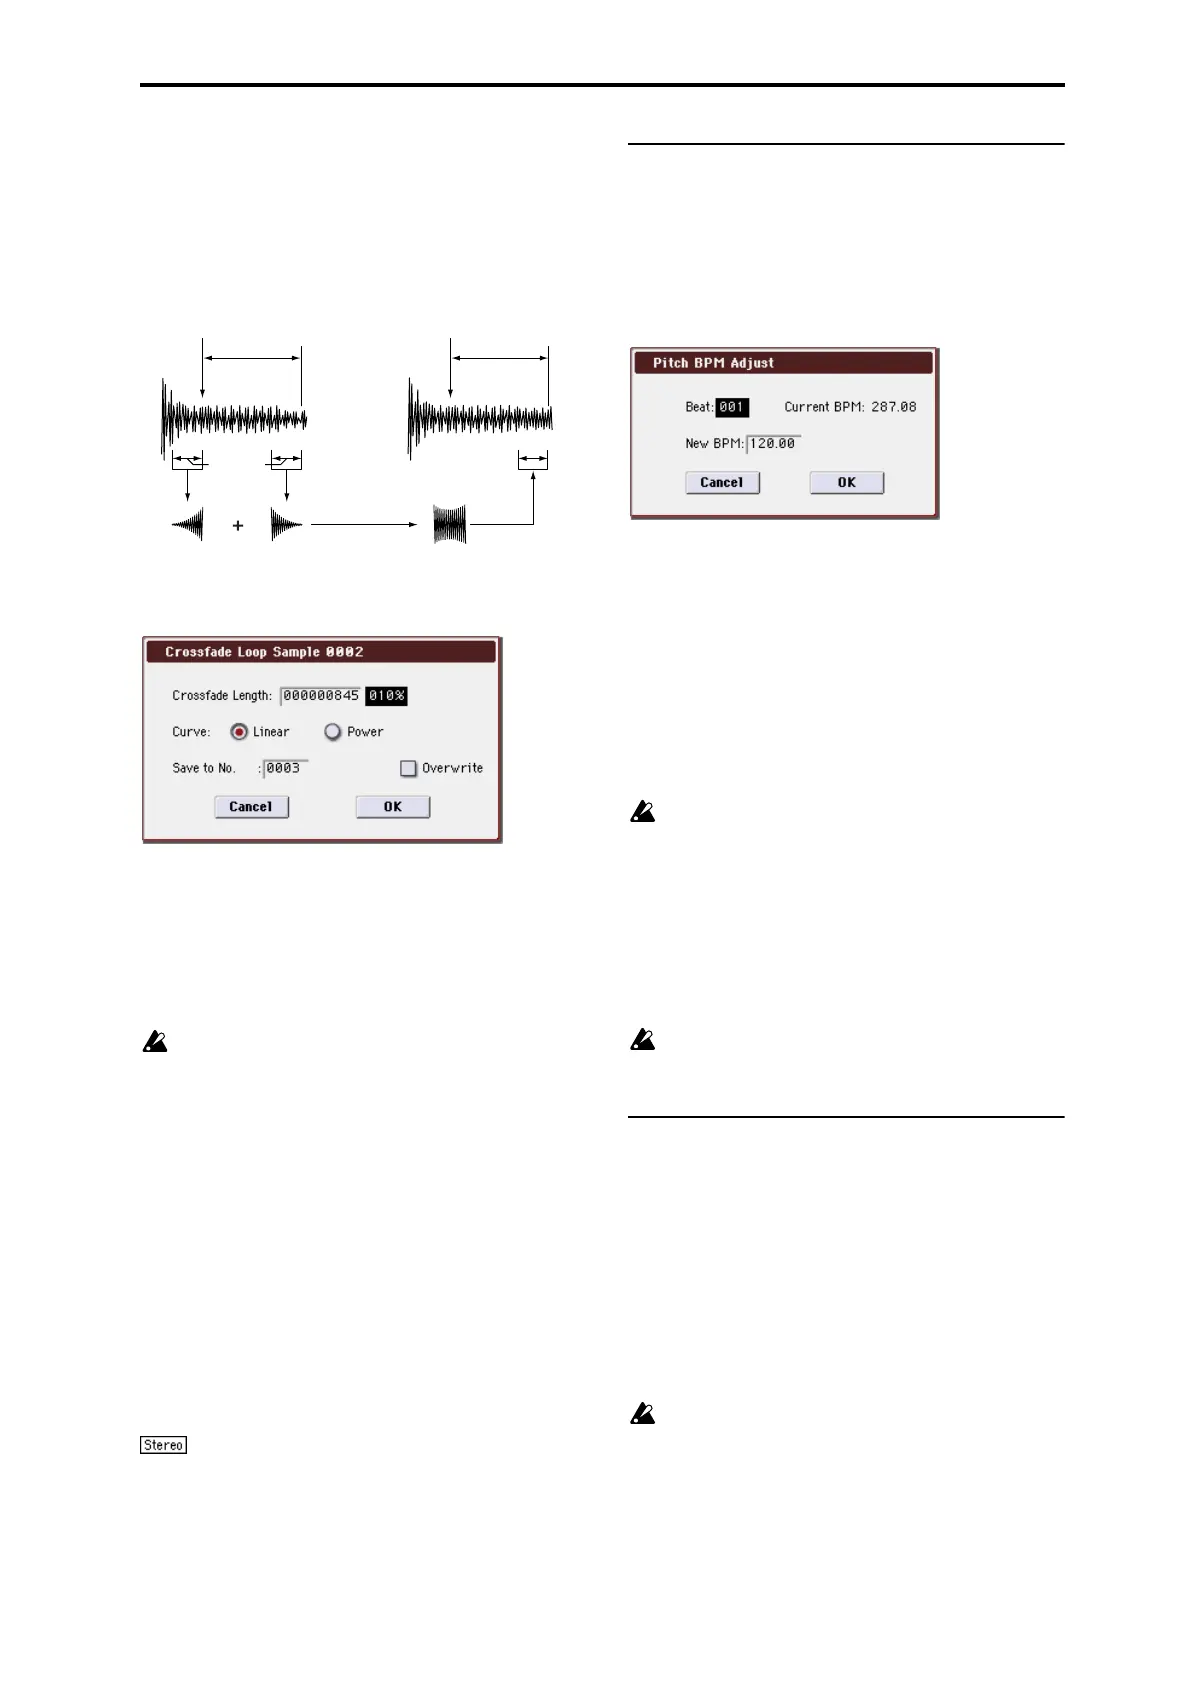
Sampling: Menu Command Pitch BPM Adjust
351
immediately before the beginning of the loop is taken and
mixed with the end portion.
At this time, the waveform level of the portion immediately
before the end (the length specified by Crossfade Length)
will gradually decrease, and the waveform level
immediately before the beginning of the loop will gradually
increase as the two are mixed.
1. Select the sample that you wish to Crossfade Loop.
2. Select “Crossfade Loop” to open the dialog box.
3. In Crossfade Length, specify the length of the sample
that you wish to crossfade.
If you set this as %, Crossfade Length will be calculated
automatically. Specify the proportion of the Crossfade
Length relative to the length between the loop start and loop
end. If you set this to 50%, crossfade will be performed on
the second half of the region between loop start and loop
end.
If the length from the beginning of the sample to the
loop start is shorter than the length from the loop start
to the loop end, Crossfade Length can be set only up to
the length from the beginning of the sample to the loop
start. In this case, a setting of 100% will not be possible.
4. Set Curve to specify how the volume will change in the
crossfaded region.
Linear: The volume will change linearly.
Power: The volume will change non-linearly. Sometimes a
setting of Linear will produce the impression that the
volume has dropped in the middle of the curve. In such
cases, use Power.
5. In “Save to No.,” specify the save destination sample
number. By default, an unused sample number will be
selected.
The sample number cannot be specified if “Overwrite” is
checked. For more information, please see “About
“Overwrite”” on page 329.
For stereo samples, use “Save to No.(L)” and “(R)” to
specify the save-destination of the L and R channels.
6. To execute Crossfade Loop, press the OK button. To
cancel without executing, press the Cancel button.
Pitch BPM Adjust
This command sets the Pitch (3–1b) of the selected index on
the basis of a BPM value. Raising the pitch of sample
playback will increase the playback speed. Lowering the
pitch will slow down the playback speed. This can be used
to match the loop length etc. of the sample to a tempo of the
desired BPM value.
1. Select “Pitch BPM Adjust” to open the dialog box.
2. Specify Beat. This is specified in quarter-note beats.
3. Current BPM will show the BPM value at the base key
(displayed in blue).
This BPM value is calculated automatically from the start
address to the end address of the sample (if looping is off) or
from the loop start address to the end address (if looping is
on).
For example if the start and end address of the sample are
two seconds apart, the original key is specified as the base
key, and Beat is set to 4, Current BPM would be 120.00. If
Beat is set to 2, the display would indicate Current BPM as
60.00.
It is not possible for this display to exceed the range of
40.00–600.00.
4. In New BPM specify the BPM value that will result
from the conversion of the Current BPM value.
5. To execute the Pitch BPM Adjust command, press the
OK button. To cancel, press the Cancel button.
When you execute this command, the Pitch (3–1b) value will
be set automatically. For example if you modify a quarter-
note 120 BPM sample to 240 BPM, the Pitch will be set to
+12.00.
This calculation is performed within the M3’s limits of
precision. Minor discrepancies may occur in the final
BPM calculation.
Destination
Specifies the writing data of the ripped data, and executes
ripping.
Ripping will create a stereo 44,100 Hz sample. You can rip to
RAM memory, or USB storage device. If you select MEDIA,
a WAVE file will be created.
USB CD-R/RW drive and monitor settings
1. Connect the USB connector of your USB CD-R/RW
drive to the M3’s USB A connector.
Into the drive, insert the audio CD from which you want to
rip.
Ripping is not supported for some CD-R/RW drives
(drives that do not support reading CD-DA data).
2. Connect the audio outputs or headphone output of
your USB CD-R/RW drive to the M3’s AUDIO INPUT
1, 2 jacks.
Set the MIC/LINE switch to the LINE position, and use the
LEVEL knob to adjust the input level. Alternatively, you can
monitor the sound by connecting the CD-R/RW drive’s S/P
DIF OUT jack to the M3’s S/P DIF IN jack.
Loop
Start
Loop
End
Crossfade
Length
Loop
Start
Loop
End