167
We advice you to install the 360° PIR motion detector in the following way:
o On the ceiling with as few obstacles as possible in the detection range.
o Near the entrance / door of a room to register if someone enters or exits
that room.
Do not install the 360° PIR motion detector:
o In the detection range of another sensor, since simultaneous signals can
cause interference.
o Exposed directly to sunlight.
o In areas were movements in the temperature field / of air currents are
taking place (e.g. above radiators / stoves / furnaces, heated floors, air
conditioning, staircases, or behind windows).
o If there are moving objects in the detection range.
Please note:
Make sure that the place of installation conforms to the conditions explained
above.
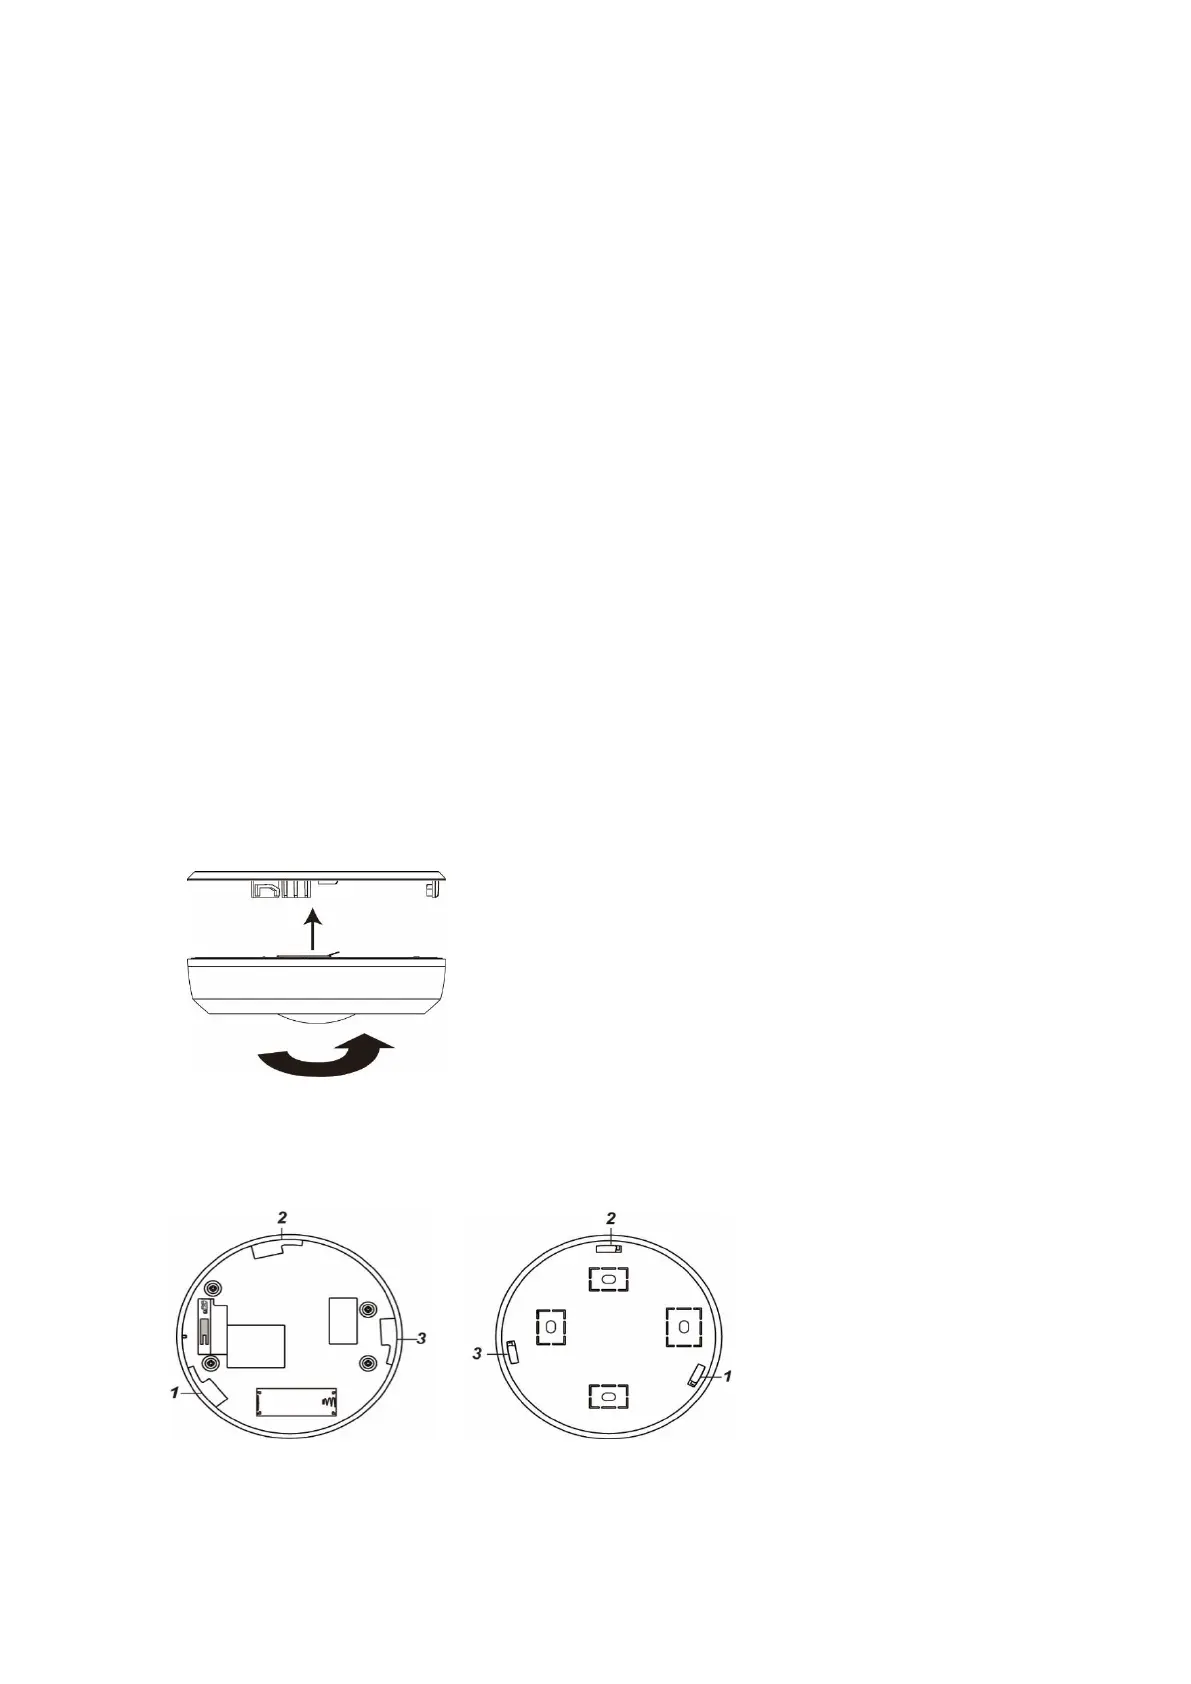
Use the back of the 360° PIR motion detector as a template for your drill holes.
Screw the back of the 360° PIR motion detector to the ceiling.
Insert the installation hooks (7) into the mounting holes (6) and turn the 360° PIR
motion detector clockwise.
360° PIR chassis 360° PIR back Side
Sleep mode:
In order to save battery
power, the 360° PIR motion
detector enters a sleep mode
after each detected motion
(irrespective of the mode of the
alarm panel) of 30 seconds.
During the sleep mode, no
motions are detected.
Supervision:
The 360° PIR motion detector transmits a status signal to the alarm panel every 30
minutes. To manually send out a status signal, you can press the learn button.