245
Panic button
Product description:
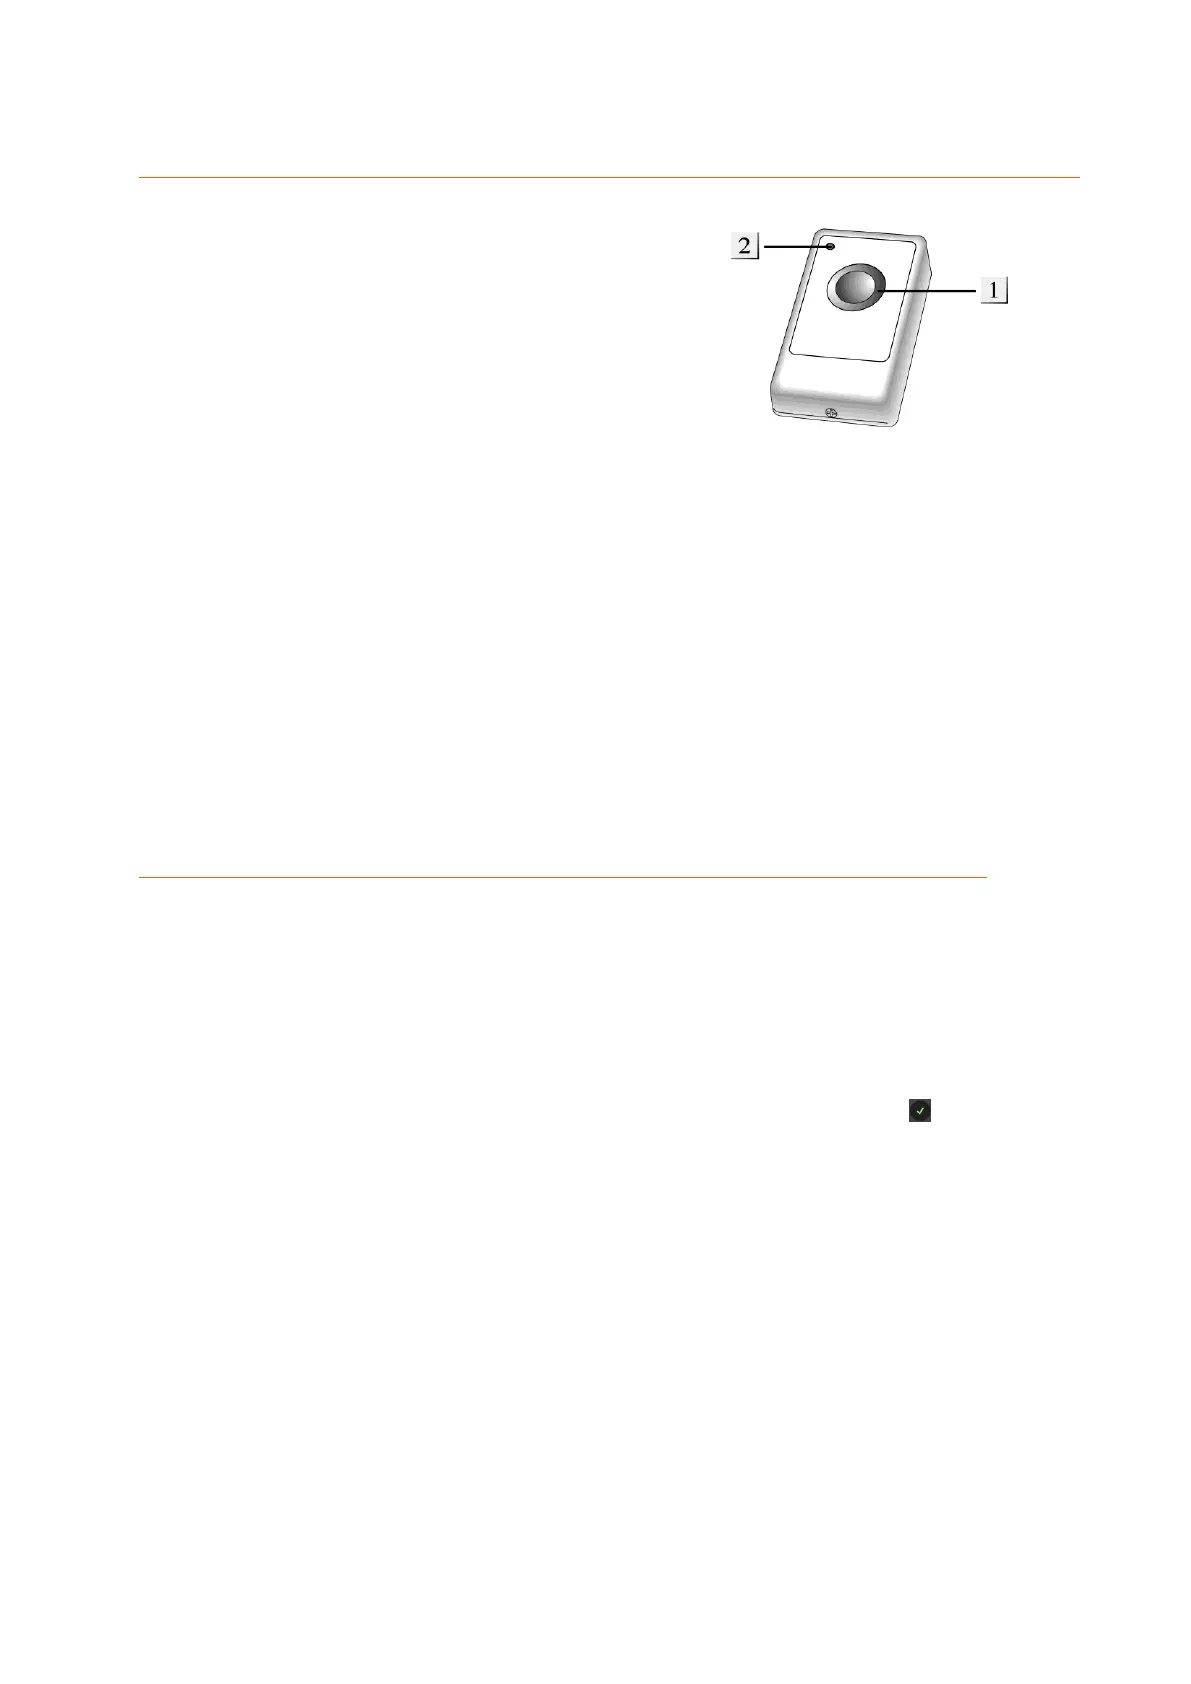
1. Panic button
If this button is pressed for at least 3
seconds, the alarm panel will trigger an
alarm regardless of which mode the alarm
panel is in (Arm / Disarm / Home).
If this button is pressed for at least 10
seconds, the panic alarm stops.
2. LED indicator
Flashes upon signal transmission.
Battery:
The panic button requires a 3V 240 mAh lithium button cell. The average battery
life is approx. three years.
When inserting the battery, make sure that you do not press both battery
contacts under the battery!
When the battery is low, the alarm panel will notify you in time.
Connecting the panic button and putting it into operation
1. Unscrew the screw at the sensor’s bottom and open the housing.
2. Insert the battery with the flat side up.
3. Close the housing.
4. Open the web interface of the alarm panel and go to the menu “Sensors”
“Add” and press “Start”.
5. Press the red panic (test) button
6. The alarm panel will confirm the successful addition with a brief signal tone and
display the panic button in the menu “Sensors” ”Add”. Click on next to the
listed sensor to finish the connection process.
Range test:
1. Open the alarm panel menu “Sensors” “Range” and press “Start”.
2. Press the panic button.
3. The sensor and the signal strength should be indicated. The higher the indicated
number the better the reception (1-9).
Please note:
If the signal strength at the place of installation is below 4, we advice to use a wireless
repeater, since it is normal that the signal strength may fluctuate for 2-3 points, thus,
a signal loss is possible.