298
Temperature sensor V2
Attention:
This product is not compatible with the XT1 or XT2 without “Upgrade dongle to XT2
Plus.”
The LUPUSEC temperature sensors measure the
temperature at the place of installation and transmits
any change directly to the alarm panel every ten
minutes.
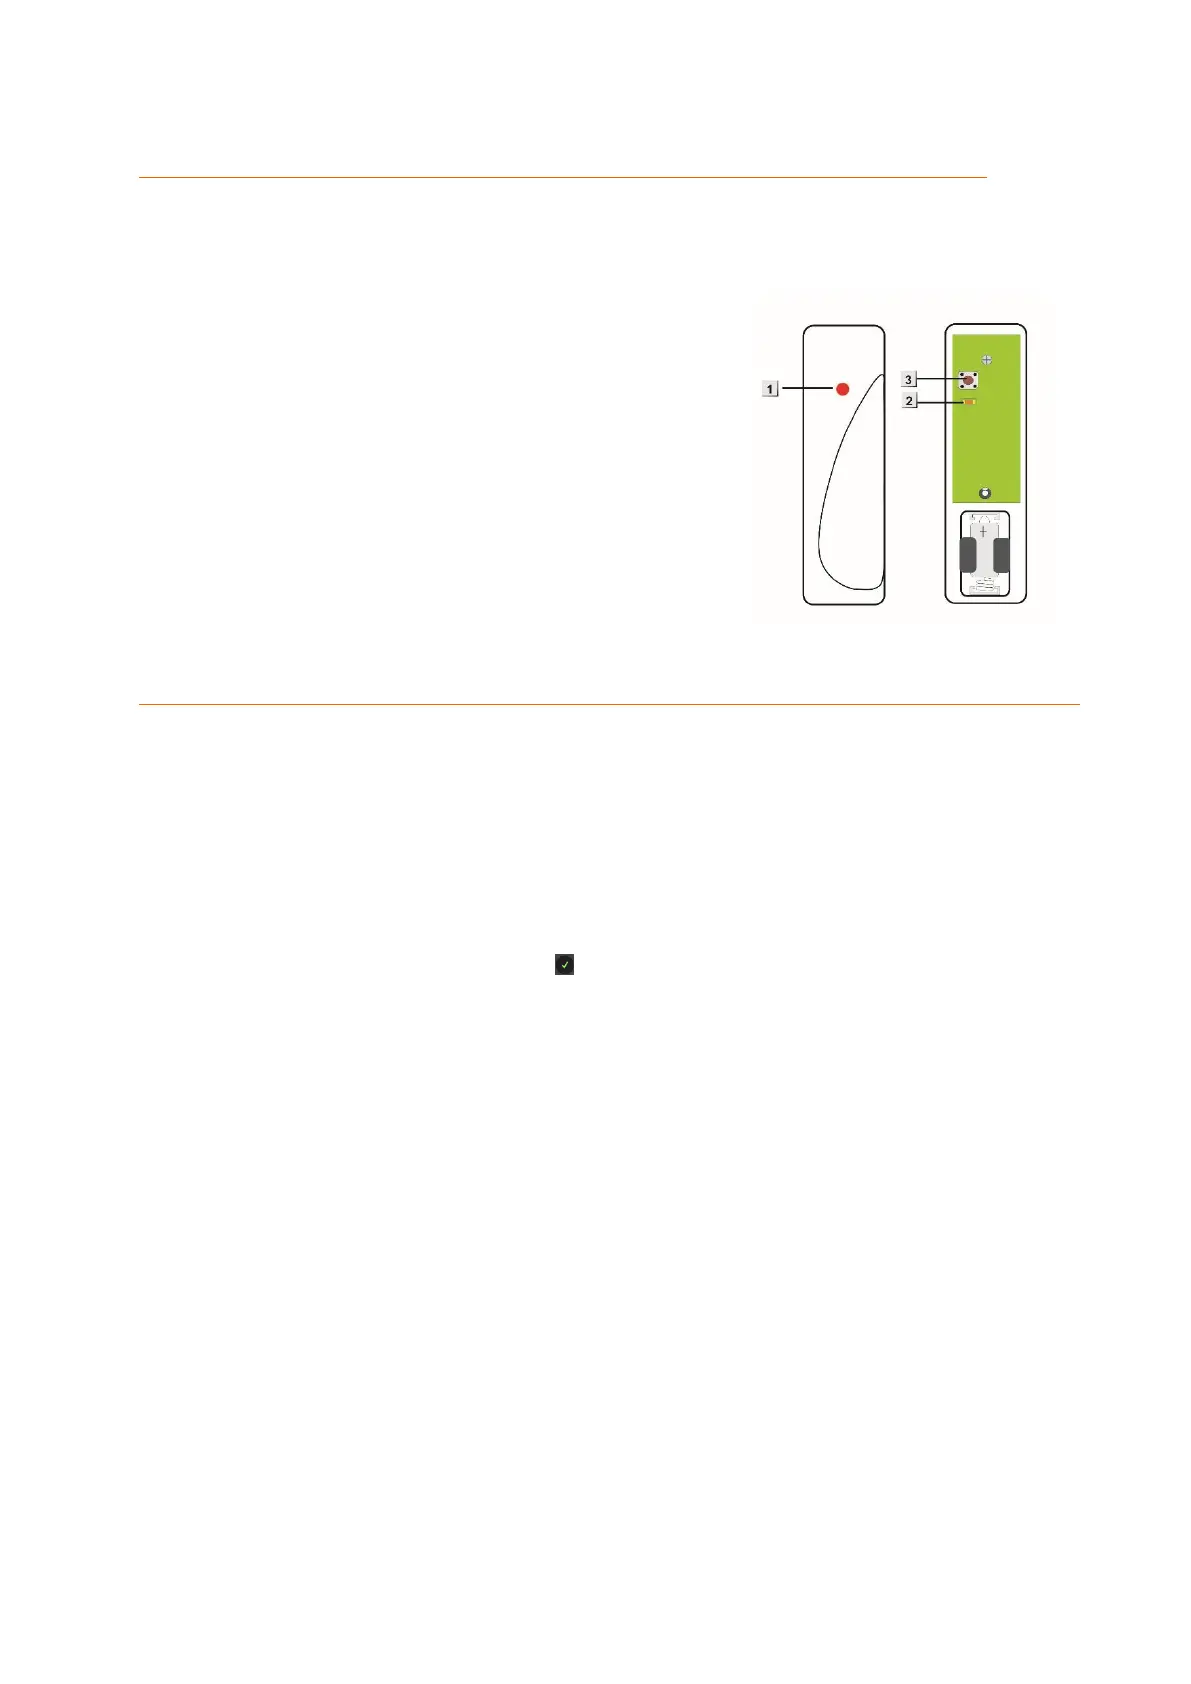
Product description:
1. Temperature probe
2. Internal control LED
3. Test button
Connecting the temperature sensor and putting it into operation
1. Unscrew the screw at the sensor bottom and open the housing and insert the
battery.
2. You can only connect the temperature sensor within the first three minutes after
you have inserted the batteries.
3. Open the menu “Sensors” “Add” and press “Start” in the web interface of the
alarm panel.
4. Press the Learn button of the temperature sensor for approx. 10 seconds.
5. After a few seconds, the alarm panel list the temperature sensor.
6. Add the temperature sensor via .
Range test:
1. Open the alarm panel menu “Sensors” “Range” and press “Start”.
2. Press the test button.
3. The sensor and the signal strength should be indicated. The higher the indicated
number the better the reception (1-9).
Please note:
If the signal strength at the place of installation is below 4, we advise to use a ZigBee
repeater, since it is normal that the signal strength may fluctuate for 2-3 points, thus,
a signal loss is possible.
Battery:
The temperature sensor requires a CR2 lithium battery. The average battery life is at least
one year. The sensor will inform the alarm panel in case of a battery running low.
Note:
The current temperature is displayed in the alarm panel in the menu “Sensors”
“List” “Status”.
In the menu “Smarthome” “Temperature history”, you find a graphic about the
temperature of the last hour, day, and week.