232
3. Enter * + 7 subsequently in the keypad. The keypad should be displayed in the
alarm panel.
4. Add the keypad to the alarm panel.
5. To exit the installation mode, press the Disarm button twice. The keypad emits
an audio signal and the Power LED goes off shortly after.
Range test:
1. Open the alarm panel menu “Sensors” “Range” and press “Start.”
2. Enter the installation mode of the keypad (default: 0000).
3. Press the shortcut * + 7 at the keypad.
4. The sensor and the signal strength should be indicated. The higher the indicated
number the better the reception (1-9).
5. To exit the installation mode, press the Disarm button twice.
Please note:
If the signal strength at the place of installation is below 4, we advice to use a repeater,
since it is normal that the signal strength may fluctuate for 2-3 points, thus, a signal
loss is possible.
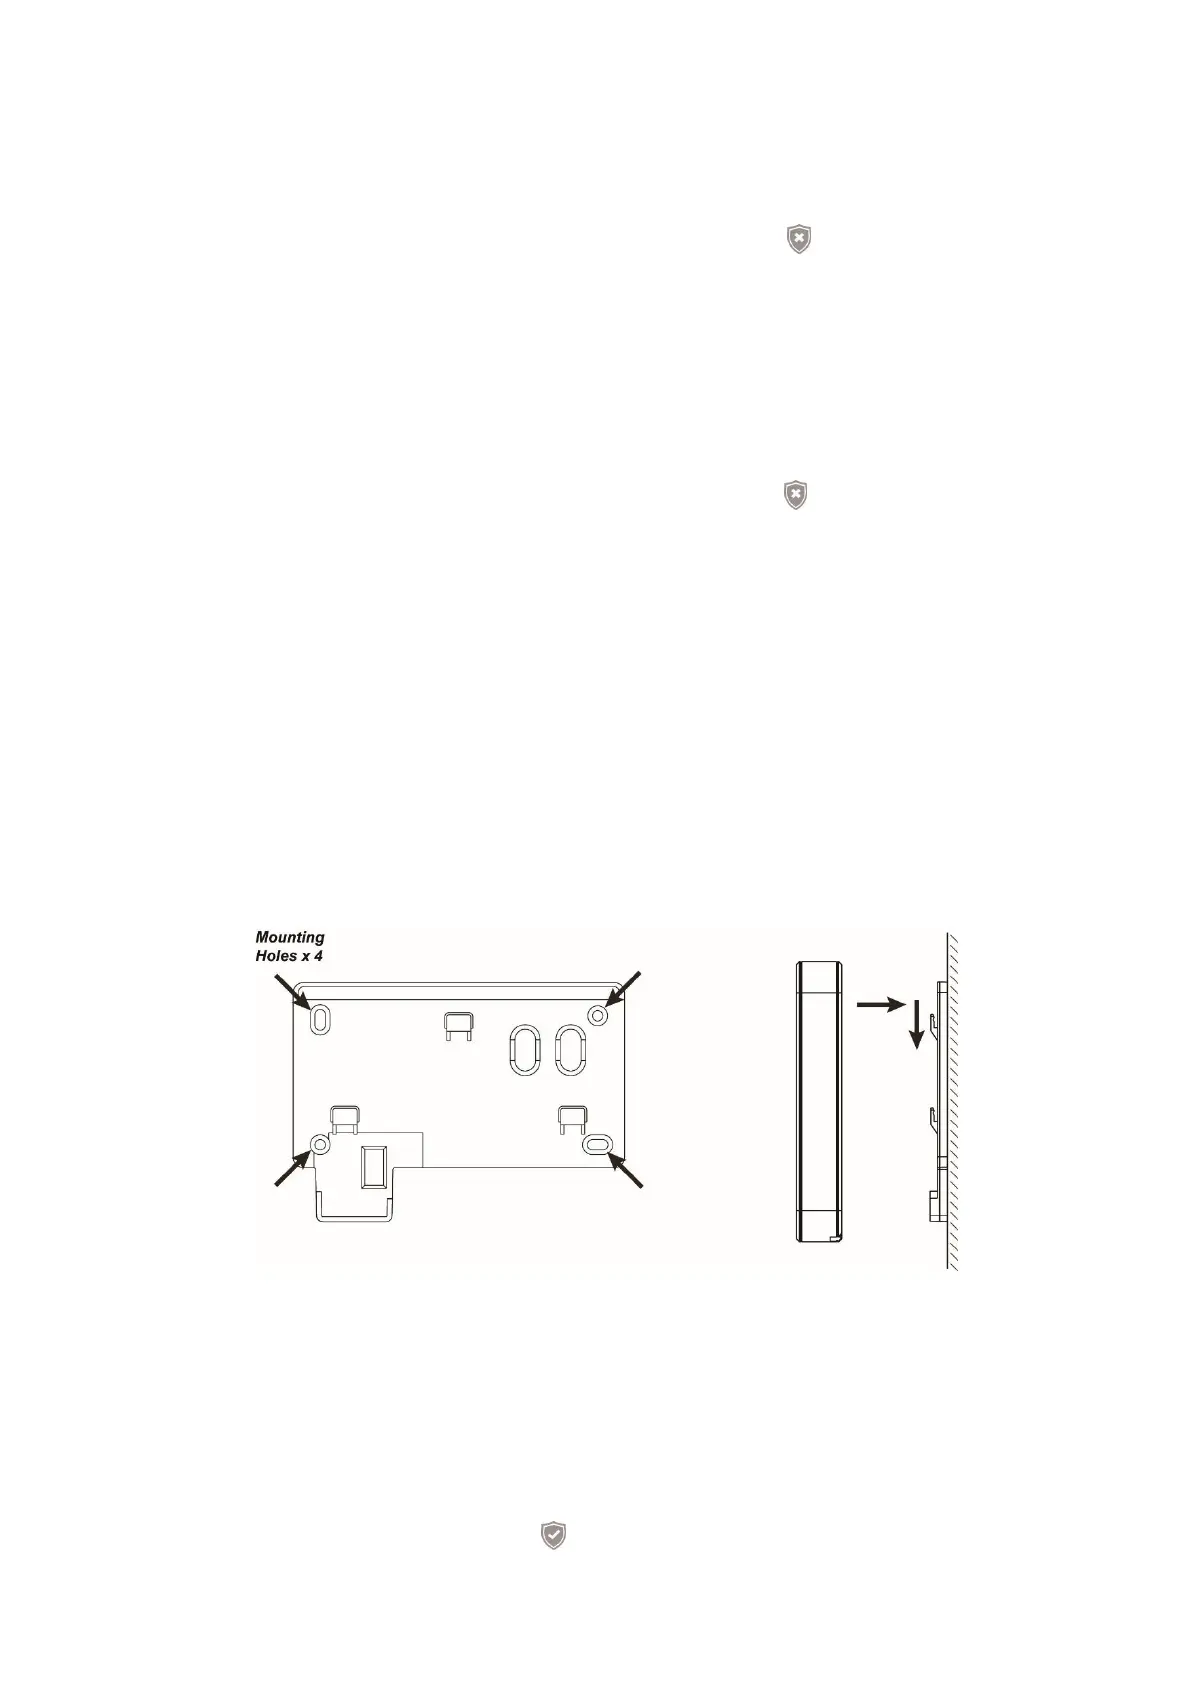
Installation of keypad:
1. Hold the bracket to the intended place of installation.
2. Use the mounting holes to mark the drill holes at the wall.
3. Drill the holes at the marked locations and install the dowels.
4. Screw the mount of the outdoor keypad to the wall.
5. Place the keypad on the three hooks and slide it a bit downwards to fix it.
Keypad PIN codes for Arm, Home, or Disarm:
You can define and edit the PIN codes for arm, home, or disarm in the web interface of
the alarm panel (“Alarm system” “PIN codes”). Refer to the “PIN codes” for more
detailed information.
Change status of alarm system by means of PIN codes:
Make sure that the outdoor keypad is activated to make the entries.
1. Arm:
User PIN (default 1234) + Arm button. One long audio signal is emitted and the