SEAWATER COOLING MODELS - 6A-1190-823225--1 1096
Installation
1. Clean gasket surfaces on thermostat cover and
thermostat housing.
2. If thermostat housing was disturbed during re-
moval of thermostat, remove thermostat hous-
ing. Clean gasket surfaces on thermostat hous-
ing and intake manifold and replace thermostat
housing-to-intake manifold gasket.
IMPORTANT: If gasket has continuity rivets, do
not coat with Quicksilver Perfect Seal, or audio
warning temperature switch may not work prop-
erly.
3. Place O-ring in the thermostat housing. Be cer-
tain it is positioned properly on mounting flange
in housing.
4. Install thermostat in thermostat housing as
shown.
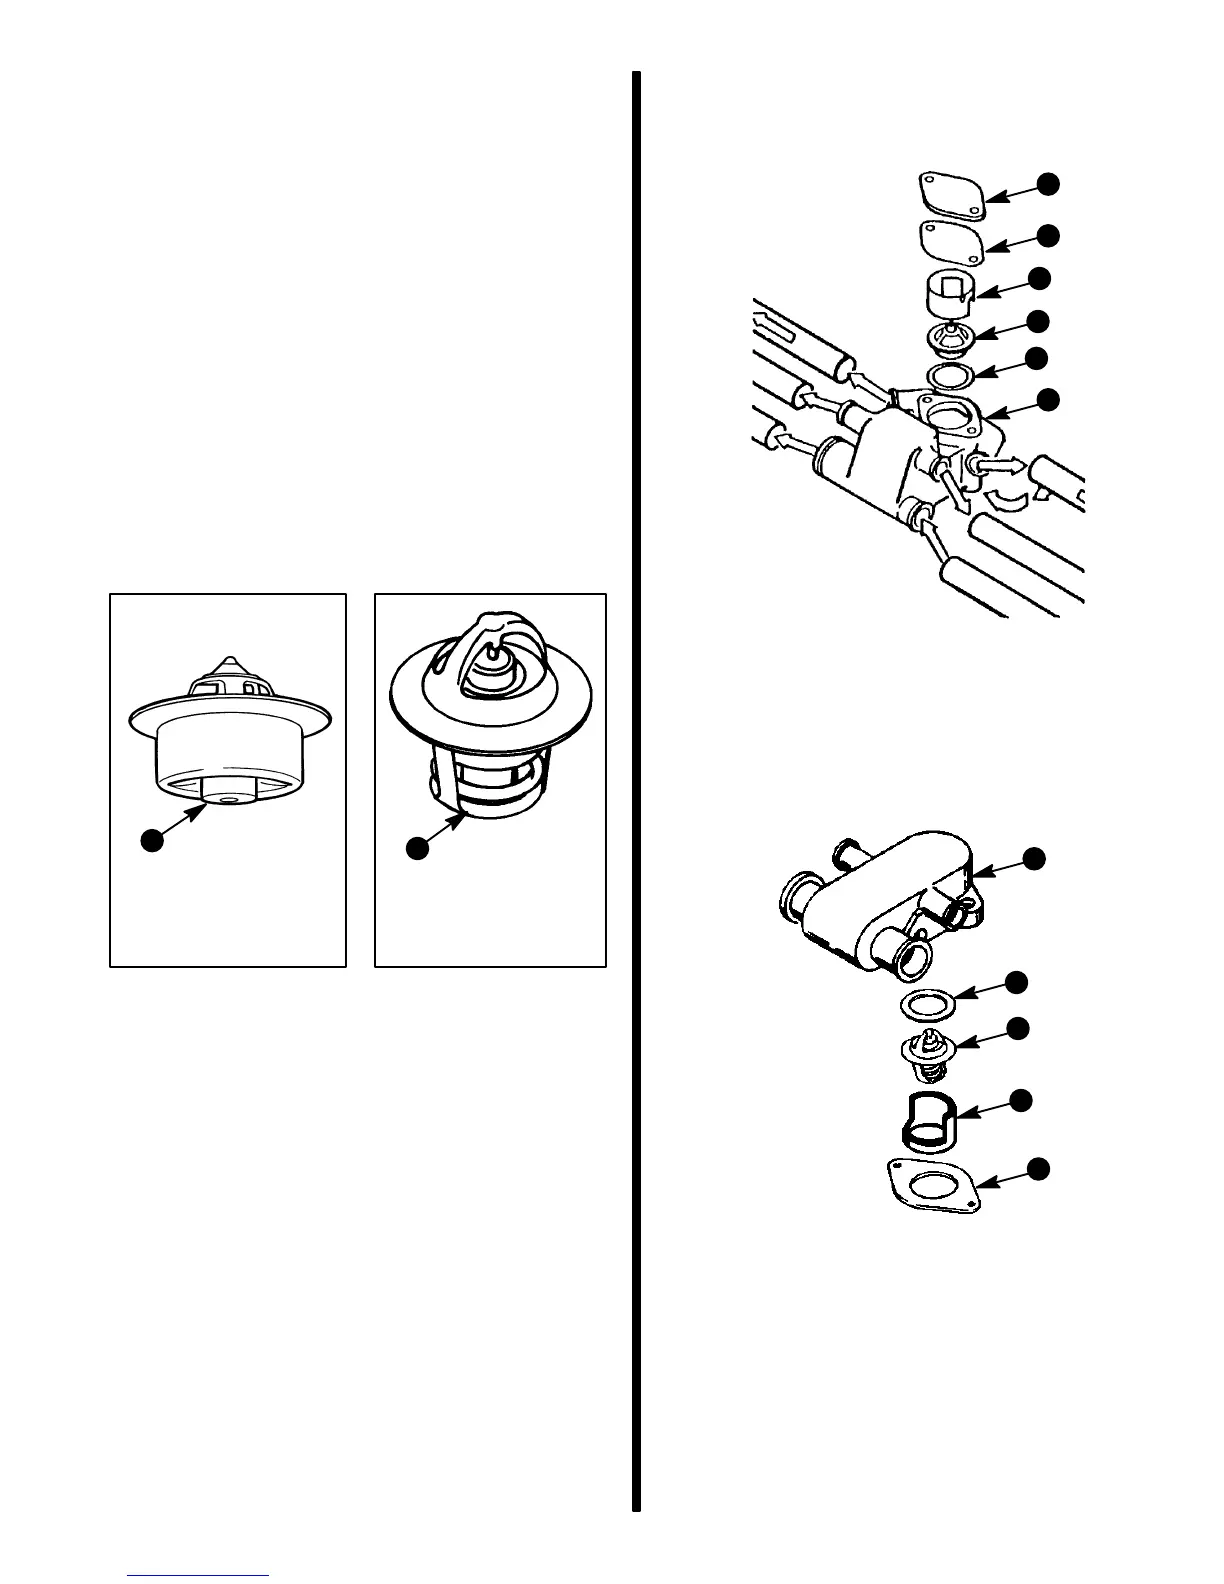
Stainless Steel
Thermostat
7180172674
a
b
Brass Thermostat
a - Install Thermostat With This End (Down) Toward
Thermostat Housing
5. Align tang on sleeve with groove in thermostat
housing bore and install sleeve into housing.
6. Coat both sides of new thermostat cover-to-ther-
mostat housing gasket with Quicksilver Perfect
Seal and position on housing.
7. Reinstall thermostat cover (with engine lifting
eye, if so equipped) and torque screws with lock-
washers to 30 lb. ft. (41 N·m).
8. Reconnect hose(s) to thermostat housing. Tight-
en hose clamps securely.
9. Start engine and inspect for leaks.
72589
b
c
d
a
e
f
6 Hole Thermostat Housing
a - Cover
b - Gasket
c - Spacer
d - Thermostat
e - O-Ring
f - Housing
71758
b
c
d
a
e
4 Hole Thermostat Housing
a - Housing
b - O-Ring
c - Thermostat (Stainless Steel)
d - Spacer
e - Gasket

 Loading...