2C-6 - INSTALLATION - BRAVO DRIVES 90-823225--1 1096
Engine Connections
IMPORTANT: When routing all wire harnesses
and hoses, be sure they are routed and secured
to avoid coming in contact with hot spots on en-
gine and avoid contact with moving parts.
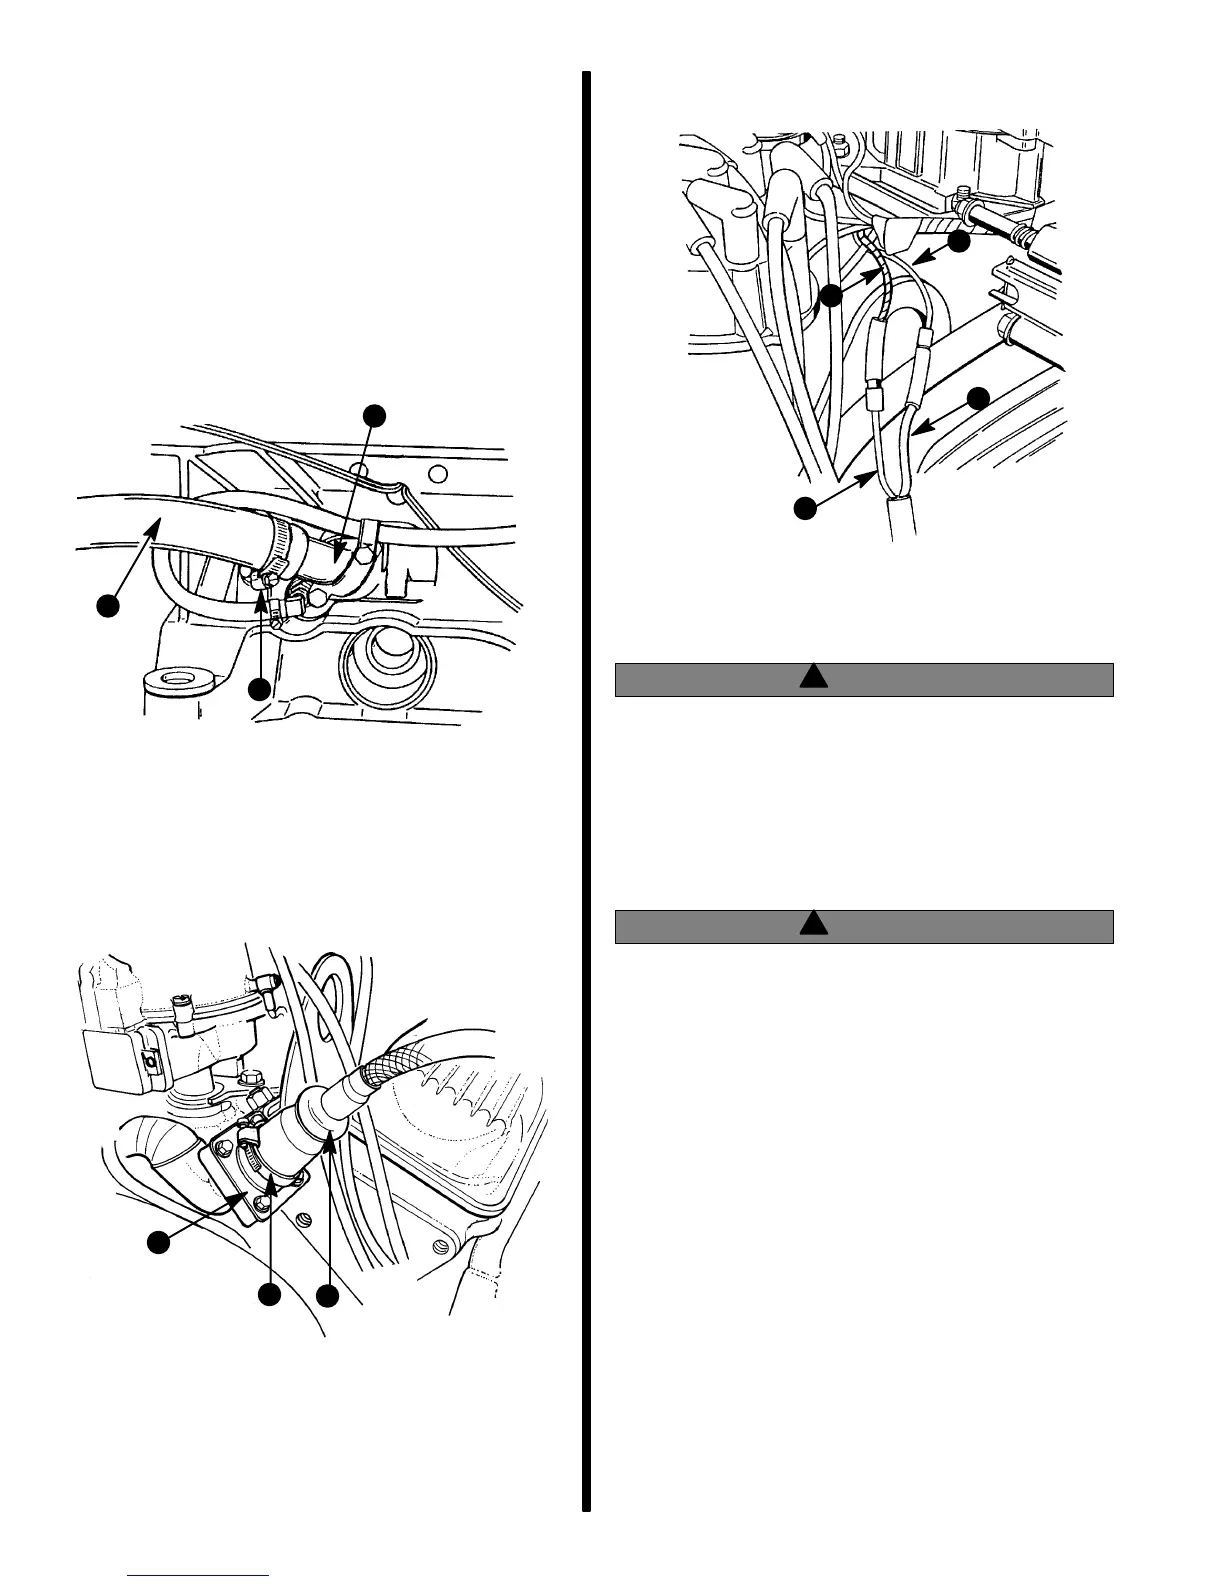
1. Connect seawater hose to water tube at gimbal
housing with hose clamp. Tighten clamp se-
curely.
NOTE: In the following view the engine is not in
position, for visual clarity in this step.
b
c
72590
a
a - Water Inlet Tube
b - Hose Clamp (Tighten Securely)
c - Seawater Inlet
2. Connect instrument harness to engine harness
with hose clamp. Tighten clamp securely.
72025
b
c
a
a - Engine Wiring Harness Receptacle Bracket
b - Instrumentation Wiring Harness Plug
c - Hose Clamp - Tighten Securely
3. Connect trim position sender leads from gimbal
housing to leads from engine harness.
72582
b
c
d
a
a - BROWN/WHITE (From Engine Harness)
b - BLACK (From Engine Harness)
c - BLACK (From Transom)
d - BLACK (From Transom Assembly)
!
WARNING
Be careful when working on fuel system. Gaso-
line is extremely flammable and highly explosive
under certain conditions. Do not smoke or allow
spark or open flame in area. Wipe up any spilled
fuel immediately.
FUEL SUPPLY CONNECTIONS
!
WARNING
Avoid gasoline fire or explosion. Improper instal-
lation of brass fittings or plugs into fuel pump or
fuel filter base can crack casting and/or cause a
fuel leak.
• Apply #592 Loctite Pipe Sealant with Teflon to
threads of brass fitting or plug. DO NOT USE
TEFLON TAPE.
• Thread brass fitting or plug into fuel pump or fuel
filter base until finger tight.
• Tighten fitting or plug an additional 1-3/4 to 2-1/4
turns using a wrench. DO NOT OVER-TIGHTEN.
• Install fuel line. To prevent over-tightening, hold
brass fitting with suitable wrench and tighten fuel
line connectors securely.
• Check for fuel leaks.

 Loading...