Startup of the CMU CMU
1100.4903.12 2.4 E-9
Startup of the CMU
This Chapter describes how to customize the CMU and perform simple RF measurements. As a pre-
requisite for starting the session, the instrument must be correctly set up and connected to the AC
power supply as described in Chapter 1.
o
I
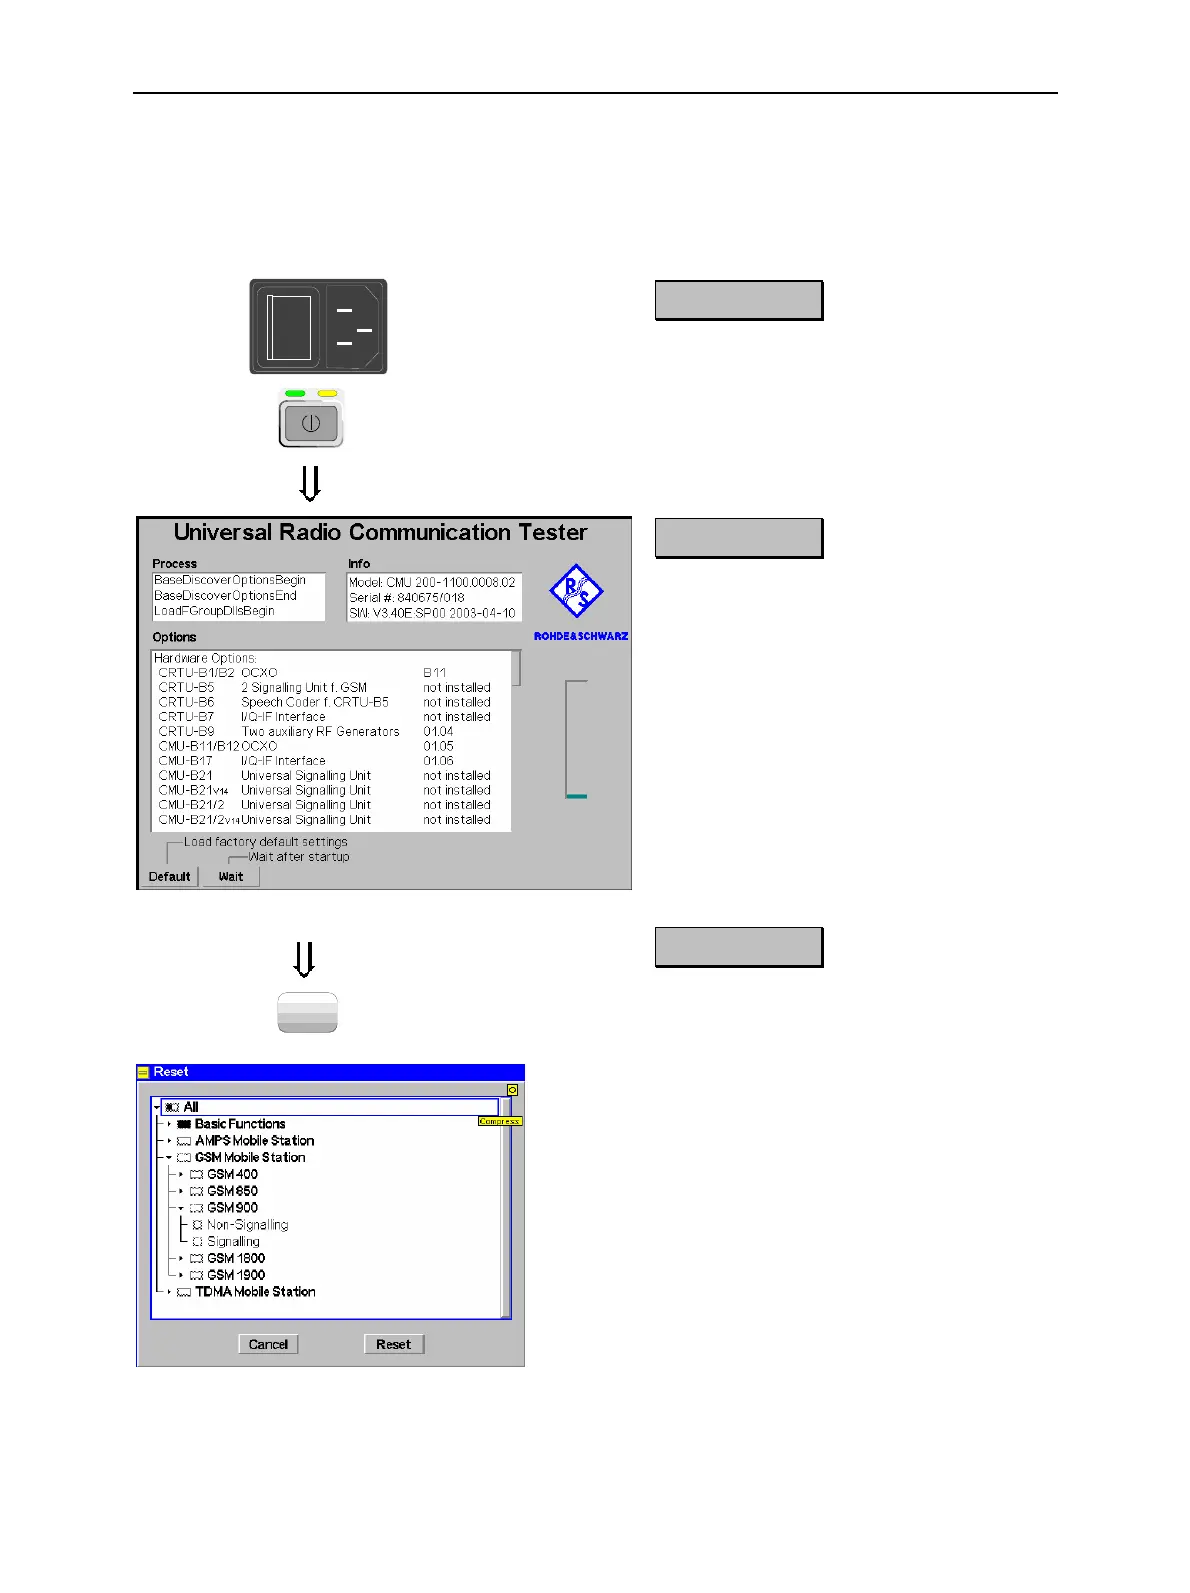
Step 1
! Switch on the CMU using the mains
switch at the rear.
"
! Check the operating mode of the instru-
ment at the ON/STANDBY key on the
front panel. If the CMU is in standby
mode, press the ON/STANDBY key.
#
Step 2
The CMU is booted and after a short while
displays the startup menu. This menu is
usually closed as soon as the instrument
software is loaded and the startup test is
finished.
$
! Press the Wait hotkey to prevent the
instrument from switching to another
menu.
%
The Wait hotkey changes to Cont. with the
additional message Change to last menu
displayed on top.
!
Press the Cont. hotkey to resume the
startup process.
Step 3
RESET
! Press the RESET key to open the Reset
popup menu.
! Proceed as described in Chapter 4, sec-
tion Reset of Instrument Settings, to ex-
pand the tree of function groups.
! Select the function groups Base and RF
to be reset (the corresponding nodes
must be black).
! Use the cursor keys to activate the Reset
button and press ENTER.
! In the popup window opened (Are you
sure?), select Yes to confirm the instru-
ment reset.
The CMU indicates that it performs a partial
reset of the two selected function groups
and is then ready to carry out the following
steps. The Reset popup menu is closed
automatically.

 Loading...


