• If the implement follows the ground, use the floating position to carefully
lower down the implement:
IMPORTANT: Always use the floating position for implements following the
ground contour. Otherwise there is a risk that the implement may get
damaged or the traction for the front wheels may be lost.
• Set the front linkage to the floating position by briefly pushing (less than
one second) the control lever for auxiliary hydraulics rear valve 3 into the
forward position.
OR:
• Activate the auxiliary hydraulics front valve floating position by pressing
the symbol side of the floating position activation switch.
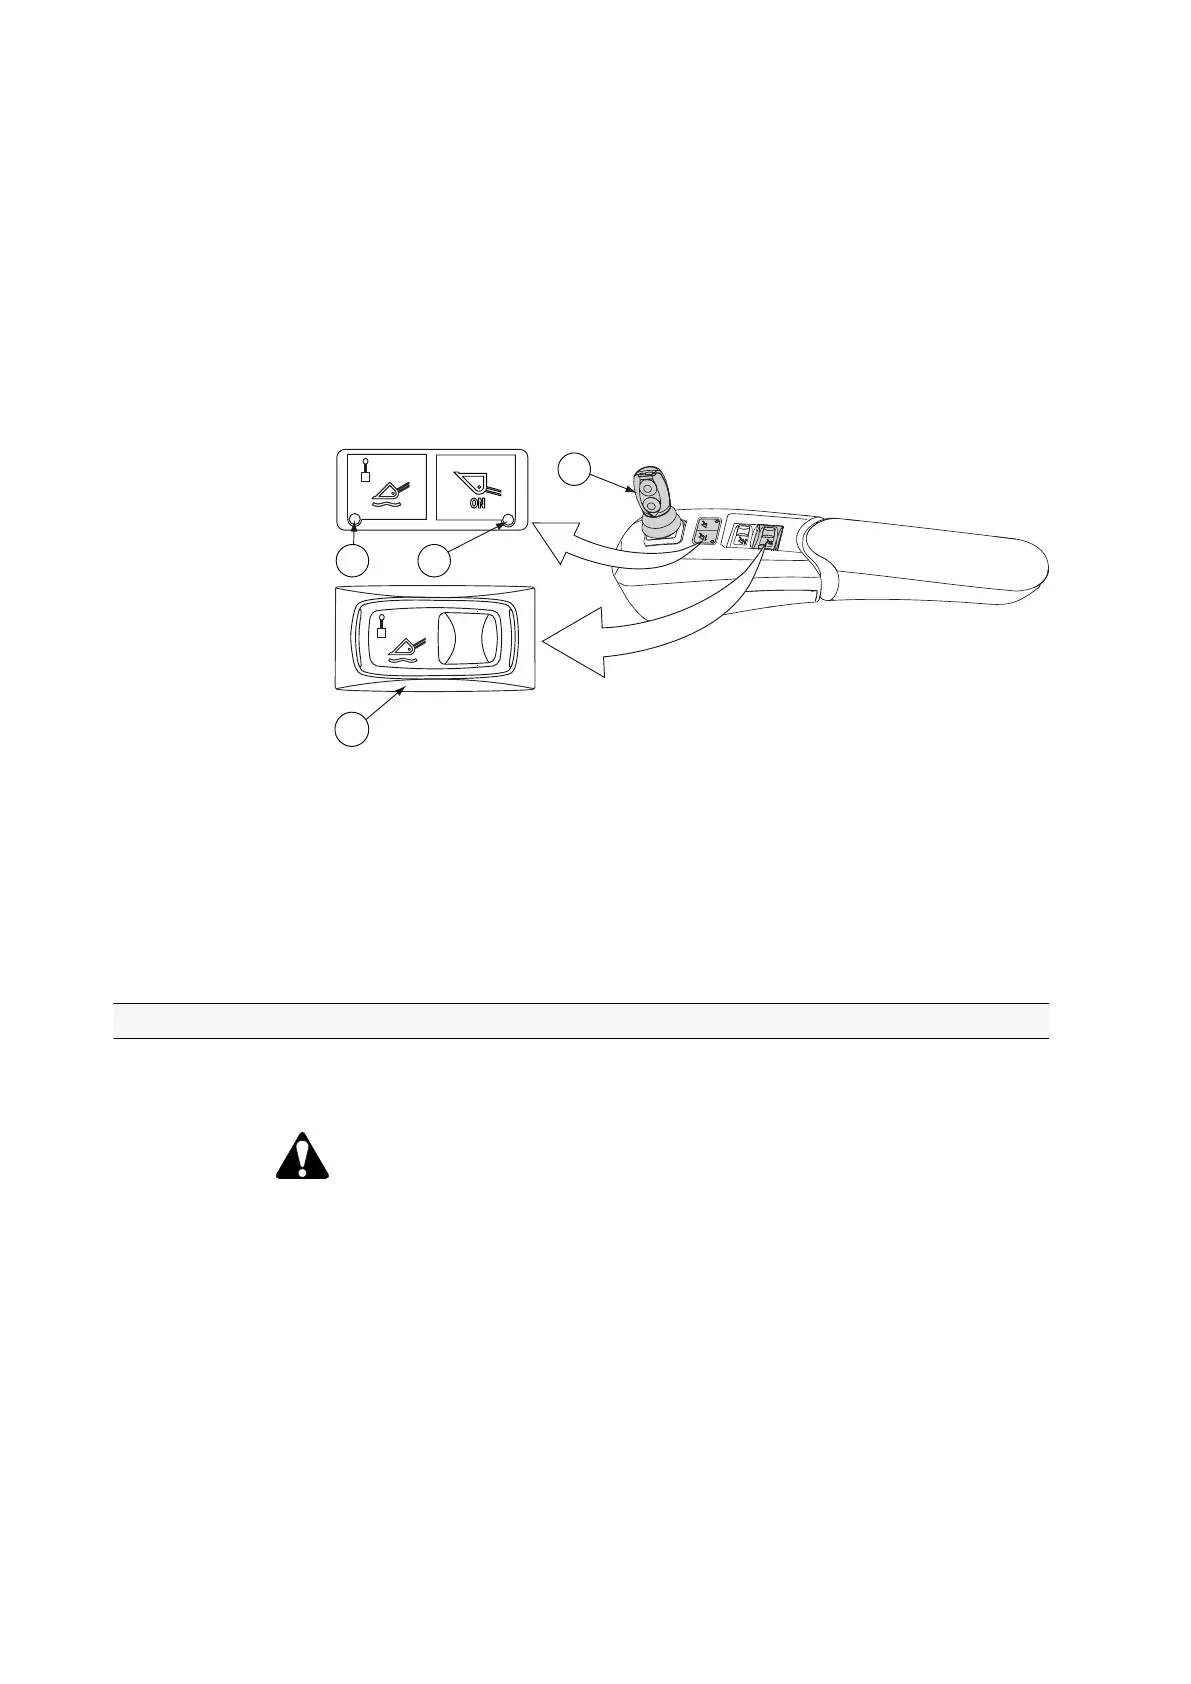
GUID-FCEF9D97-1ABA-4408-B300-D87ADCBE6B04
1. Joystick
2. Floating position indicator light
3. Front loader hydraulics indicator light
4. Floating position activation switch
• Press down the lower push button on the joystick and simultaneously
move the joystick forward or rearward.
When the floating position is in use the floating position indicator light is lit.
3.15.1 Setting front linkage lifting link positions
You can set the lifting links to different positions by attaching the fastening pins to
different holes and by turning the arms up or down.
WARNING: When you drive on public roads and there is no implement
on the front linkage, the lifting links have to be folded up.
IMPORTANT: When using the front loader, the front linkage lifting links must be
folded to the transport position.
3. Operation
- 184 -

 Loading...