x
List of Figures
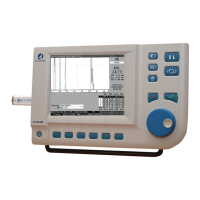
Figure 32 Accutome A-Scan Plus Screen Hierarchy - - - - - - - - - 58
Figure 33 Preferences Button - - - - - - - - - - - - - - - - - - - - - - - - 66
Figure 34 Eye Types Screen - - - - - - - - - - - - - - - - - - - - - - - - - 67
Figure 35 Selecting the Lens Materials Table - - - - - - - - - - - - - 69
Figure 36 Selecting a Cell to Enter New Lens Material - - - - - - - 70
Figure 37 Entering the Name for New Lens Material - - - - - - - - 71
Figure 38 Adding New Material Velocity - - - - - - - - - - - - - - - - - 72
Figure 39 Selecting the Eye Type Name Cell - - - - - - - - - - - - - 73
Figure 40 Adding the New Eye Type Name - - - - - - - - - - - - - - - 74
Figure 41 Activating the Area to Select New Lens Material - - - - 75
Figure 42 Lens Material Selected - - - - - - - - - - - - - - - - - - - - - - 76
Figure 43 Lens Thickness Entered - - - - - - - - - - - - - - - - - - - - - 77
Figure 44 Anterior Chamber Material Selected - - - - - - - - - - - - 78
Figure 45 Vitreous Chamber Material Selected - - - - - - - - - - - - 79
Figure 46 Non-Factory Field - - - - - - - - - - - - - - - - - - - - - - - - - 80
Figure 47 Restore Selected Field Prompt - - - - - - - - - - - - - - - - 81
Figure 48 Selected Field Restored - - - - - - - - - - - - - - - - - - - - - 82
Figure 49 Non-Factory Fields Displayed - - - - - - - - - - - - - - - - - 83
Figure 50 Restore All Fields Prompt - - - - - - - - - - - - - - - - - - - - 84
Figure 51 More Settings - Setup Screen - - - - - - - - - - - - - - - - - 86
Figure 52 Print Title Field Selected - - - - - - - - - - - - - - - - - - - - - 87
Figure 53 Print Title Field Activated - - - - - - - - - - - - - - - - - - - - 88
Figure 54 Entering the Print Title - - - - - - - - - - - - - - - - - - - - - - 89
Figure 55 Print Title Added - - - - - - - - - - - - - - - - - - - - - - - - - - 90
Figure 56 Printer Field Selected - - - - - - - - - - - - - - - - - - - - - - - 92
Figure 57 Printer Field Activated - - - - - - - - - - - - - - - - - - - - - - 93
Figure 58 Selecting the Printer - - - - - - - - - - - - - - - - - - - - - - - - 94
Figure 59 New Printer Selected - - - - - - - - - - - - - - - - - - - - - - - 95
Figure 60 Serial Data Printout - - - - - - - - - - - - - - - - - - - - - - - - 97
Figure 61 Serial Link Field Selected - - - - - - - - - - - - - - - - - - - - 98
Figure 62 Serial Link Field Activated - - - - - - - - - - - - - - - - - - - - 99
Figure 63 Selecting the Serial Link - - - - - - - - - - - - - - - - - - - - 100
Figure 64 New Serial Link Selected - - - - - - - - - - - - - - - - - - - 101
Figure 65 Serial Baud Field Selected - - - - - - - - - - - - - - - - - - 102
Figure 66 Serial Baud Field Activated - - - - - - - - - - - - - - - - - - 103
Figure 67 Selecting the Serial Baud - - - - - - - - - - - - - - - - - - - 104
Figure 68 New Serial Baud Selected - - - - - - - - - - - - - - - - - - 105
Figure 69 Delete Confirm Field Selected - - - - - - - - - - - - - - - - 106
Figure 70 Delete Confirm Field Activated - - - - - - - - - - - - - - - 107