Home
Accutome
Medical Equipment
a-scan plus
Page 92 (Figure 40 Adding the New Eye Type Name)
Accutome a-scan plus - Figure 40 Adding the New Eye Type Name
292 pages
Manual
Save Page as PDF
To Next Page
To Next Page
To Previous Page
To Previous Page
Loading...
74
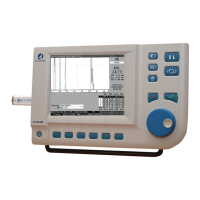
Accutome A-Scan Plus
User’s Guide
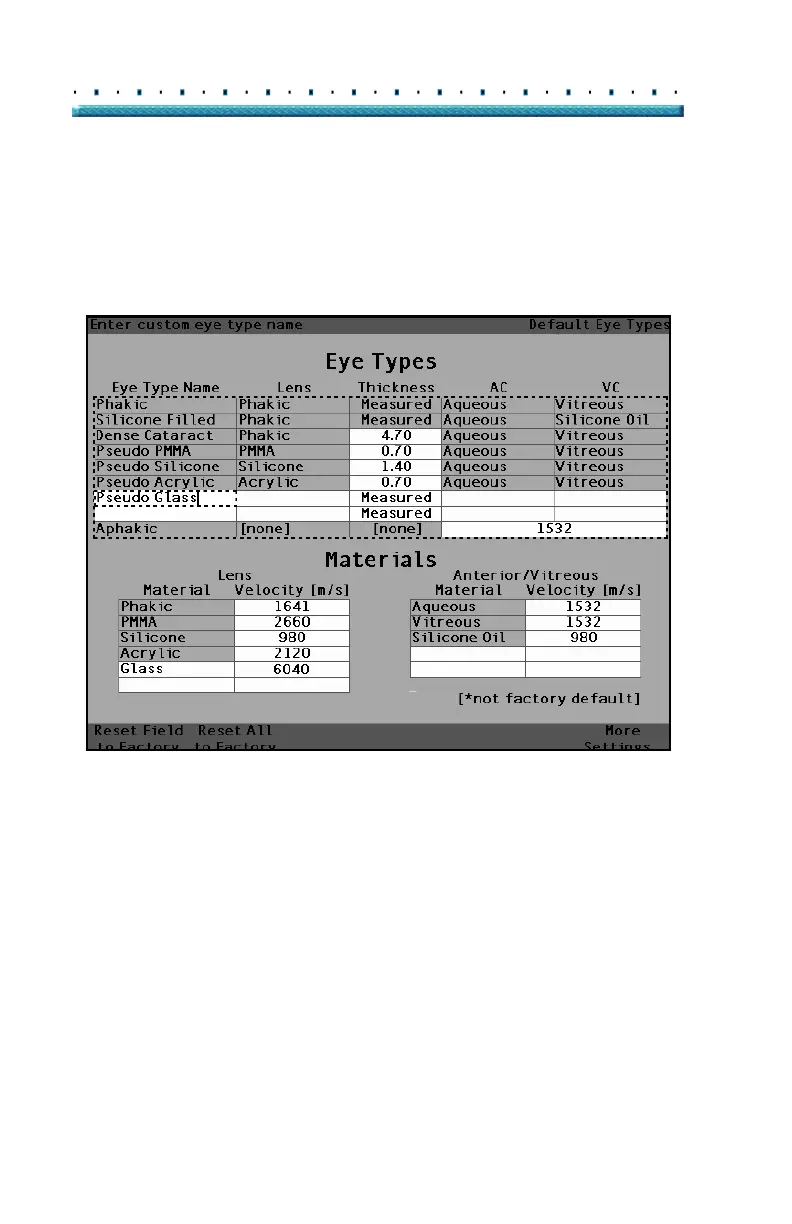
4.
Enter the name of th
e new Eye T
ype.
5.
Press the knob or the
√
button,
to save the Eye
T
ype Na
me and to deactivate
the cell.
[All eye types incl
ude an assumed corne
a]
Figure 40
Add
ing the New Ey
e T
ype Name
91
93
Table of Contents
Main Page
Default Chapter
3
Table of Contents
3
Introduction
19
Accutome A-Scan Plus Overview
19
Figure 1 Accutome A-Scan Plus
19
Features
20
Measurements
20
IOL Calculations
21
Components
22
Optional Components
22
About this Manual
23
Safety
25
Safety Information
25
Safety Issues to Consider When Using the Accutome A- Scan Plus
25
Indications for Use
25
Symbol Definitions for the Accutome
26
Safety Precautions
27
Sterilization
27
Disinfection and Cleaning
28
Avoiding Equipment Damage
30
Electrical Hazard and Safety
30
Getting Started
31
Assembling the Accutome A-Scan Plus
31
What You Need
31
Figure 2 Accutome A-Scan Plus Components
32
Printer
32
Probe
32
Foot Switch
33
Keyboard
33
Power Supply
33
Serial Link Port
33
Placing the Accutome A-Scan Plus
34
Figure 3 Closed Kickstand
34
Quick-Close Kickstand
34
Figure 4 Open Kickstand
35
Mounting
36
Connecting the Components
36
Figure 5 Accutome A-Scan Plus Mounted on a Pedestal
36
Connecting the Footswitch
37
Connecting the Printer
37
Connecting the Keyboard
38
Connecting the Serial Link
39
Connecting the Power
40
Figure 6 Component Connectors (Left Side of Instrument)
40
Connecting the Probe
41
Figure 7 Probe Connector (Right Side of Instrument)
41
Figure 8 Probe Connected
42
Probe Setup
43
Figure 9 Accutome Ultrasonic Probe Kit (PN 24-4001)
43
Accutome Probe with an Immersion Shell
44
Figure 10 Accutome Probe
44
Figure 11 Probe Setup with Immersion Shell
44
Accutome Probe with Goldman Tonometer Adapter
45
Figure 12 Probe with Goldman Tonometer Adapter
45
Accutome Probe with Handle Extension
46
Figure 13 Inserting the Probe into the Handle Extension
46
Figure 14 Probe with Handle Extension and Insertion Tool
47
Figure 15 Probe with Handle Extension
47
Basic Operation
48
How to Power on the Accutome A-Scan Plus
48
Figure 16 Turning on the Accutome A-Scan Plus
48
Figure 17 Measure Screen Displayed
49
How to Adjust the Contrast
50
Using the Test Block
51
Figure 18 Accutome A- Scan Plus Test Block (Top of Instrument)
51
How to Start a New Patient
52
Figure 19 Measure Screen Starting New Patient
52
Figure 20 Patient Field Activated
53
Figure 21 Entering New Patient Information
54
Figure 22 New Patient Information Entered
55
Figure 23 Screen Keyboard
56
How to Enter Text Without a Keyboard
56
Screen Keyboard Features
57
Entering a Patient with the Screen Keyboard
58
How to Take a Measurement
59
Figure 24 Measurement Fields Selected
59
How to Perform a Calculation
61
Figure 25 Calculate IOL Screen
61
Figure 26 ACD Field Selected
62
Figure 27 K1, K2 Values Entered
63
Figure 28 Calculation Completed
64
How to Print a Record
65
How to Save Patient Records
66
Figure 29 Patient Record Screen
66
Figure 30 Patient Record Stored
67
How to Use the Buttons and Screens
69
Overview
69
Accutome A-Scan Plus Buttons
70
Dedicated Buttons
70
Figure 31 Accutome A-Scan Plus Buttons
70
Calculate
71
Measure Button
71
Patient Record Button
71
Preferences
71
Check or Affirmative ( )
72
Negative or Delete (X)
72
Print
72
Soft Menu Buttons
73
Buttons that Display Other Screens or Soft Menus
73
Buttons that Toggle between Two Selections
73
Accutome A-Scan Plus Knob
73
How the Knob Works
73
Screens
74
What the Screen Displays
74
Types of Information
74
Error Messages
75
Soft Menus
75
Sounds
75
Tips
75
Moving between Screens
75
Screen Hierarchy
76
Figure 32 Accutome A-Scan Plus Screen Hierarchy
76
Top Level Screens
77
Associated Sub-Level Screens
77
From the Calculate Screen
77
From the Measure Screen
77
From the Patient Records Screen
77
From the Preferences Screen
77
How Buttons, Screens and Knob Work Together
78
Changing Fields and Table Cells
78
Active Area
78
Text Entry
78
Selecting a New Active Area
79
Changing Fields in the Active Area
79
Fields Requiring Information
79
Pre-Entered Fields
79
Numeric Fields
80
Keyboard Shortcuts
81
Using the Footswitch
82
Preferences - - - - - - - - - - - - - - - - 65
83
Preferences
83
Setting up the Accutomre A-Scan Plus
83
How to Access Preferences
84
Figure 33 Preferences Button
84
Figure 34 Eye Types Screen
85
Top Level of Preferences
85
How to Add a New Eye Type
86
Adding a New Lens Material
87
Figure 35 Selecting the Lens Materials Table
87
Figure 36 Selecting a Cell to Enter New Lens Material
88
Figure 37 Entering the Name for New Lens Material
89
Assigning a Velocity to the New Lens Material
90
Figure 38 Adding New Material Velocity
90
Adding the New Eye Type Information
91
Figure 39 Selecting the Eye Type Name Cell
91
Figure 40 Adding the New Eye Type Name
92
Figure 41 Activating the Area to Select New Lens Material
93
Figure 42 Lens Material Selected
94
Figure 43 Lens Thickness Entered
95
Figure 44 Anterior Chamber Material Selected
96
Figure 45 Vitreous Chamber Material Selected
97
Eye Type Screen Menu Selections
98
Reset Field to Factory
98
Figure 46 Non-Factory Field
98
Figure 47 Restore Selected Field Prompt
99
Figure 48 Selected Field Restored
100
Reset All to Factory
101
Figure 49 Non-Factory Fields Displayed
101
Figure 50 Restore All Fields Prompt
102
More Settings
103
Setup Screen Fields
103
Setup Screen Soft Menu
103
Figure 51 more Settings - Setup Screen
104
How to Set the Print Title
105
Figure 52 Print Title Field Selected
105
Figure 53 Print Title Field Activated
106
Figure 54 Entering the Print Title
107
Figure 55 Print Title Added
108
How to Set the Printer
109
Figure 56 Printer Field Selected
110
Figure 57 Printer Field Activated
111
Figure 58 Selecting the Printer
112
Figure 59 New Printer Selected
113
How to Set the Serial Link
114
Text with Data Driver
114
Figure 60 Serial Data Printout
115
Figure 61 Serial Link Field Selected
116
Figure 62 Serial Link Field Activated
117
Figure 63 Selecting the Serial Link
118
Figure 64 New Serial Link Selected
119
How to Set the Serial Baud
120
Figure 65 Serial Baud Field Selected
120
Figure 66 Serial Baud Field Activated
121
Figure 67 Selecting the Serial Baud
122
Figure 68 New Serial Baud Selected
123
How to Set Delete Confirm
124
Figure 69 Delete Confirm Field Selected
124
Figure 70 Delete Confirm Field Activated
125
Figure 71 Selecting the Delete Confirm Value
126
Figure 72 New Delete Confirm Entered
127
How to Adjust the Contrast
128
Figure 73 Contrast Field Selected
128
Figure 74 Contrast Field Activated
129
Figure 75 Adjusting the Contrast
130
Figure 76 Contrast Adjusted
131
How to Set the Default Patient Eye Type
132
Figure 77 Default Eye Type Field Selected
132
Figure 78 Default Eye Type Field Selected
133
Figure 79 New Default Eye Type Selected
134
Figure 80 Default Eye Type Changed
135
How to Set the Default ID
136
Figure 81 Default ID Field Selected
136
Figure 82 Default ID Field Activated
137
Figure 83 Entering the Default ID
138
Figure 84 Default ID Added
139
How to Set the Default Gain
140
Figure 85 Default Gain Field Selected
140
Figure 86 Default Gain Field Changed
141
How to Set the Target Refraction
142
Figure 87 Target Field Selected
142
Figure 88 Target Field Activated
143
Figure 89 Adjusting the Target
144
Figure 90 Target Adjusted
145
How to Set the K Index
146
Figure 91 K Index Field Selected
147
Figure 92 K Index Field Activated
148
Figure 93 Adjusting the K Index
149
Figure 94 K Index Field Adjusted
150
How to Set the IOL Step
151
Figure 95 IOL Step Field Selected
151
Figure 96 IOL Step Field Activated
152
Figure 97 Adjusting the IOL Step
153
Figure 98 IOL Step Adjusted
154
How to Adjust the Date and Time
155
Figure 99 Day Field Selected
155
Figure 100 Day Field Activated
156
Figure 101 Adjusting the Day
157
Figure 102 Day Adjusted
158
How to Set the Auto Mode
159
Figure 103 Auto Mode Sclera Selected
160
Figure 104 Auto Mode Sclera Field Activated
161
Figure 105 Changing the Auto Mode - Turning off Sclera
162
Figure 106 Auto Mode - "Sclera" off
163
Figure 107 Auto Mode - "Stable" Selected
164
Figure 108 Auto Mode Defined by "Stable" Measurement
165
Sound On/Sound off
166
Restart On/Restart off
166
Scr Save On/Scr Save off
166
Save and Restore Factory Default Gates and Threshold
167
About this Unit
168
Figure 109 about this Unit Screen
168
Performing Measurements
169
Overview
169
Measure Screen
170
Figure 110 Measure Screen Displaying Current Settings
170
Information Displayed on the Measure Screen
171
Soft Menu Selections
171
Starting a New Patient
172
How to Set the Eye Type
173
Eye Types
173
Eye Type Materials and Velocities
174
Figure 111 Eye Type Selected
175
Setting the Eye Type
175
Figure 112 Eye Type Active
176
Figure 113 Eye Type Changed
177
Probe Application Methods
178
Capture Modes
179
Manual Mode
180
How to Capture a Waveform
181
Figure 114 Measurement Selected
182
How to Select a Measurement
182
Figure 115 Measurement Activated with Waveform Review Menu
183
Selecting a Measurement Using Waveform Review Menu
183
Selecting a Measurement with the Foot Switch
184
How to Delete a Measurement
185
How to Adjust Gates/Threshold
186
Available Gates/Threshold
187
Figure 116 Current Measurement Waveform Selected
188
Selecting Gates/Threshold
188
Figure 117 Waveform Review Menu Activated
189
Figure 118 Cornea Gate Selected
190
How to Adjust the Cornea Gate
190
How to Adjust the Anterior Lens Gate
191
Figure 119 Anterior Lens Gate Selected
192
How to Adjust the Posterior Lens Gate
193
Figure 120 Posterior Lens Gate Selected
194
Figure 121 Retina Gate Selected
195
How to Adjust the Retina Gate
195
Figure 122 Threshold Gate Selected
196
How to Adjust the Threshold
196
How to Apply Gate Adjustments to All Waveforms
197
Figure 123 Gain Selected
198
How to Adjust the Gain
198
Figure 124 Gain Field Changed
199
Figure 125 Zoom Selected
200
Figure 126 Zoom Changed
201
Figure 127 Scroll Selected
202
How to Scroll
202
Figure 128 Measurement Scrolling Changed
203
Switching Eyes
204
Customizing Eye Types
205
Customize Eye Type Screen
206
Figure 129 Customize Eye Type Screen
208
Figure 130 os Materials Table Selected
209
Figure 131 os Materials Table Activated
210
Figure 132 Changing VC Material
211
Figure 133 VC Material Cell Changed
212
Figure 134 Changing Velocity Field
213
Figure 135 os Eye Type Customized
214
Performing Calculations
215
Figure 136 Calculate Button
216
Calculate IOL Screen
217
Figure 137 Calculation Fields
217
Selecting an IOL Group
218
Changing the AXL Value
219
Entering an AXL Value
220
Entering the Target Value
222
Figure 138 Calculate IOL Screen - All Fields Entered
223
Figure 139 Compare on Selected
224
Formula Compare Feature
224
Refractive Surgery
225
Post Rx Surg IOL Calculation Steps
226
Changing Rx Surg Field to Yes
228
Figure 140 Post Rx Surgery Field (Rx Surg) Selected
228
Clinical History Method
229
Figure 141 Post Rx Surgery Calculation Activated - Clinical History
229
Figure 142 Post Rx Surgery Calculation with Contact Lens Method
230
Figure 143 Post Rx Surgery Calculation with Shammas Clinical Method
231
Calculation Results
232
Setting up IOL Groups
233
Figure 144 Select IOL Groups
234
Accessing the IOL Groups Screen
234
Figure 145 IOL Groups Screen
235
Figure 146 Entering the IOL Group Name
236
Figure 147 Entering the IOL Description
237
Entering the Group's Lenses
237
Figure 148 Selecting the A-Constant Field
239
Figure 149 Entering the IOL Constant
240
Figure 150 First Lens Entered for Group 1
241
Figure 151 First IOL Group Complete
242
Personalizing Lens Constants
243
Figure 152 Calculate IOL Screen - IOL Groups Selection
244
How to Personalize Constants
244
Figure 153 Personalize Iols Screen
245
Personalize Iols Screen
246
Selecting an IOL Group and Lens
247
Selecting IOL Group with the Knob
248
Entering Postoperative Results
249
Pasting Patient Information
250
Manually Entering Patient Information
251
Entering Remaining Postoperative Results
252
Deleting All Postoperative Results
253
How to Update IOL Constants
254
Figure 154 Update IOL Constants Screen
255
Selecting an IOL Group and Lens
256
Storing and Recalling Records
259
Figure 155 Patient Record Screen
260
How to Store a Record
260
Figure 156 Patient Record Stored
261
Figure 157 Recalling a Patient Record
262
How to Recall a Record
262
Figure 158 Recalled Patient Record
263
How to Adjust Parameters on Saved Records
264
How to Sort Patient Records
265
Printing Records
267
How to Select the Right Printout Format
268
Figure 159 Measurement Printout
269
Figure 160 Calculation Printout
270
Figure 161 Waveform Text Printout
271
Figure 162 Saved Patient Record Screen
272
How to Batch Print
272
Figure 163 Saved Patient Record - Select for Batch Print
273
Required Printer
274
Maintenance
275
Specifications
277
Environmental Specifications
280
Measurement Accuracy
281
Operating Modes
282
Formula References
283
Storage/Range Specifications
284
Acoustic Output
286
Warranty & Repairs
289
Warranty & Repairs - - - - - - - - - - - 271
290
Product Returns
290
Replacement Parts
291
Related product manuals
Accutome A-Scan Plus Connect
210 pages
Accutome ACCUPEN
41 pages
Accutome PachPen
27 pages