iv
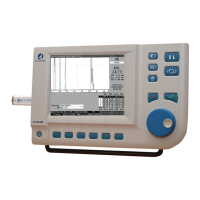
Accutome A-Scan Plus User’s Guide
Assigning a Velocity to the New Lens Material - - 72
Adding the New Eye Type Information - - - - - 73
Eye Type Screen Menu Selections - - - - - - - - 80
Reset Field to Factory - - - - - - - - - - - - - 80
Reset All to Factory - - - - - - - - - - - - - - 83
More Settings - - - - - - - - - - - - - - - - - 85
Setup Screen Fields - - - - - - - - - - - - - - 85
Setup Screen Soft Menu - - - - - - - - - - - - 85
How to Set the Print Title - - - - - - - - - - - - 87
How to Set the Printer - - - - - - - - - - - - - 91
How to Set the Serial Link - - - - - - - - - - - 96
Text with Data Driver - - - - - - - - - - - - 96
How to Set the Serial Baud - - - - - - - - - - 102
How to Set Delete Confirm - - - - - - - - - - 106
How to Adjust the Contrast - - - - - - - - - - 110
How to Set the Default Patient Eye Type - - - - 114
How to Set the Default ID - - - - - - - - - - 118
How to Set the Default Gain - - - - - - - - - 122
How to Set the Target Refraction - - - - - - - 124
How to Set the K Index - - - - - - - - - - - 128
How to Set the IOL Step - - - - - - - - - - - 133
How to Adjust the Date and Time - - - - - - - 137
How to Set the Auto Mode - - - - - - - - - - 141
Sound On/Sound Off - - - - - - - - - - - - - 148
Restart On/Restart Off - - - - - - - - - - - - 148
Scr Save On/Scr Save Off - - - - - - - - - - 148
Save and Restore Factory Default Gates
and Threshold - - - - - - - - - - - - - - - 149
About This Unit - - - - - - - - - - - - - - - 150
Performing Measurements - - - - - - - - 151
Overview - - - - - - - - - - - - - - - - - - -151
Measure Screen - - - - - - - - - - - - - - - -152
Information Displayed on the Measure Screen - - 153
Soft Menu Selections- - - - - - - - - - - - 153
Starting a New Patient - - - - - - - - - - - - 154
How to Set the Eye Type - - - - - - - - - - - -155
Eye Types - - - - - - - - - - - - - - - - - 155