13. Projector Control
13.5.2 Wired DHCP set up
How to set up
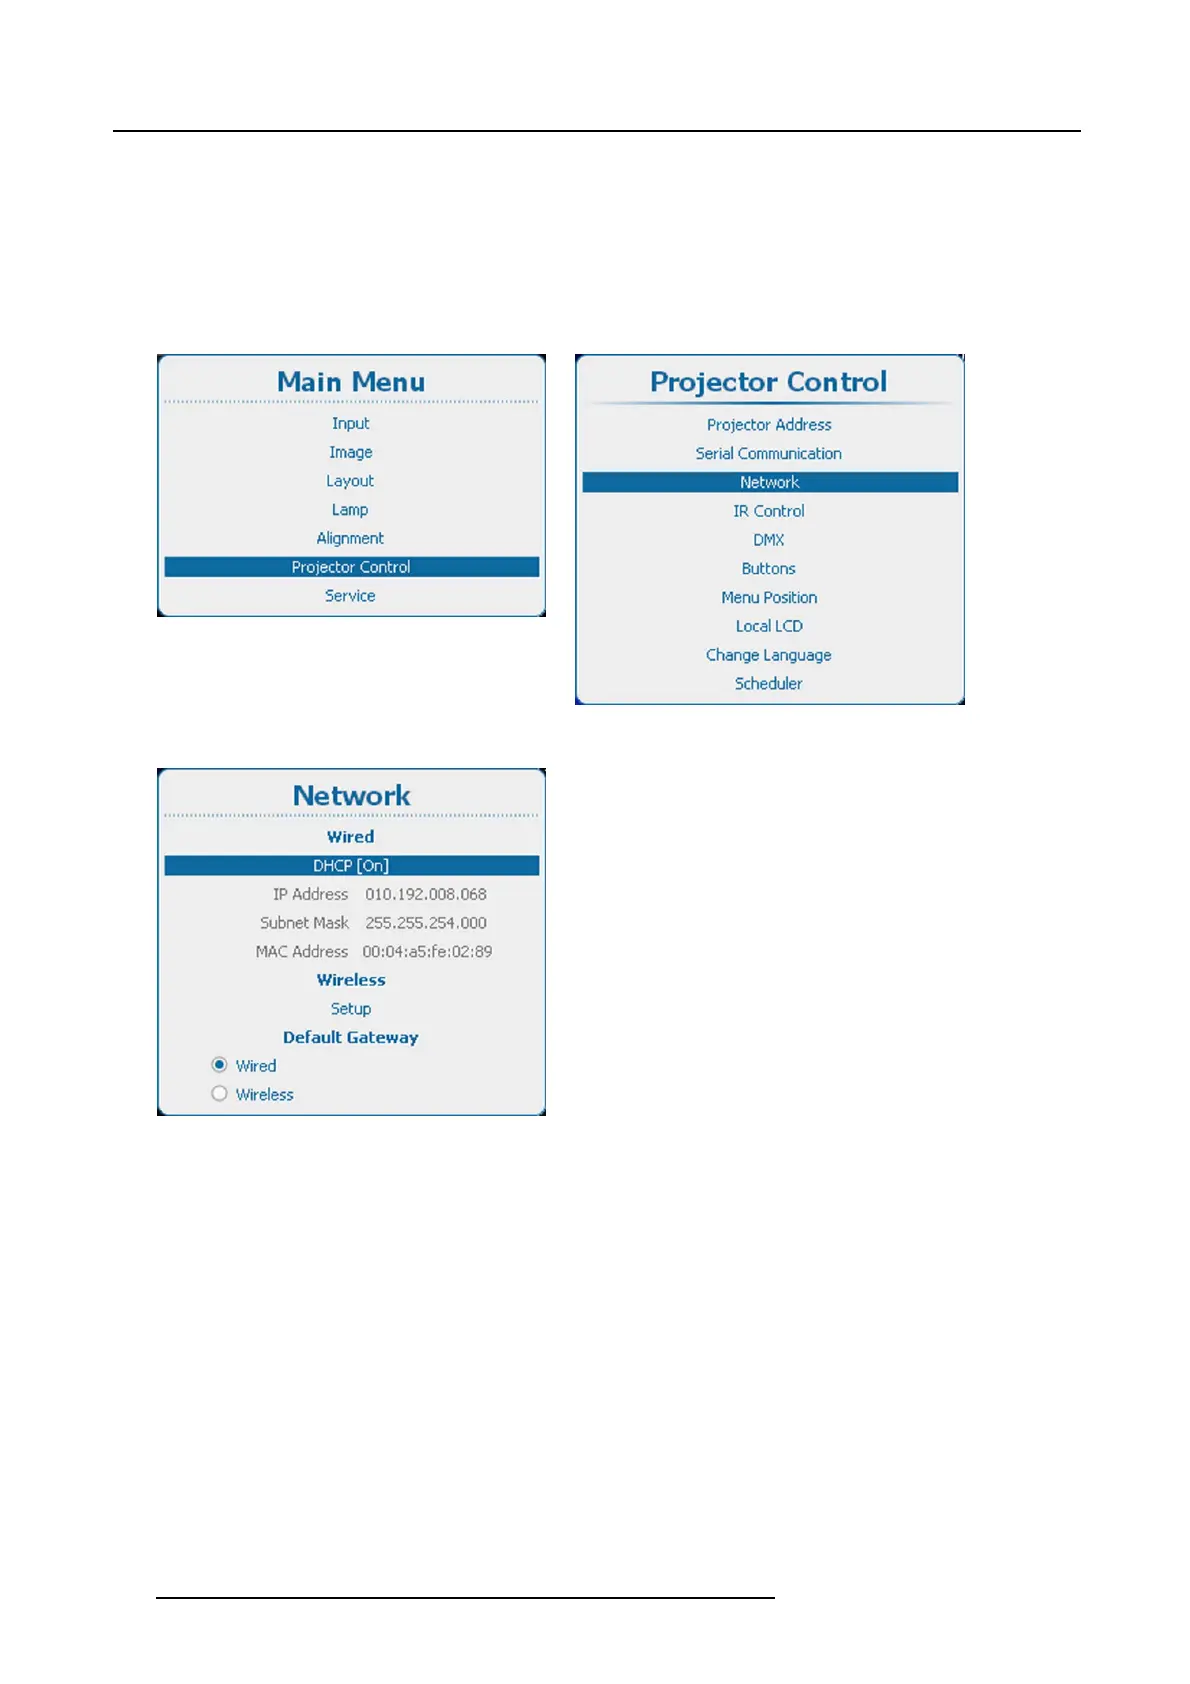
1. Press Menu to activate the menus and select P rojector Control → Network. (image 13-15, image 13-16, image 13-17)
2. Use the ▲ or ▼ key to select DHCP under Wired and press ENTER to toggle between [On] or [Off].
[On] : DHCP is activated. An automatic IP address is assigned.
[Off] : DHCP is deactivated. A fixed address must be used.
Image 13-15
Main menu, projector control
Image 13-16
Projector control, network
Image 13-17
Wired DHCP
13.5.3 Wired IP address set up
How to set up
1. Press Menu to activate the menus and select P rojector Control → Network. (image 13-18, image 13-19, image 13-20)
2. Use the ▲ or ▼ key to select IP Addr ess under Wired and press ENTER to activate the input box. (image 13-21)
3. Use the ▲ or ▼ key to change the selected character.
Use the ◄ or ► key to select another character.
Note: Digits can be entered with the digit keys on
the remote control or the local ke ypad. W hen a digit is entered in that way,
the next character will be s elected automatically.
168
R5905158 HDF W SERIES 10/07/2012

 Loading...


