3. Physical installation
3.2.2 Lens selection
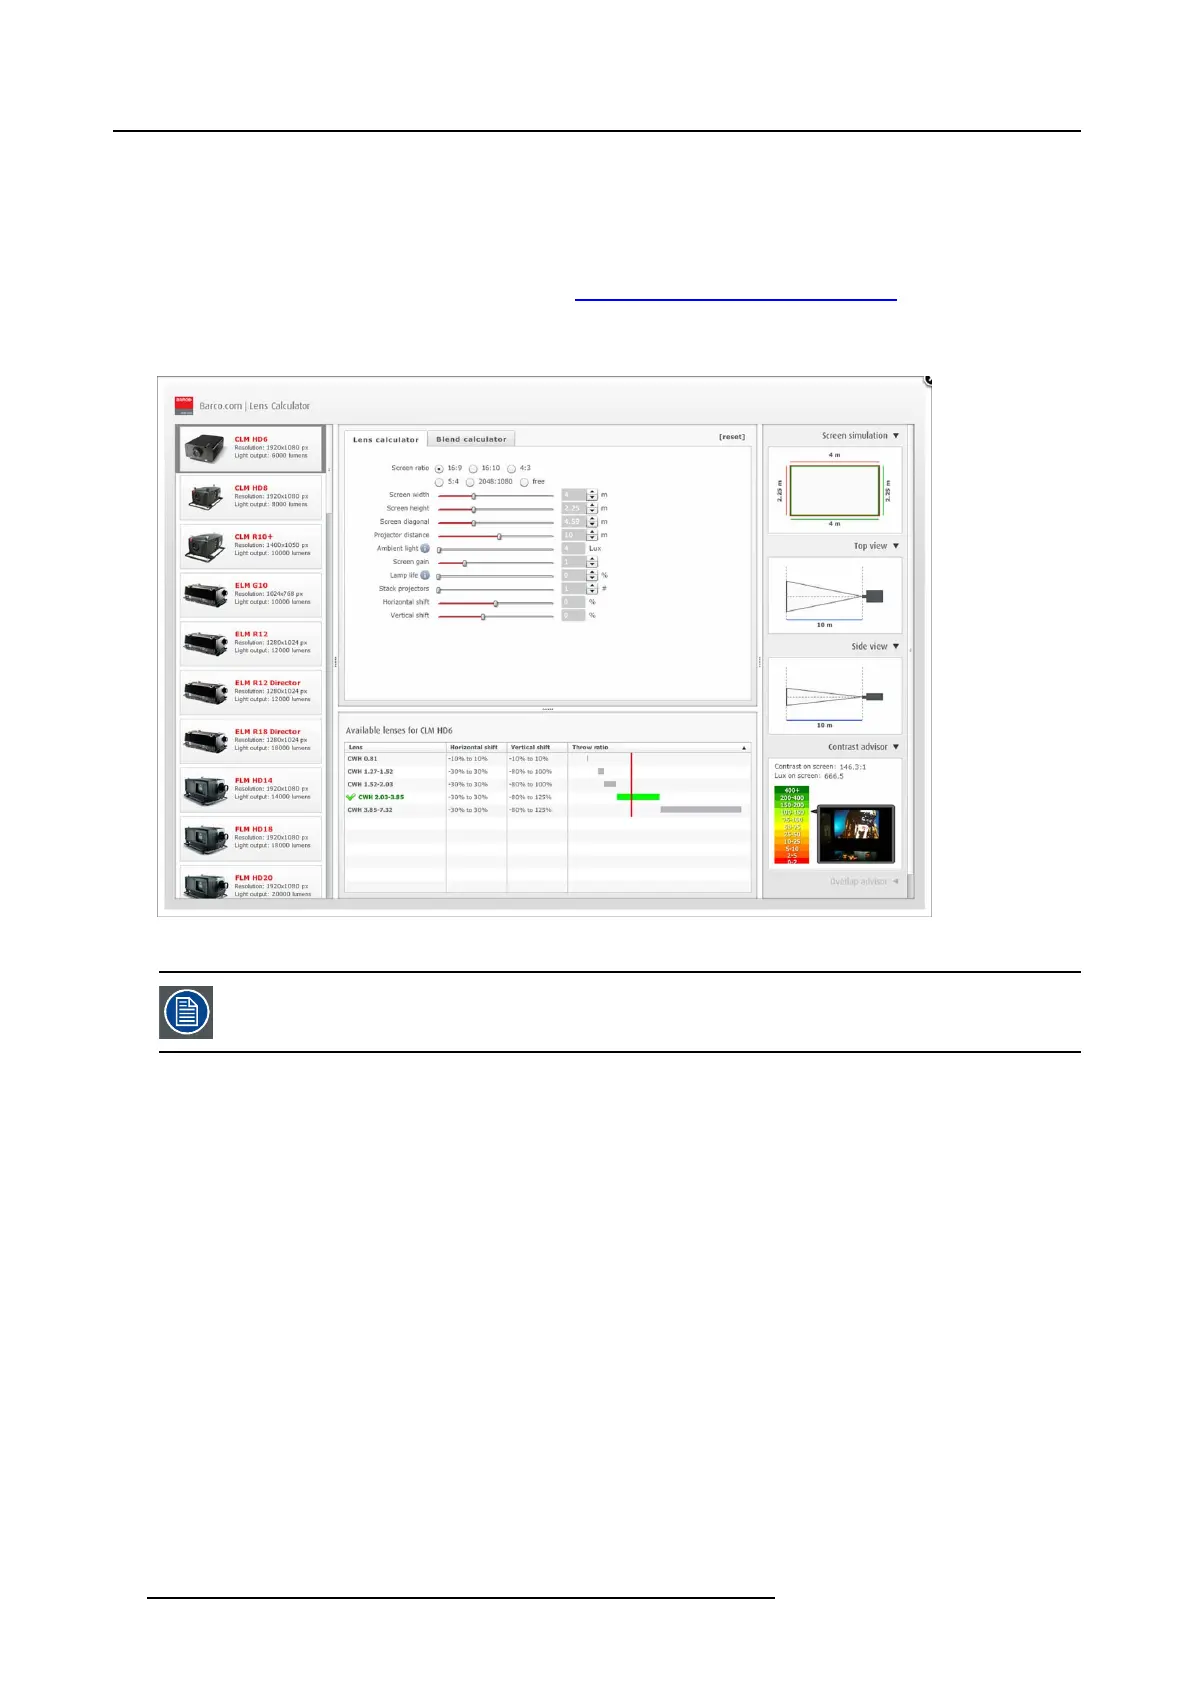
How to select the right lens
1. Determine the required screen width (SW).
2. Determine the approximate position of the projector in the room.
3. Start up the Lens Calculator ontheBarcowebside: h
ttp://www.barco.com/en/tools/lenscalculator to determine the possible
lenses for your configuration.
The Lens Calculator window opens. (image 3-17)
Image 3-17
Lens calculator
The Lens Calculator can also be used to determine the position of the projector when the lens type and screen
width is known.
3.2.3 Lens installation
How to install
1. Remove the foam rubber in the opening of the lens holder if not removed yet.
2. Take the lens assembly out of its packing mat
erial and remove the lens caps on both sides.
3. Place the lens holder in the “unlocked” position by moving the lens lock handle (A) towards the lens power supply socket (B) as
illustrated. (image 3-18)
4. Ensure that the lens holder stands in the On-Axis position (horizontal and vertical mid position).
Note: The lens holder is p laced default in the On-Axis position at factory.
5. Gently insert the lens in such a way that the lens connector matches the socket (B). (image 3-19)
6. Insert the lens until the connector seats into the socket.
Warning: Do not re lease the Lens yet, as the Lens may fall out of the Lens Holder.
7. Secure the lens in the lens holder by sliding the lens lock handle into the “locked” position, which is away from the lens power
supply socket. Ensure the lens touches the front plate of the lens holder. (image 3-20)
8. Check if the lens is really secured by trying to pull the lens out of the lens holder.
24
R5905158 HDF W SERIES 10/07/2012

 Loading...


