E. Stacking HDF W series projectors
D
C
BA
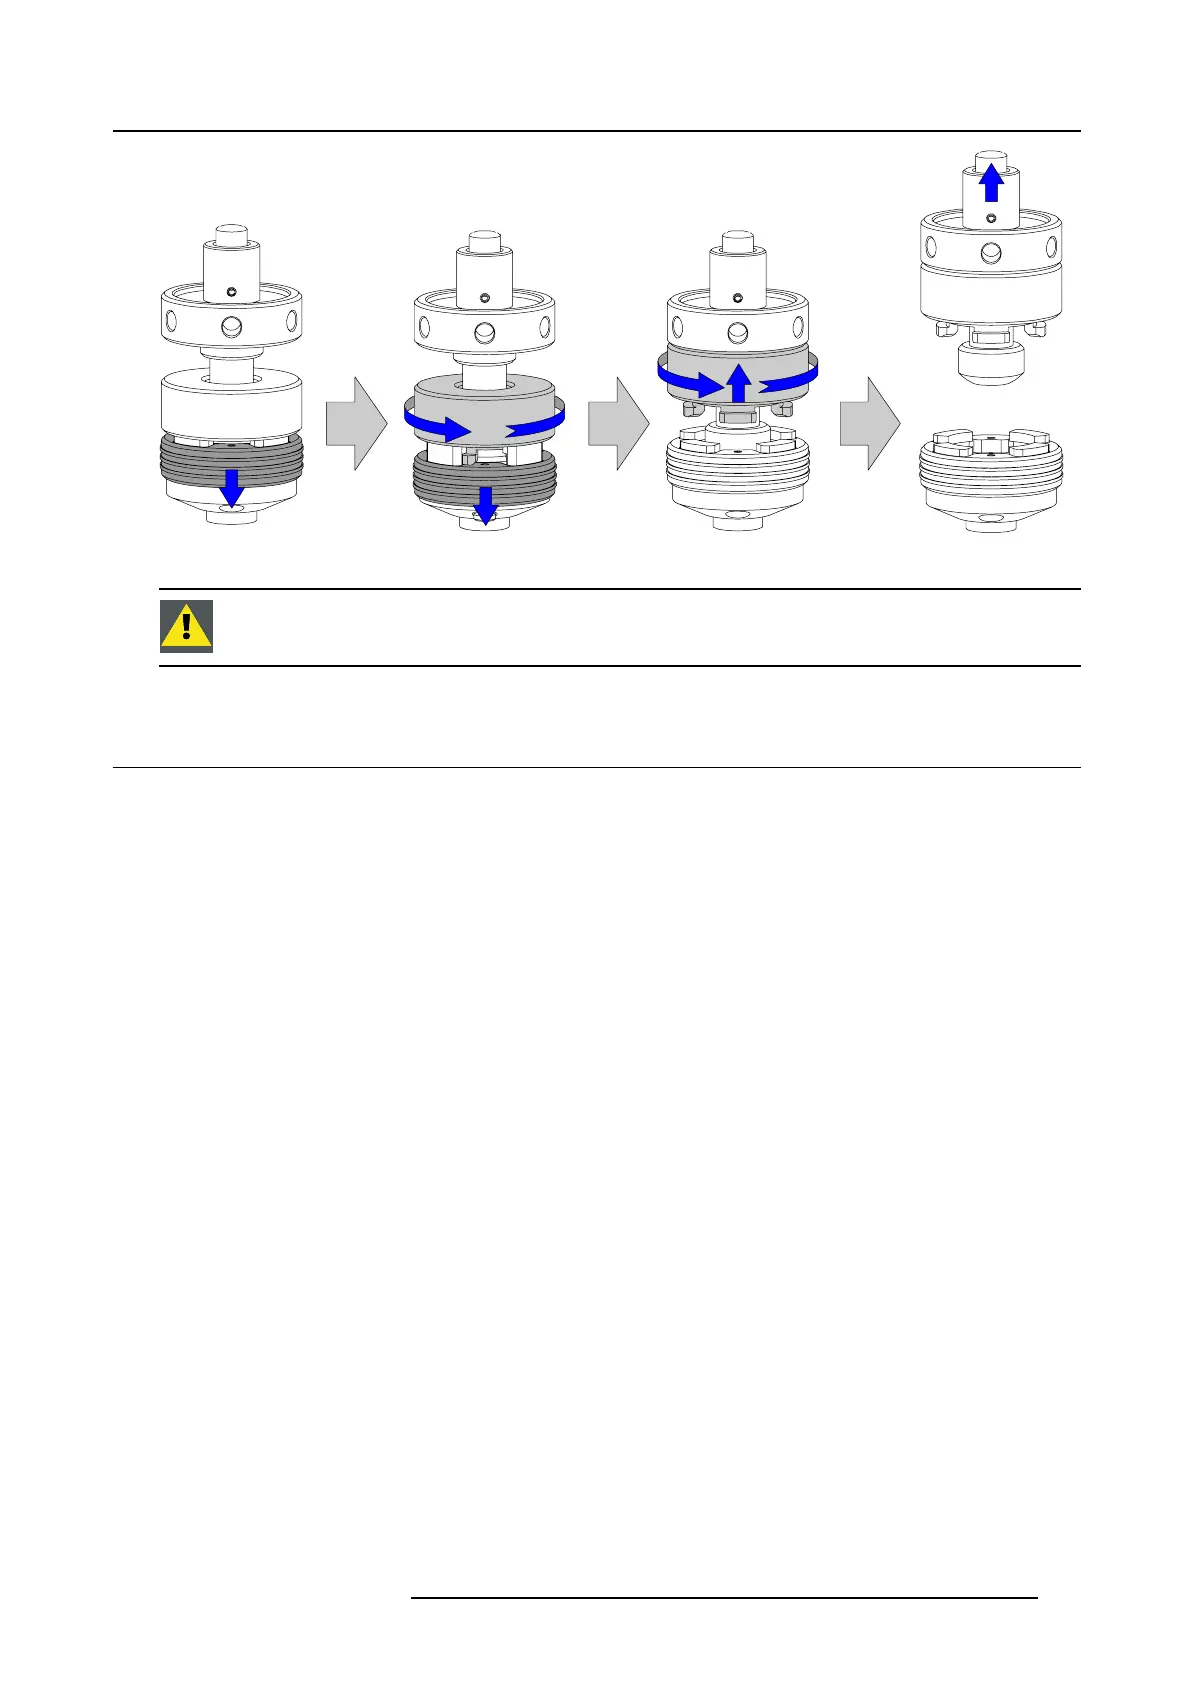
Image E-5
Opening interlocking adapter
WARNING: Never open an interlocking adapter of a stacked projector which is still suspended. First place
the stacked projectors on the floor.
E.2 Aligning stacked HDF W series projectors
Necessary tools
8mmAllenkey.
How to align two stacked HDF W series projectors ?
1. Make sure that the internal hatch pattern projected by the reference projector is sharp and has a perfect rectangle outline. If this
is not the case, readjust the reference projector before aligning the other stacked projector(s) with the reference hatch pattern.
Note: The reference projector in a stacked configuration is the lowes t projector in case of table mo unt and the uppermost
projector in case of ceiling m ount.
2. Project with the stacked projector the same internal hatch pattern as the reference projector.
Tip: Use a white colored hatch pattern for the reference projector and e.g. green colored f or the stacked projector. This
makes it easier to see the difference between both hatch patterns projected.
3. If necessary, adjust the rotation of the stacked projector with respect to the reference projector by turning in or out the height
adjustment ring of the interlocking adaptor
s at the rear of the stacked projector. Adjust until the outline of the hatch pattern is
most symmetric with the reference hatch pattern. (image E-6)
Tip: You can increase leverage by using a screw driver in the holes of the adjustment ring
4. If necessary, adjust the inclination of the stacked projector with respect to the reference projector by turning the height adjustment
ring of the interlocking adaptor at the front of the stacked projector in or out. Adjust until the outline of the hatch pattern is most
symmetric with the reference hatch pattern. (image E-7)
5. If necessary, adjust the skew of the stacked projector with respect to the reference projector by turning the screw Q in or out
using a 8 mm Allen key. The screw Q is located behind the cover of the lamp, just above the volt meter. Adjust until the outline
of the hatch pattern is most symmetric with the reference hatch pattern. (image E-8)
Note: See procedure “Removal of t he lamp cover”, to access the skew adjustment screw Q.
6. Shift the hatch pattern horizontally and vertically until the outline of the hatch pattern is most symmetrically placed with respect
to the reference hatch pattern. (image E-9)
Note: Note that the “Shift” function is motorized, which means that you have to access the projector software, via the local
keypad or remote control unit, to operate the “Shift” function.
7. Zoom the hatch pattern in or out unt
il the outline of the hatch pattern matches exactly the outline of the reference hatch pattern.
(image E-10)
Note: Note that the “Zoom” function is motorized, which means that you have t o access the projector software, via the local
keypad or remote control unit, t
o operate the “Zoom” function.
8. If necessary, repeat from step 2 until the hatch pattern of the stacked projector is perfectly aligned with the hatch pattern of the
reference projector.
R5905158 HDF W SERIES 10/07/2012
257

 Loading...


