16. Removal and installation of the projector covers
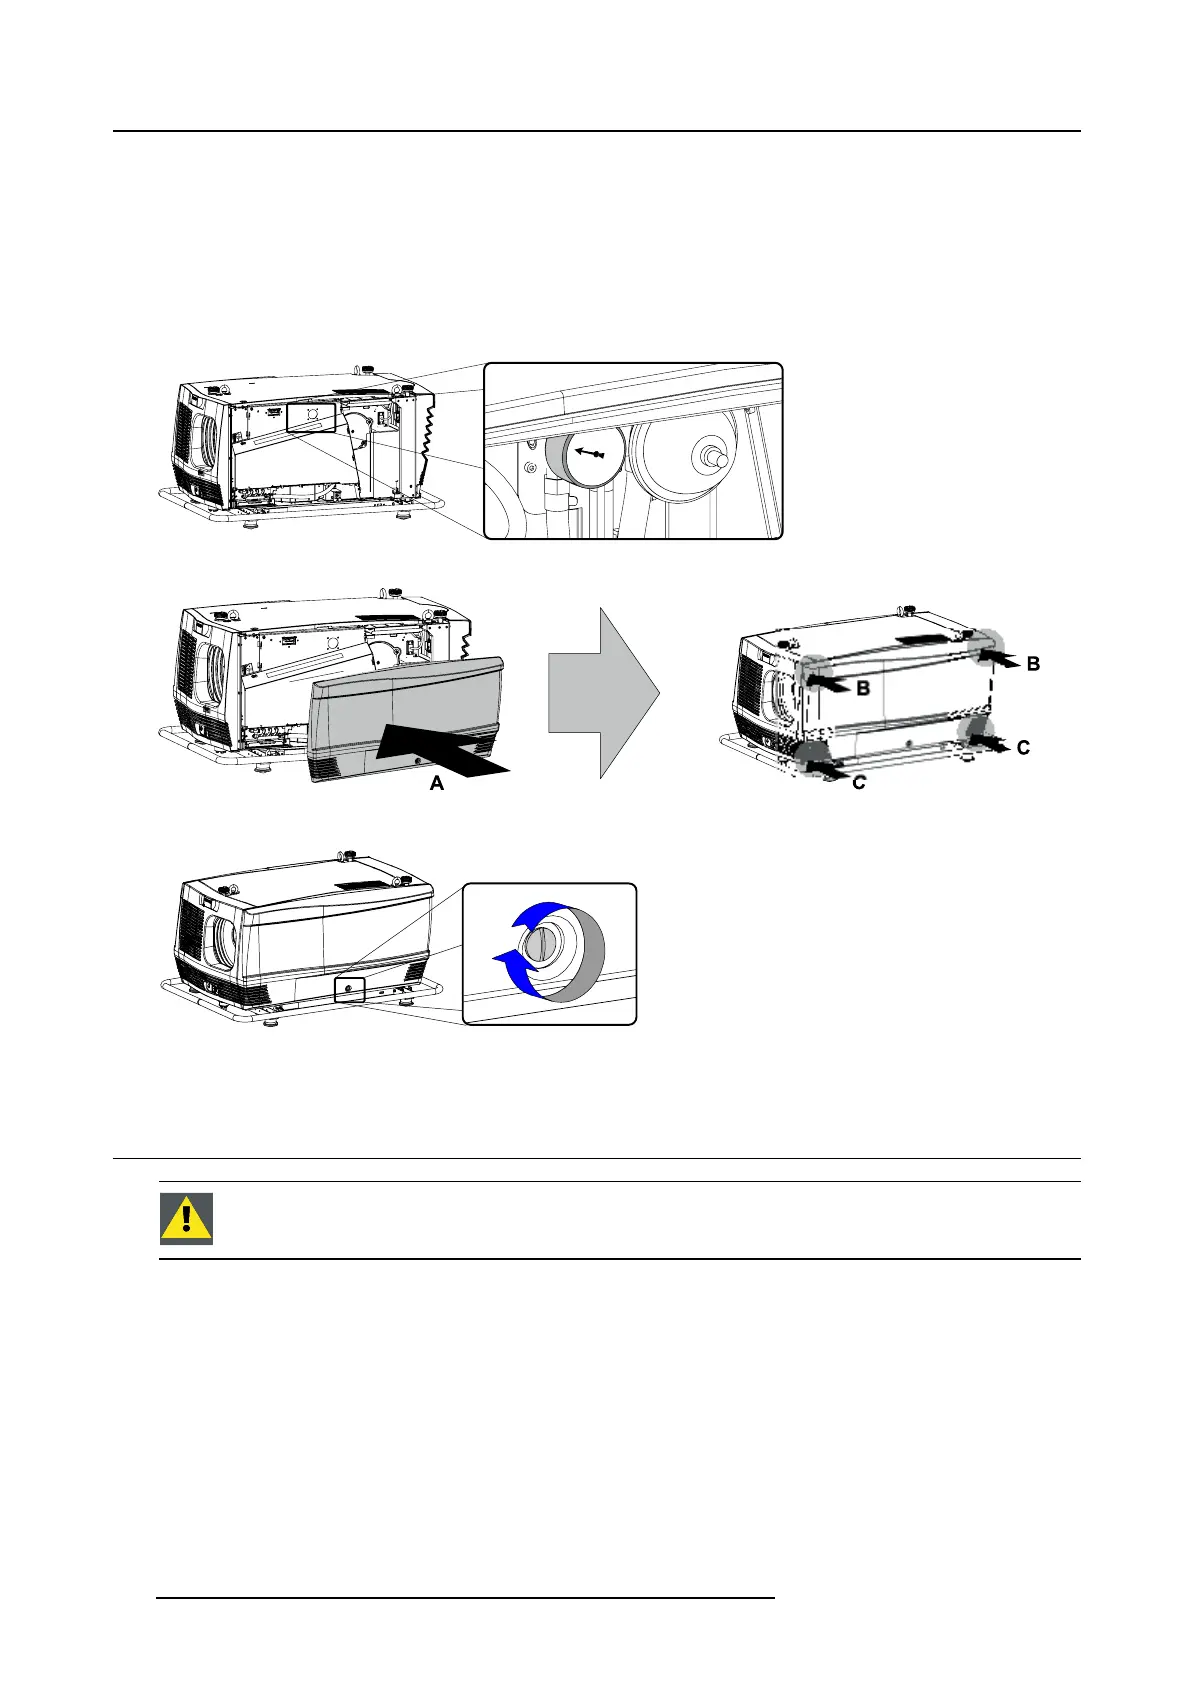
2. Check the pressure indicated on the internal manometer of the liquid cooling circuit. This pressure should be between 0,5 and 1
bar. If the pressure is out of range, inform the responsible and qualified technician, so he may take necessary corrective action.
(image 16-11)
3. Install the side cover of the projector doing the following:
a) Bring the side cover towards its final position (A),
b) then gently push the locking studs of the top corners (B) into their receivers,
c) then gently push the locking studs of the bottom corners (C) into their receivers. (image 16-12)
4. Secure the side cover by locking the captive screw in the middle at the bottom of the side cover. (image 16-13)
1
0.5
Image 16-11
Image 16-12
Mount side cover
Image 16-13
Fixate captive screw
16.7 Installation of the lamp cover
WARNING: This procedure may only be performed by qualified technical service personnel.
Necessary tools
7mmflat screw driver.
How to install the lamp cover
1. Install the lamp cover of the projector as follows:
a) Bring the lamp cover towards its final position (A),
b) then gently push the locking stud at the left top corner (B) into its receiver,
c) then gently push the locking stud at the left bottom corner (C) into its receiver. (image 16-14)
2. Secure the lamp cover by locking the two captive screws at the right side of the lamp cover. (image 16-15)
228
R5905158 HDF W SERIES 10/07/2012

 Loading...


