3. Physical installation
3. PHYSICAL INSTALLATION
About this projector
This chapter describes how the mechanical set up of the projector has to be done and how to realize the electrical connections.
Overview
• Remote control unit (RCU)
• Lenses
• Power connection
• Suspension of the HDF W series projector with rigging clamps
3.1 Remote control unit (RCU)
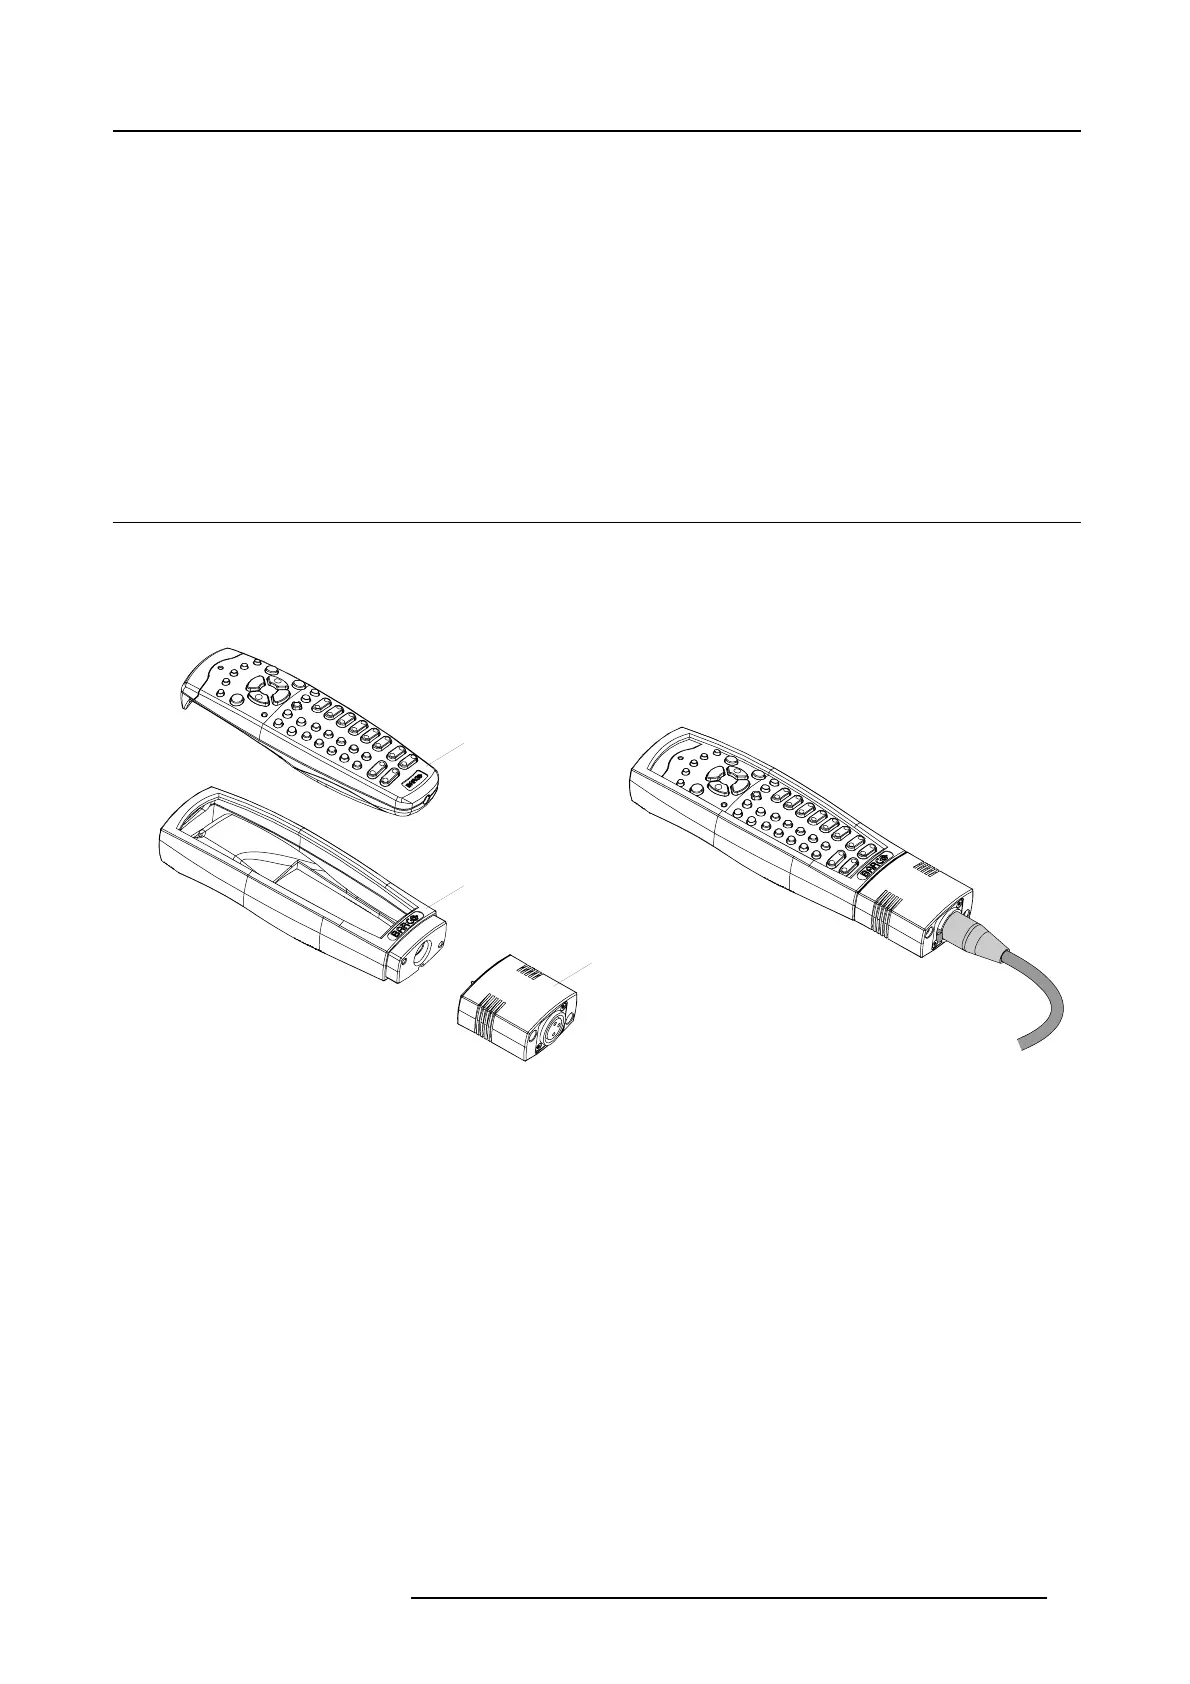
Introduction
The remote control unit (A) of the HDF W series projector is equipped with a rugged case (B) and an XLR adaptor (C). The remote
control unit can be used wired via mini-jack or via rugged XLR. Note that the backlight, of the remote control unit, illuminate contin-
uously when wire connected.
C
B
A
Image 3-1
A Remote control unit (RCU).
B Rugged case.
C XLR adaptor.
Overview
• RCU battery installation
• RCU rugged case installation
• RCU XLR adaptor installation
• Using the XLR adaptor of the RCU
• RCU usage possibilities
3.1.1 RCU battery installation
Where to find the batteries for the remote control ?
The batteries are not placed in the remote control unit to avoid control operation in its package, resulting in a shorter battery life
time. At delivery the batteries c
an be found in a separated bag attached to the remote control unit. Before using your remote control,
install the batteries fi rst.
How to install the batteries in the remote control ?
1. Push the battery cover tab with the fingernail a little backwards (1) and pull, at the same time, the cover upwards (2). (image 3-2)
2. Insert the two AA size batteries, making sure the polarities match the + and - marks inside the battery compartment. (image 3-3)
R5905158 HDF W SERIES 10/07/2012
19

 Loading...


