3. Physical installation
3
F
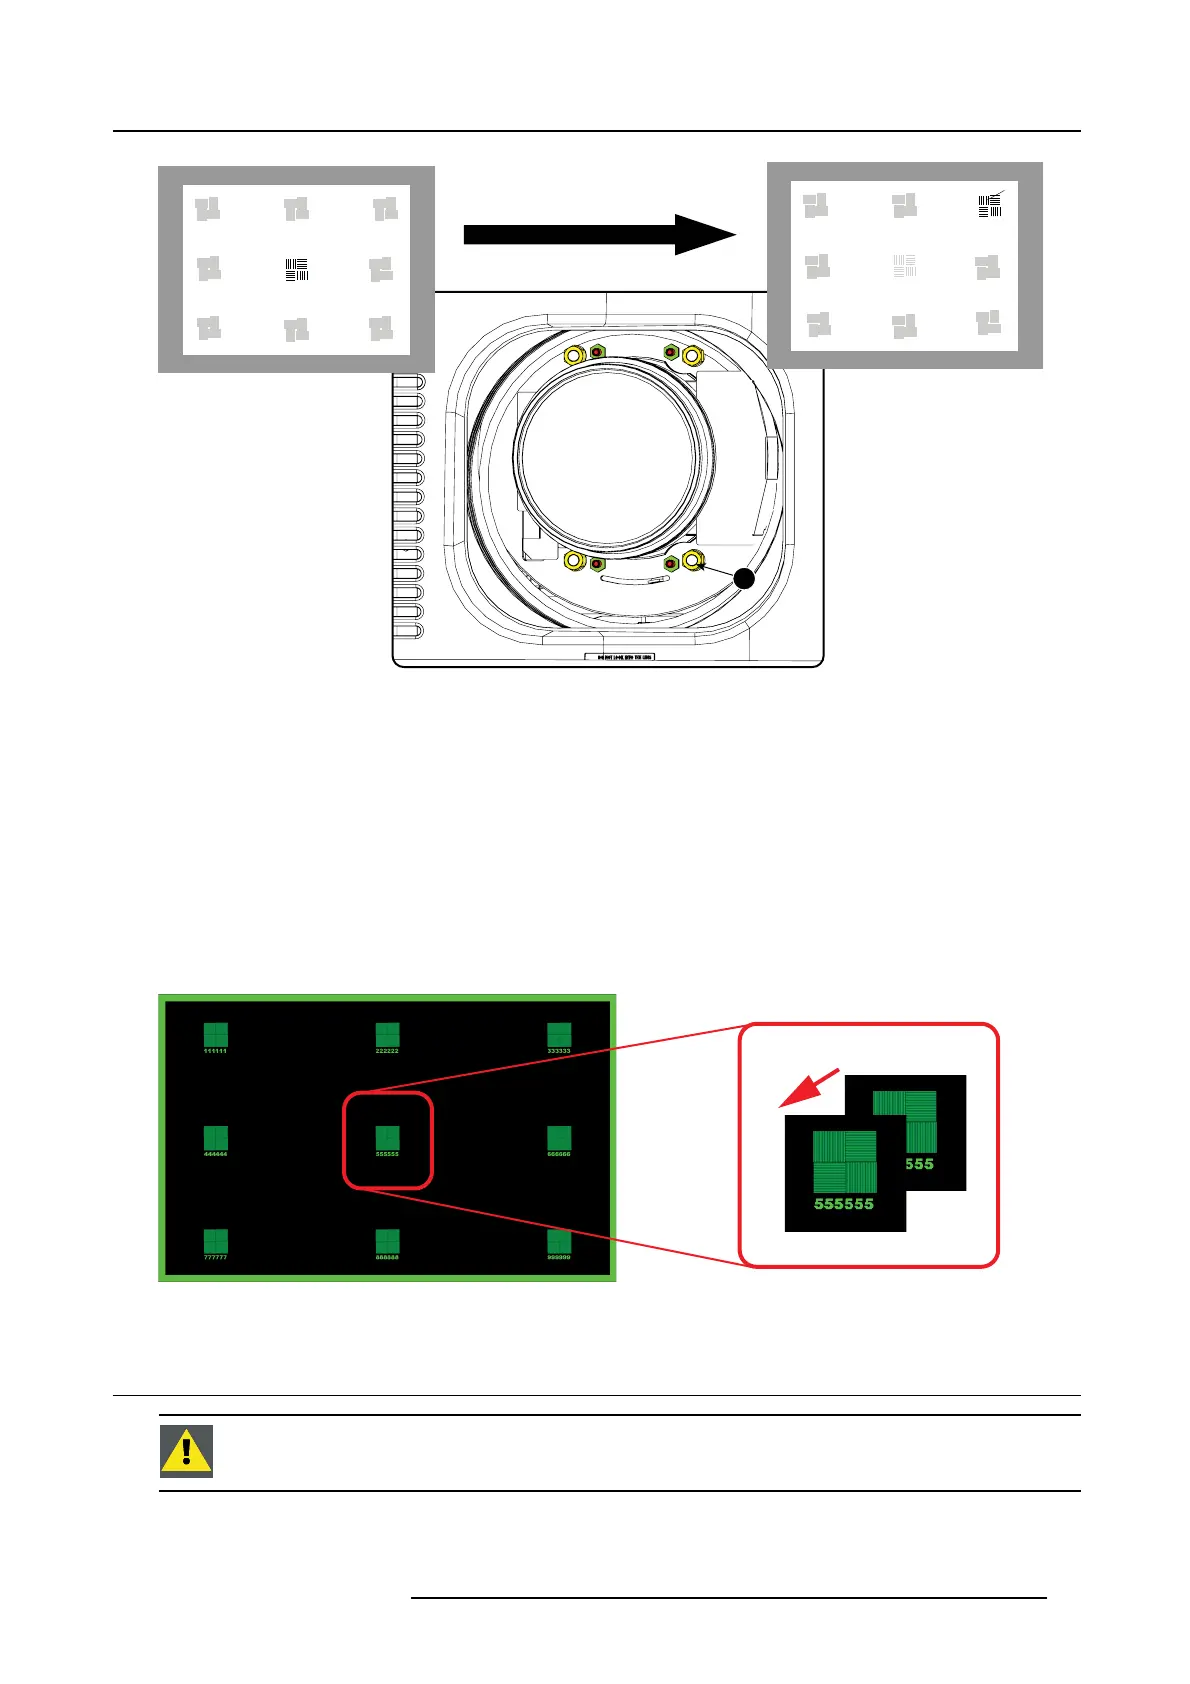
Image 3-34
Corner focusing
How to fixtheScheimpflug
Start the fixation as follows (steps must be followed strictly) :
1. Turn in set screw A, B and C. Tighten lightly (by hand).
Tip: Any movement of the image will affect the Scheimp flug adjustment
2. Fasten lock nuts a, b and c.
3. Turn in set screw D lightly (by hand) allowing the image to move slightly (1/3 to 1/2 of a square). (image 3-35)
4. Fasten lock nut d.
5. Tighten nut 4 until the offset of the image movement created in step 3 is canceled.
Tip: The amount of image movement in step 3 will determ ine how tight the nut in step 5 will need to be turned to return the
image to its original position.
1/3 to 1/2
Image 3-35
3.3 Power connection
CAUTION: Use only the power cord provided with the projector.
R5905158 HDF W SERIES 10/07/2012 33

 Loading...


