If there are discrepancies and you click OK, the affected VSANs in the zone databases are cleared. This may
become disruptive if the switch is in use.
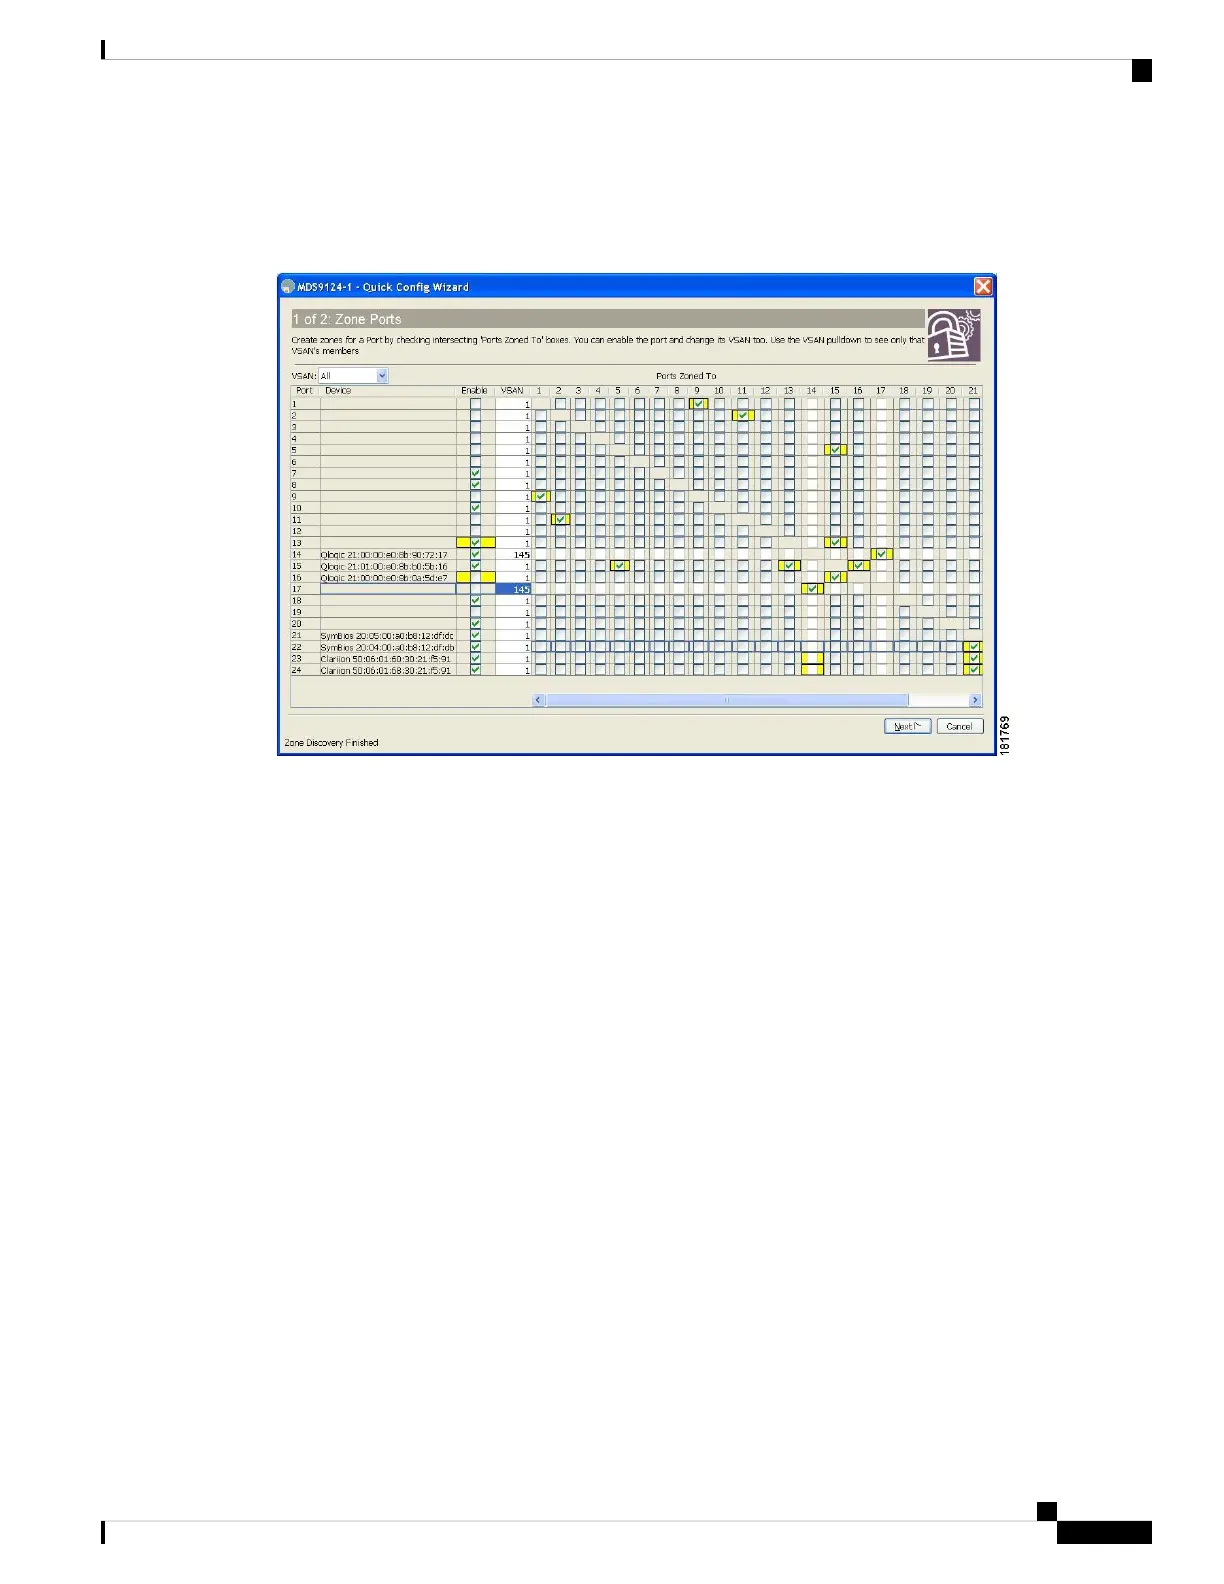
Figure 8: Quick Config Wizard
Note
Step 3 Check the check box in the Ports Zoned To column for the port you want to add or remove from a zone. The check box
for the matching port is similarly set. The selected port pair is added or removed from the zone, creating a two-device
zone.
The VSAN drop-down menu provides a filter that enables you to zone only those devices within a selected VSAN.
Step 4 Right-click any of the column names to show or hide a column.
Step 5 Click Next to verify the changes.
You see the Confirm Changes dialog box (see Figure 9: Confirm Changes Dialog Box, on page 44).
Cisco MDS 9000 Series Fabric Configuration Guide, Release 8.x
43
Configuring and Managing Zones
Using the Quick Config Wizard

 Loading...