Configuring Connectivity
LOGIQ 7 Basic User Manual 16-95
Direction 2392206-100 Rev. 1
Button
You can assign print buttons via the Utility --> Connectivity -->
Button page.
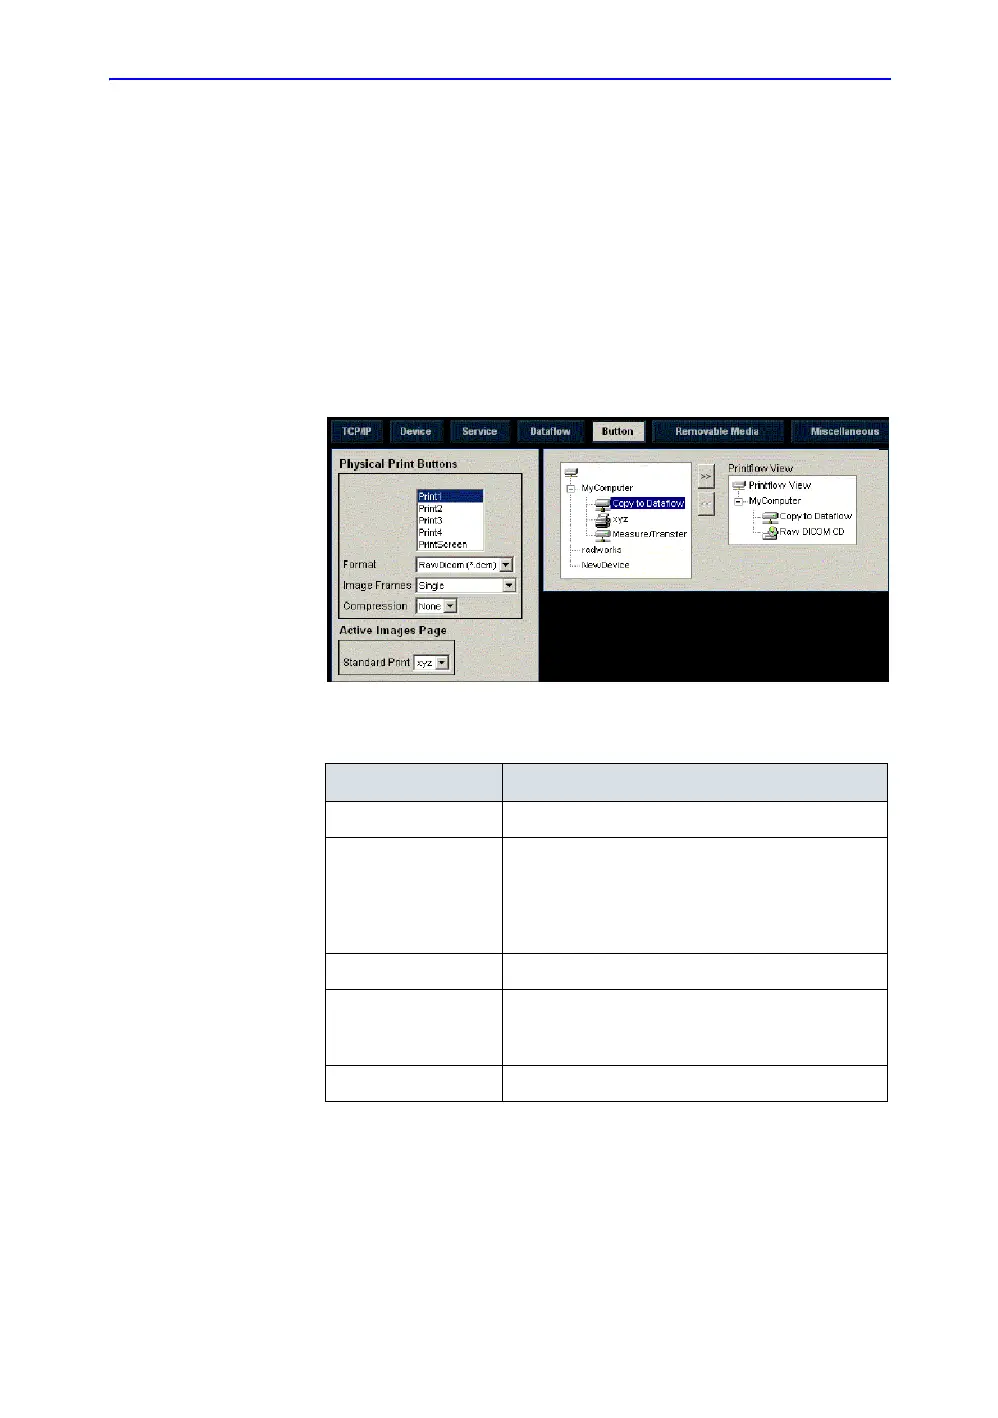
Assigning print buttons. First select the print button to configure
on the upper, left corner of the page. Then select the device you
want to add in the middle part of the page, under Available Input/
Outputs. Then click on the right arrow in the top right corner of
the page.
NOTE: You can configure each print key to multiple output devices/
dataflows.
Figure 16-67. Button Preset Menu
Table 16-57:
Preset Parameter Description
Format RawDICOM, DICOM, or M&A.
Image Frames Single (captures a DICOM single frame image),
Multiple (captures a DICOM multiframe, CINE) --
only select this if the PACS supports multiframe,
and Secondary Capture (forces all DICOM images
to Secondary Capture).
Compression Always set to None.
Single Association Only applies to DICOM image storage destinations.
When checked, the spooler sends multiple images
in one store job.
Active Images Page Lets you send to a Windows-based printer.

 Loading...


