215575 173 Revision B
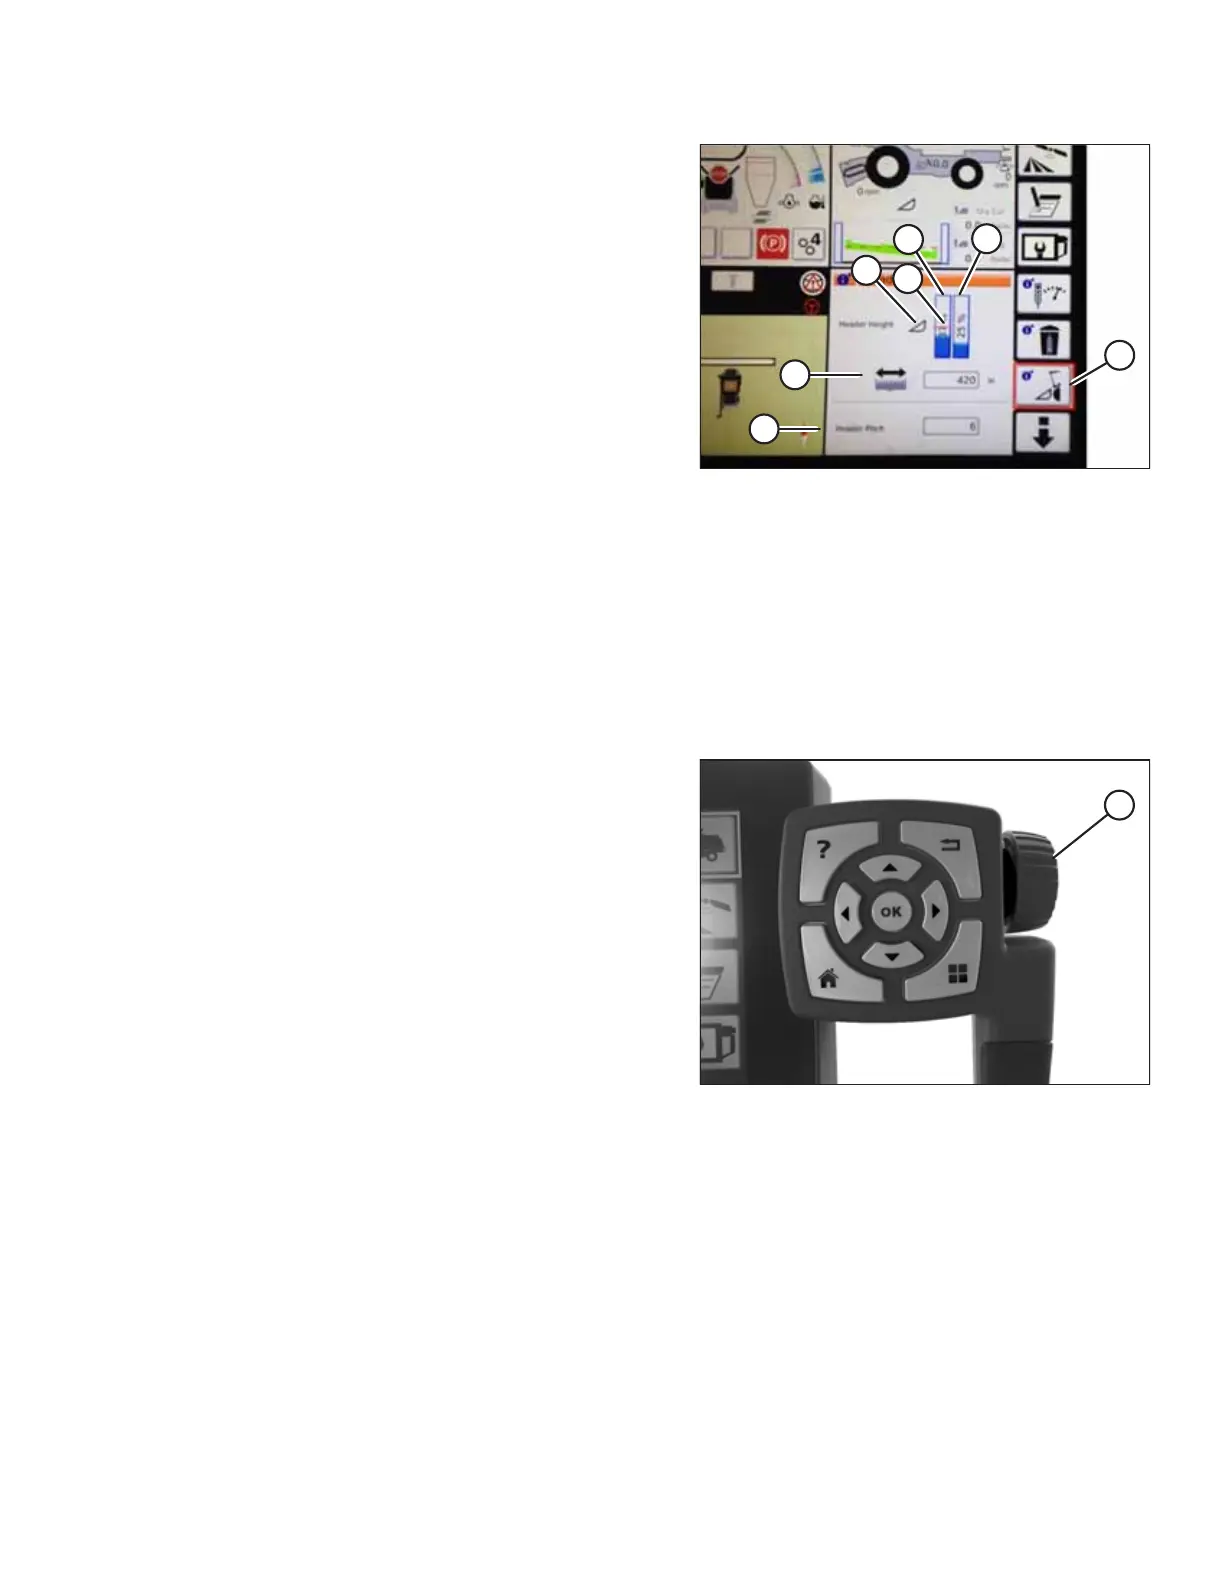
Figure 4.141: Header Groups
1. To view the header group settings, touch HEADER icon (A).
2. The display area shows:
• Left header height indicator (B), which shows the
current position of the header.
• Red line (C) on current header height position
indicator (B), which shows the setpoint cut-off position.
• Header symbol (D). Touch and then use the scroll wheel
on the right of the Tyton terminal to adjust the setpoint
cut-off position. As the scroll wheel is moved, the cut-
off position will move.
• Right indicator (E), which shows the set cutting height
when AHHC is enabled. You can fine-tune the cutting
height by using the header height setpoint control dial
on the header control cluster. As this control is adjusted,
the cut height indicator will change position.
• Header working width (F).
• Header pitch (G).
3. Touching a field on the display opens the on-screen
keyboard so that the values can be adjusted. Enter a new
value and touch the green check mark when you are
finished.
Figure 4.142: Scroll Wheel for Adjustments
NOTE:
Scroll wheel (A) is on the right of the Tyton terminal.
AUTO HEADER HEIGHT CONTROL