215575 293 Revision B
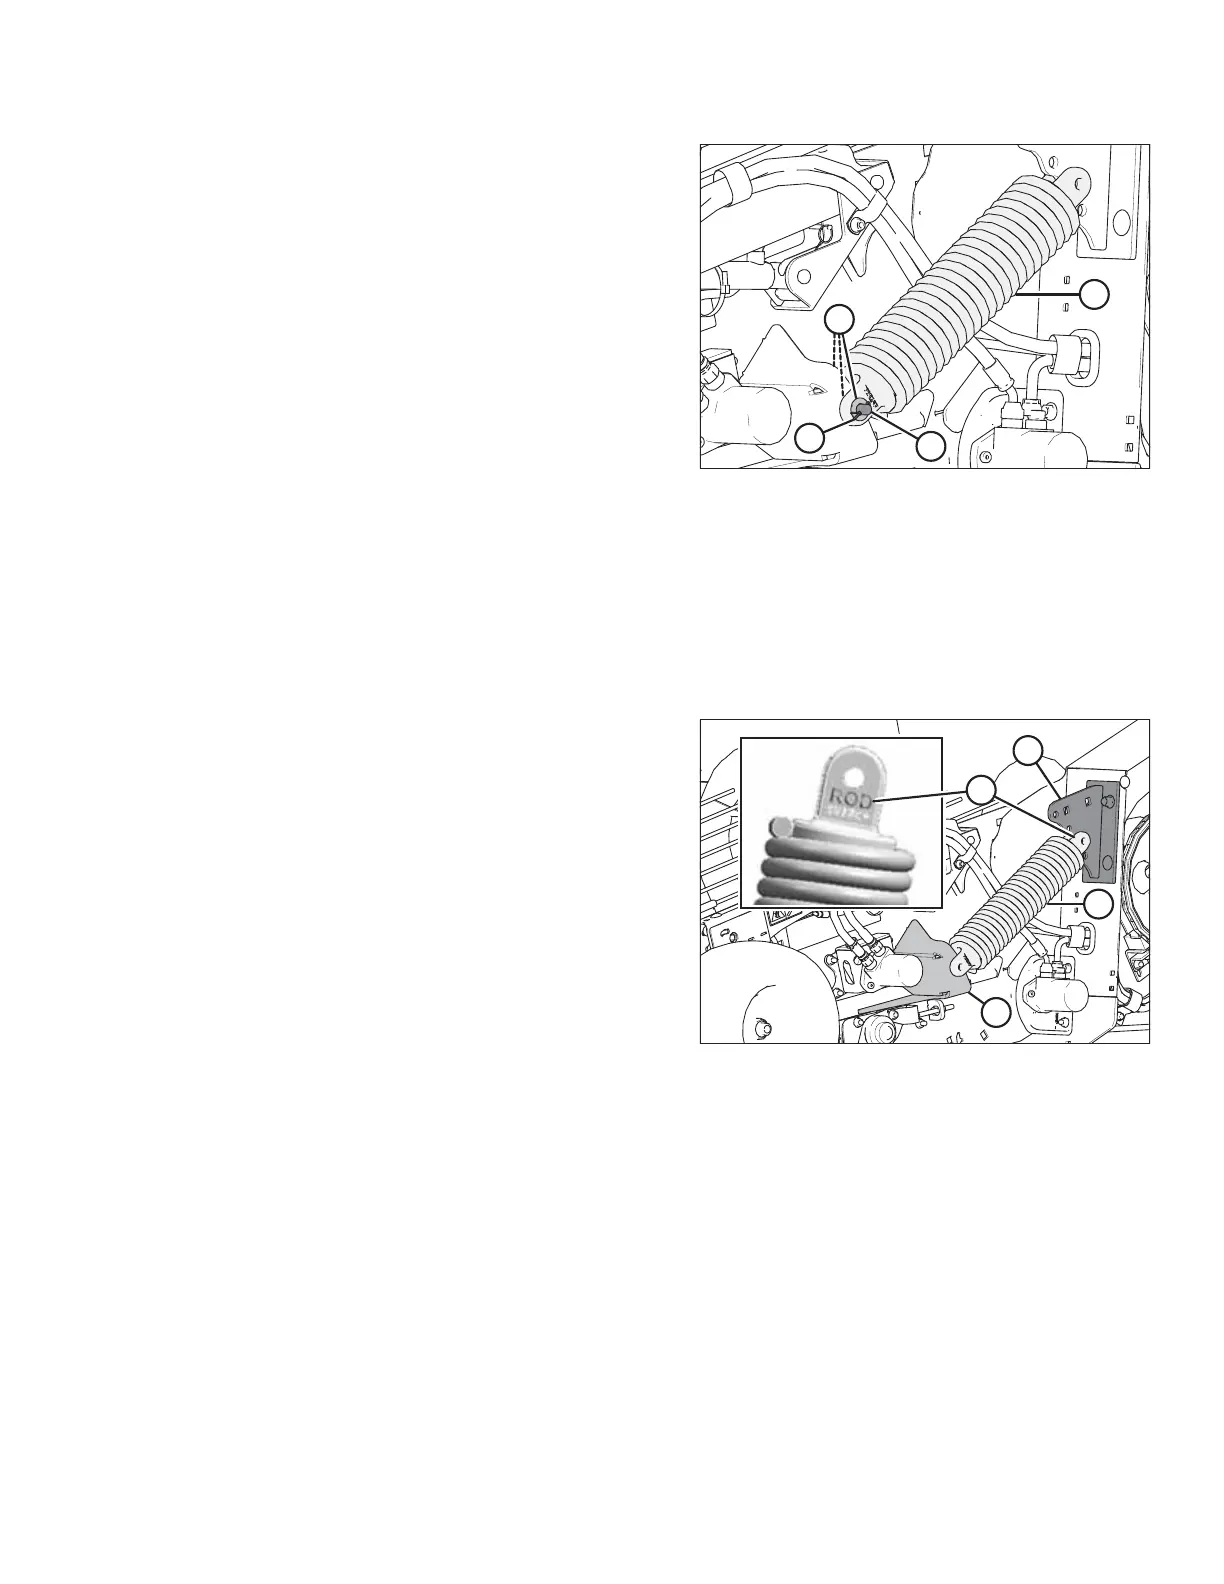
Figure 5.169: Left Front Anchor
IMPORTANT:
Note the spring float assembly position on the anchor. To
prevent damage to the draper deck, ensure that the left and
right assemblies are set to the same anchor hole position
during installation.
6. Remove cotter pin (B), clevis pin (C), and three flat
washers (D) from spring float assembly (A) on the
front anchor.
7. Remove spring float assembly (A).
8. Repeat Steps 4, page 292 to 7, page 293 to remove the
right spring float assembly.
5.8.2 Installing Header Spring Float Assembly
Ensure that the spring float assembly is installed at the same height settings on both sides of the header. Ensure that the
end with the shock absorber is installed in the correct orientation.
NOTE:
The spring tension is factory-set to the second hole from the bottom on the anchor.
Figure 5.170: Left Anchors Shown – Right Side
Opposite
1. Position rod end (D) of spring float assembly (A) onto
anchor (B) while positioning the opposite end of the
assembly onto front anchor (C).
IMPORTANT:
The word ROD is stamped onto the casting of the assembly
to indicate which side of the spring float assembly (A)
contains the rod end (D) of the shock absorber. Ensure that
rod end (D) of the shock absorber is installed onto
anchor (B) as shown.
MAINTENANCE AND SERVICING