215575 294 Revision B
$
%
&
'
(
(
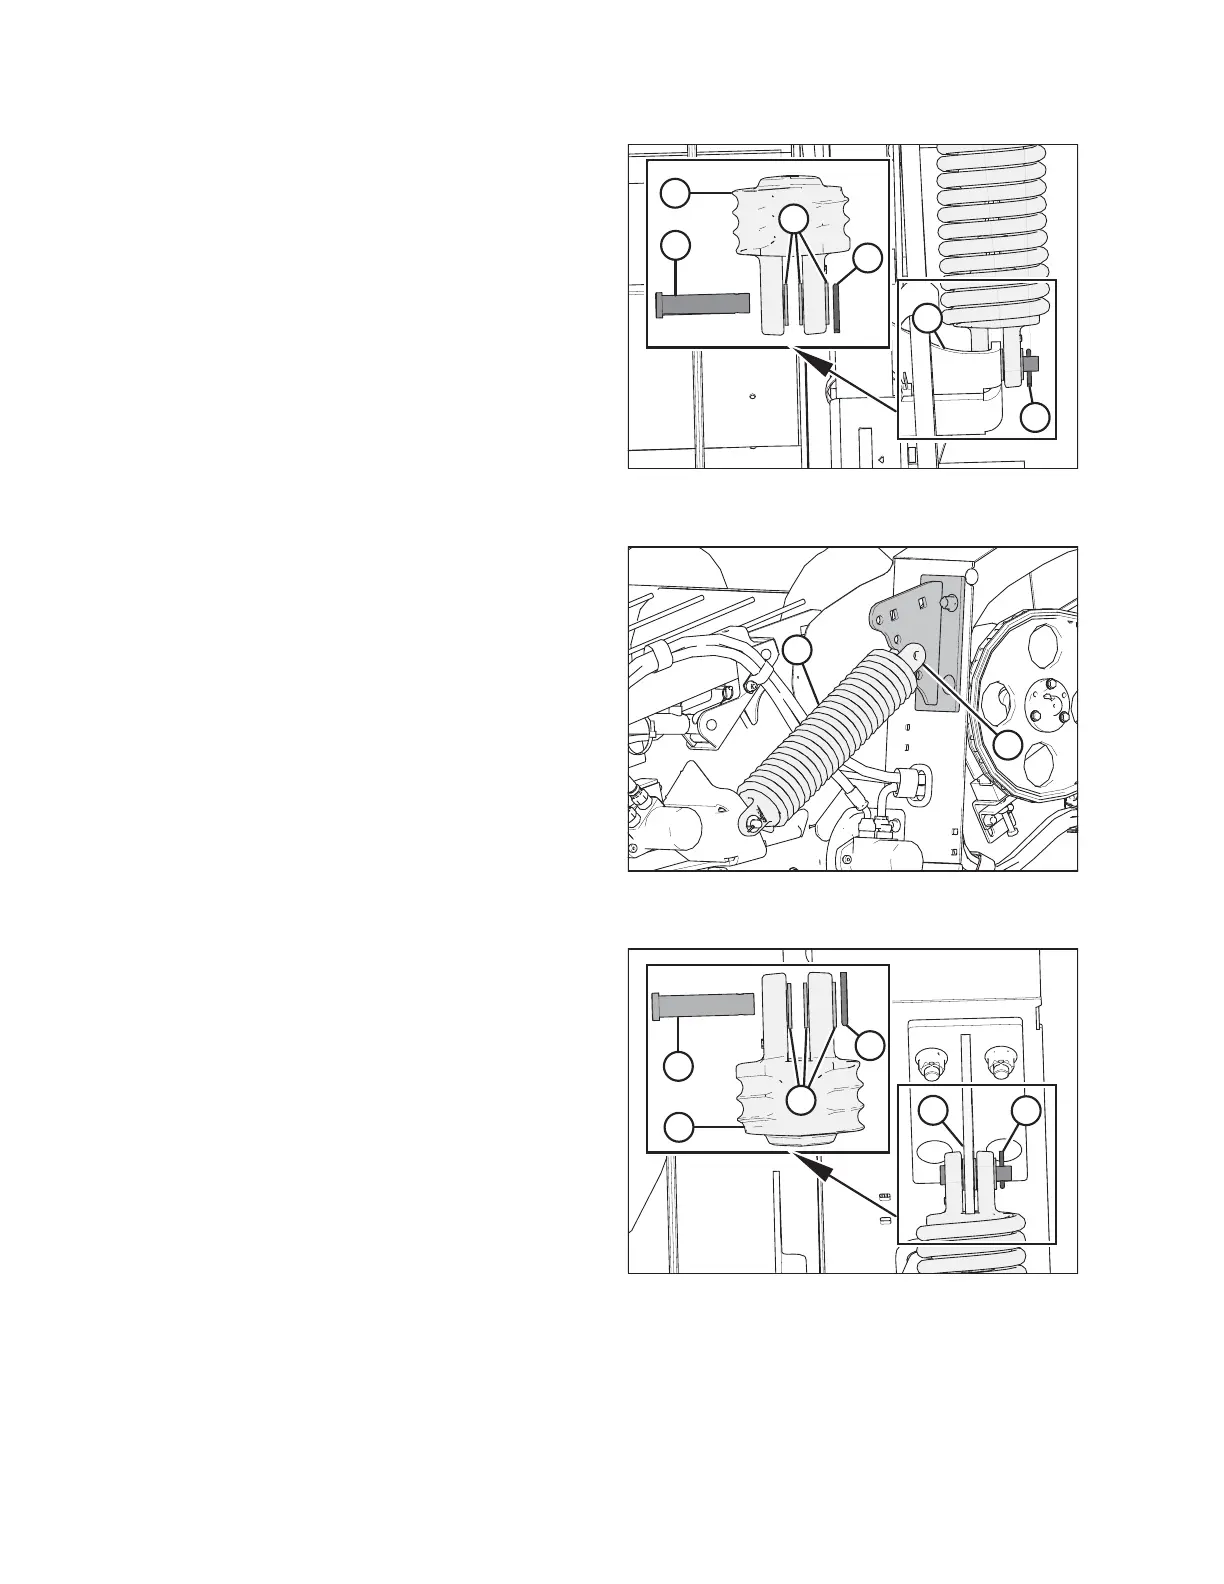
Figure 5.171: Left Spring Float Assembly Shown –
Right Side Opposite
2. Insert clevis pin (A) from the inboard side through spring
float assembly (B), along with three flat washers (C), and
front anchor (D) as shown. Secure the clevis pin with cotter
pin (E).
$
%
Figure 5.172: Left Anchor Shown – Right Side
Opposite
3. Align spring float assembly (A) with float anchor hole (B).
Refer to 3.12.4 Adjusting Header Float, page 93 for
instructions on how to change the header float setting.
IMPORTANT:
The left and right spring float assemblies must be set to the
same anchor hole position or draper deck damage could
result.
NOTE:
If the spring float assembly (A) hole does not align with
anchor hole (B), raise or lower header as necessary.
$
%
&
'
(
(
Figure 5.173: Left Spring Float Assembly
4. Insert clevis pin (A) from the inboard side through the rod
end of spring float assembly (B), along with three flat
washers (C), and anchor (D) as shown. Secure the clevis pin
with cotter pin (E).
5. Repeat Steps 1, page 293 to 4, page 294 to install the
remaining spring float assembly, ensuring that both spring
float assemblies are set to the same anchor hole position.
MAINTENANCE AND SERVICING