215575 258 Revision B
&
%
$
Figure 5.88: Stripper Plate Clearance
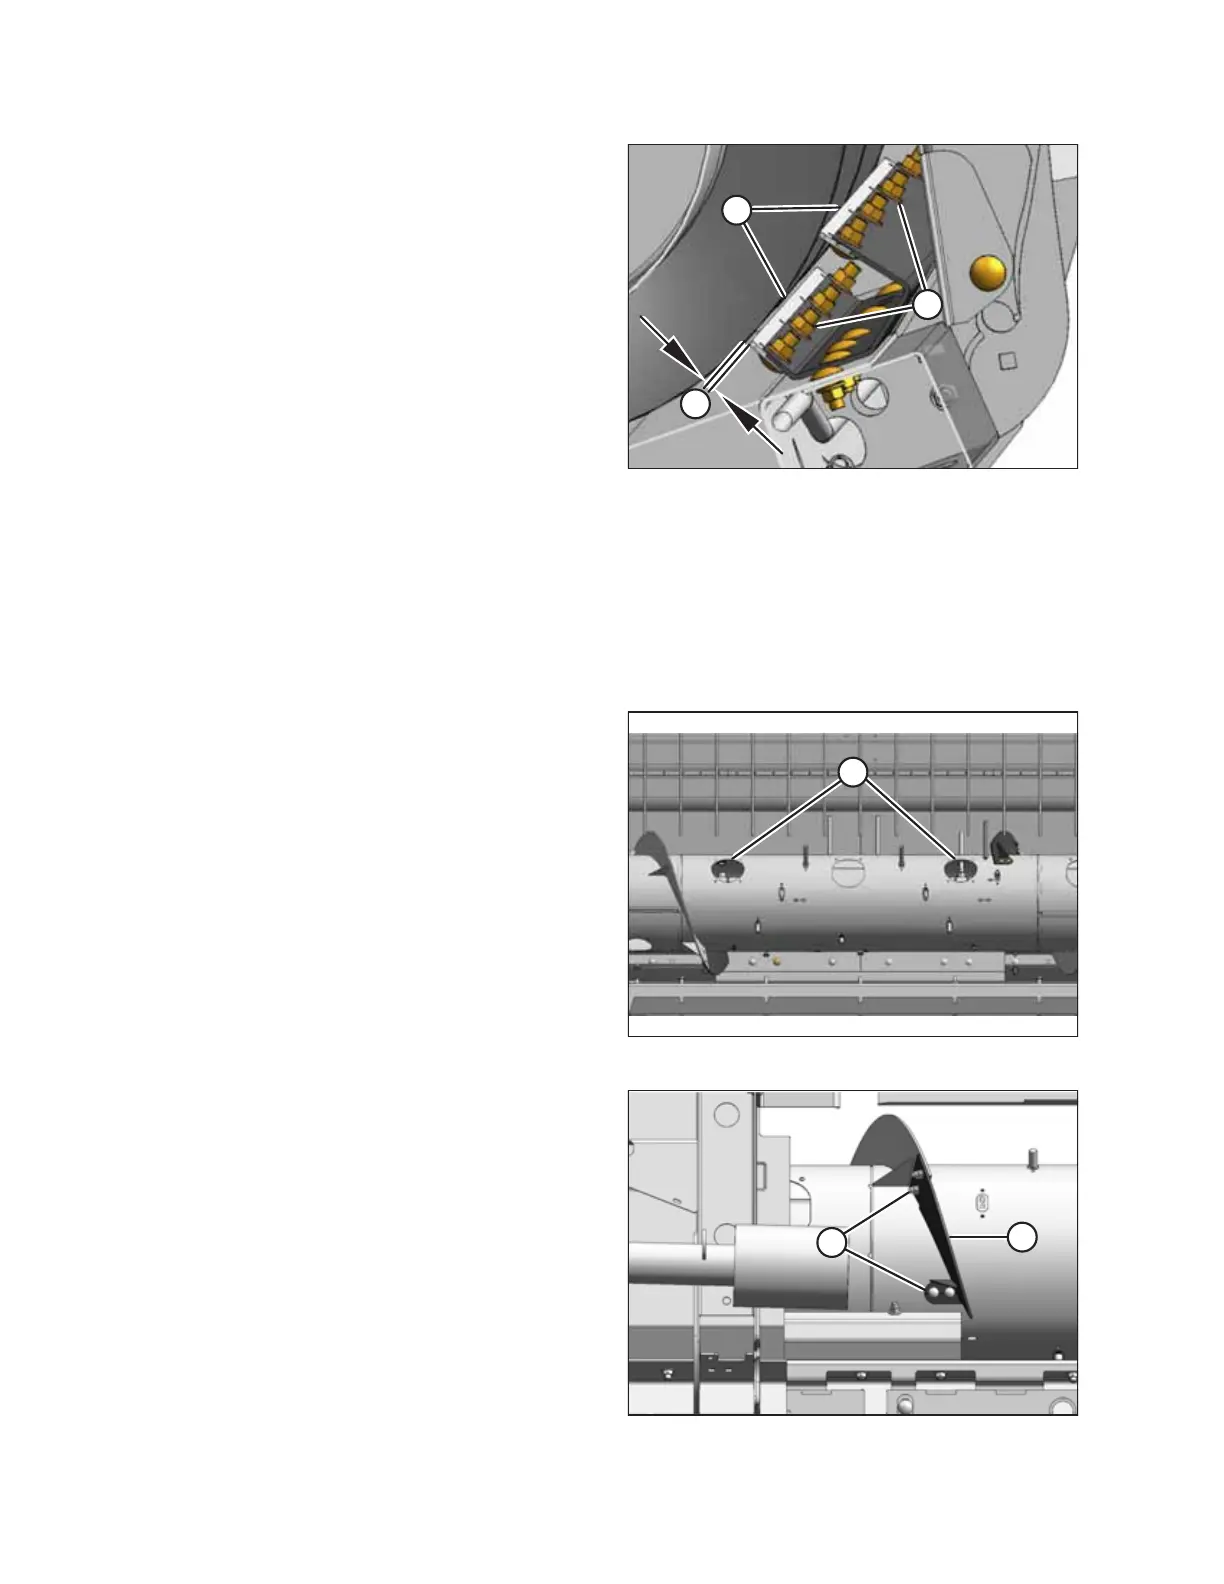
3. Remove four bolts and nuts (A) from stripper plate (B).
NOTE:
Access the auger/stripper plate area from the top of the
header.
4. Replace stripper plate (B) and secure it with four bolts and
nuts (A); do NOT fully tighten the hardware yet.
5. Adjust stripper plate (B) to achieve 3–8 mm (1/8–5/16 in.)
clearance (C) from the auger flighting.
6. Tighten nuts (A).
7. Check the clearance between the stripper plate and the
auger flighting. For instructions, refer to Checking Stripper
Plate Clearance, page 86.
5.6.5 Replacing Flighting Extensions
Be sure that the auger flighting extensions do not interfere with the rotation of the auger drum.
1. Remove the header from the combine. Refer to 3.10
Header Attachment and Detachment, page 38 for
instructions.
$
Figure 5.89: Auger Access Covers
2. Remove two access covers (A) from both sides of the center
of the auger.
$
%
Figure 5.90: Flighting Extension
3. Remove hardware (A) securing existing auger flighting
extensions (B) and remove the extensions. Retain the
hardware.
MAINTENANCE AND SERVICING