215575 282 Revision B
%
$
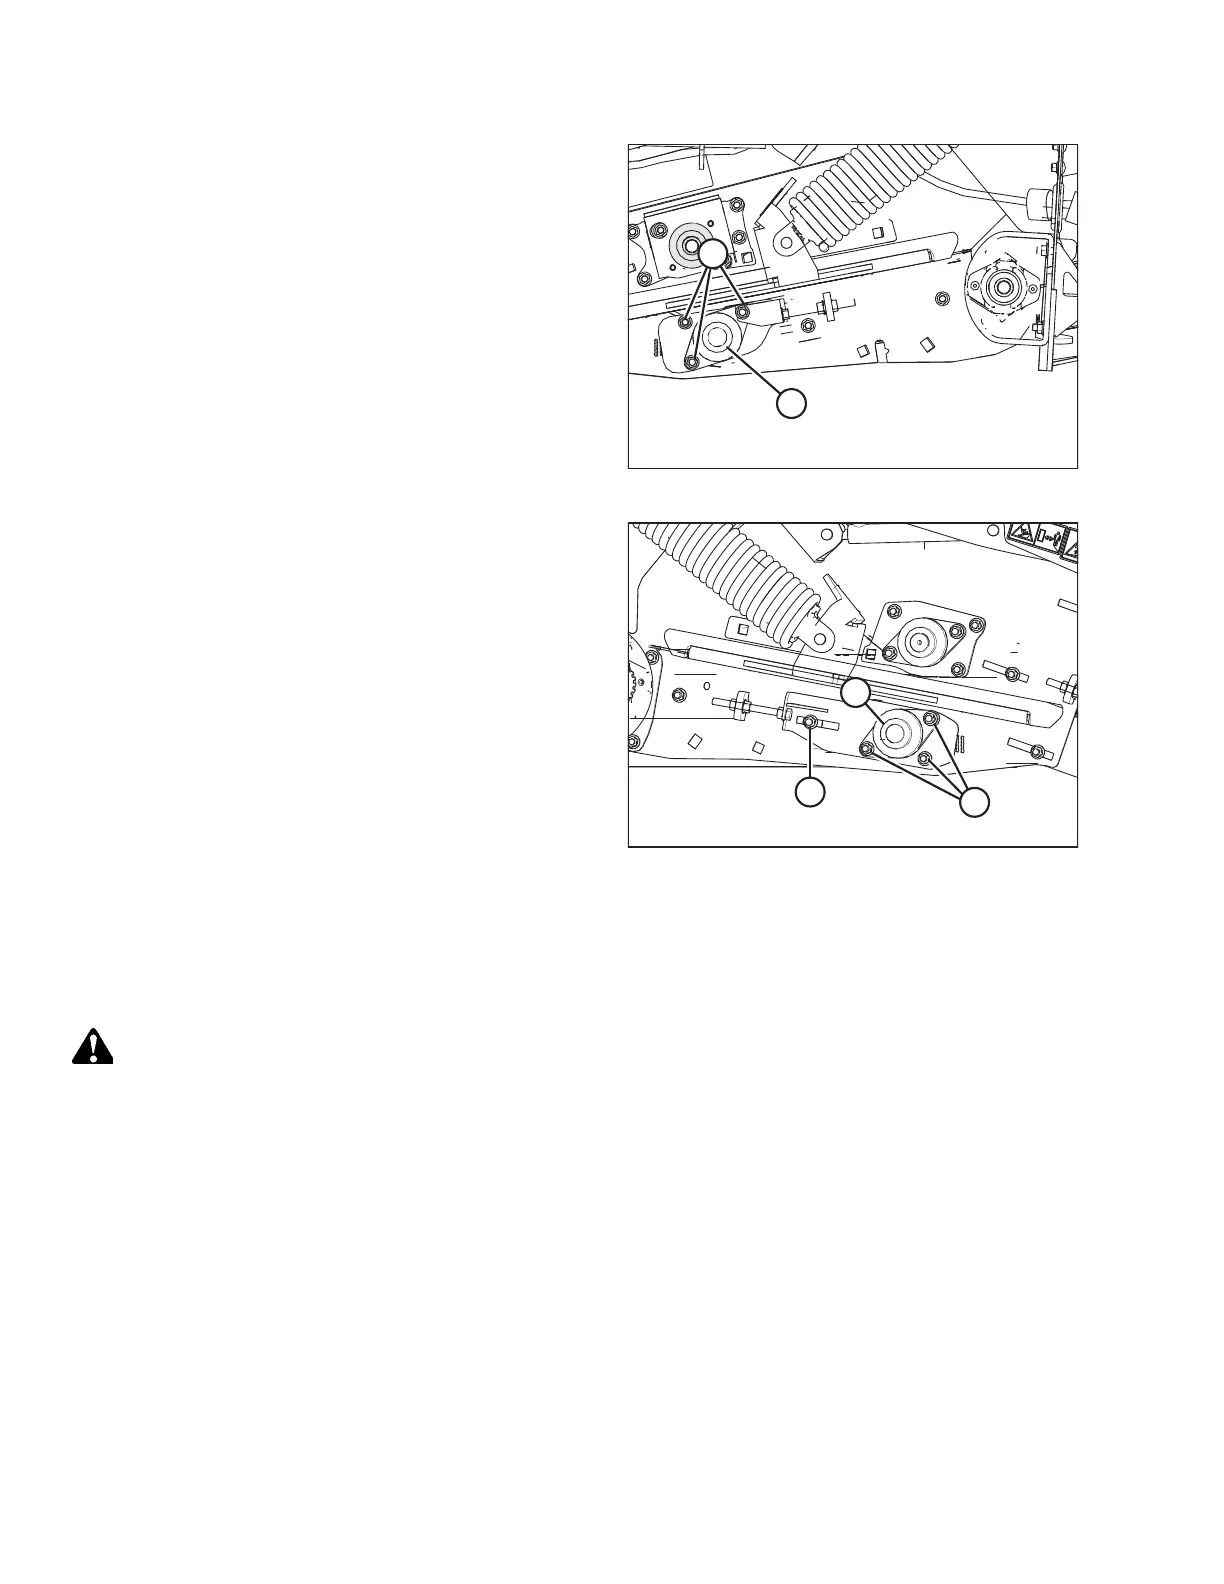
Figure 5.143: Left Rear Deck Idler Roller
11. Tighten locking collar (A) and three nuts (B) securing the
bearing flange to the frame on the left side of the header.
$
&
%
Figure 5.144: Right Rear Deck Idler Roller
12. Tighten locking collar (A) and three nuts (B) securing the
bearing flange to the frame on the right side of the header.
13. Tighten locking bolt (C).
14. Recheck the measurement made in Step 10, page 281 to
ensure that nothing has moved while tightening the nuts on
each side of the header.
15. Tension the draper belt.
16. Reinstall the front hydraulic motor. For instructions, refer
to Installing Front Hydraulic Motor, page 235 .
17. Close the left endshield. For instructions, refer to 3.3.2
Closing Left Endshield, page 26.
Replacing Drive Roller Bearing on Left Side of Front Deck
Replacing the left drive front deck roller bearing requires removing the front deck hydraulic motor and pulling off the
motor support bracket.
WARNING
To avoid bodily injury or death from unexpected startup of machine, always stop the engine and remove the key from
the ignition before leaving the operator’s seat for any reason.
1. Lower the hold-down fully.
2. Lower the header to the ground until the two float springs are loose.
3. Shut down the engine, and remove the key from the ignition.
4. Open the left endshield. Refer to 3.3.1 Opening Left Endshield, page 25 for instructions.
5. Fully release the tension on the draper belt.
MAINTENANCE AND SERVICING