215575 237 Revision B
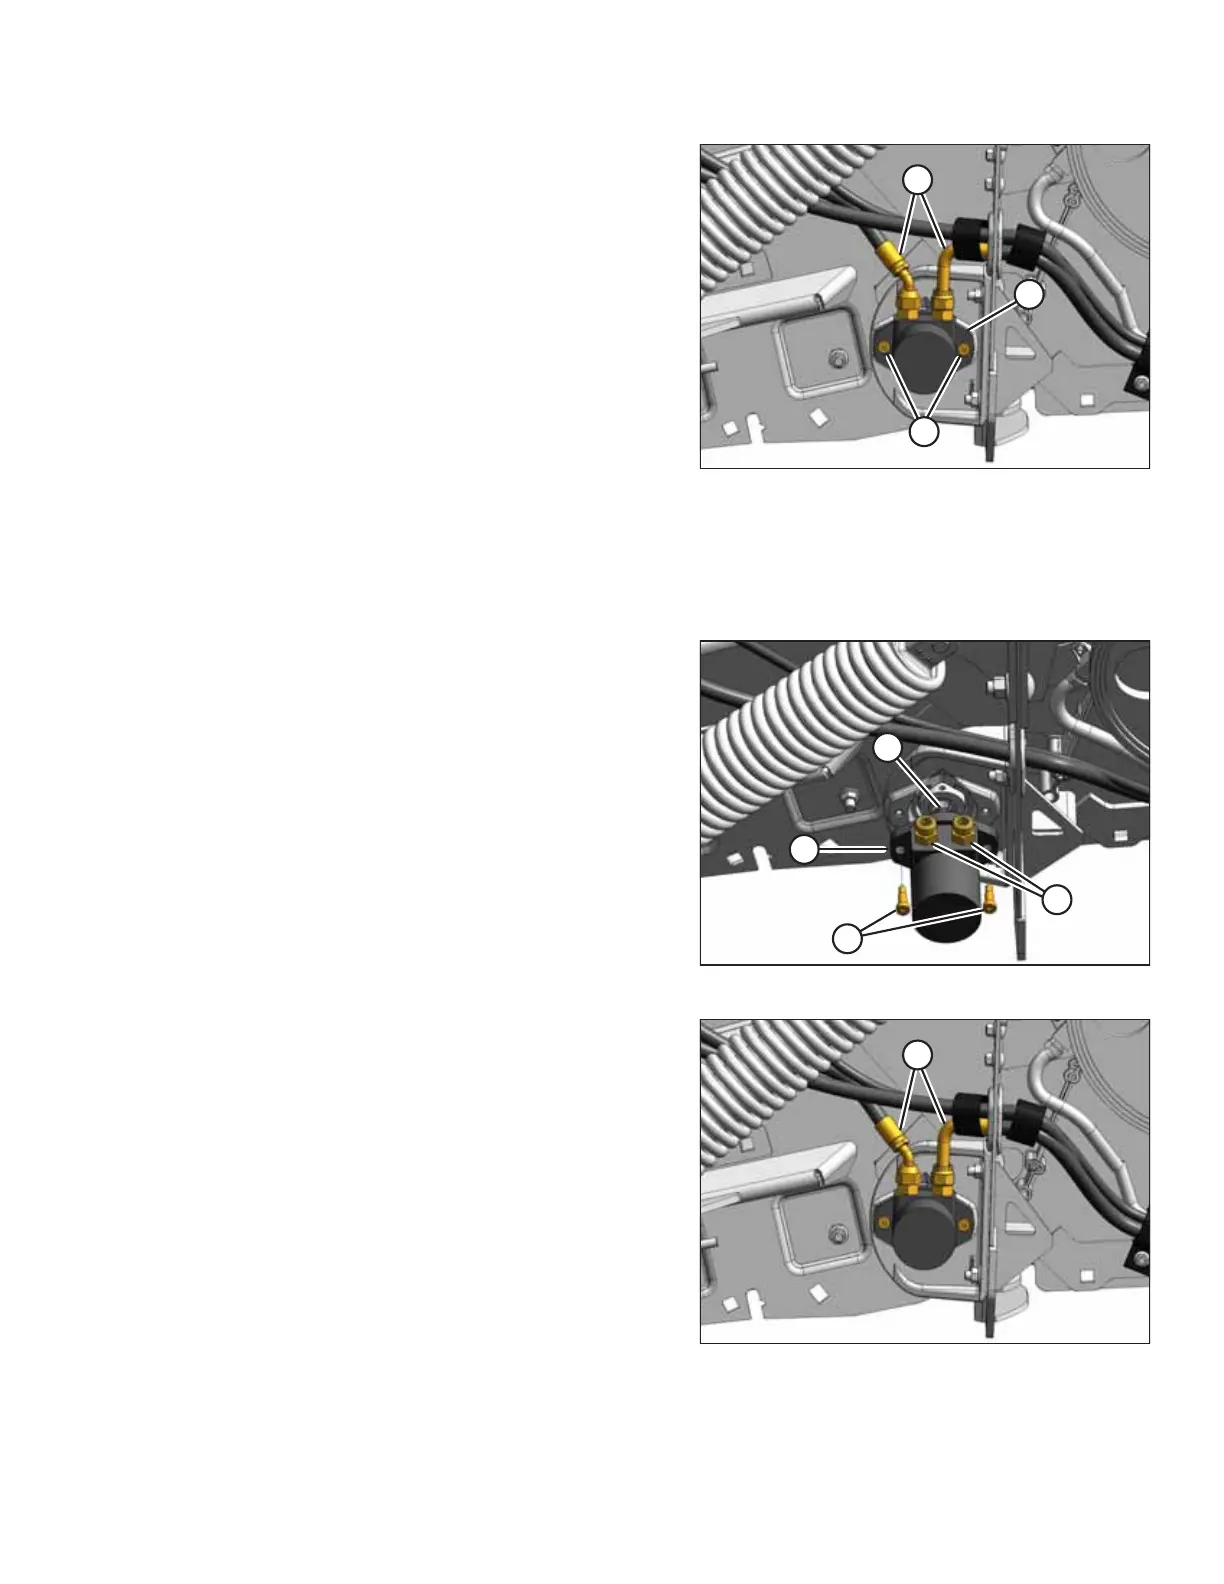
Figure 5.34: Rear Hydraulic Motor – Left Side
4. Disconnect hydraulic hoses (A) from the motor. Install plugs
onto the hose ends, or wrap the ends with plastic and
move the hoses away from the work area. Loosen or
remove the cinch straps on the hoses if necessary.
IMPORTANT:
Keep hydraulic coupler tips and connectors clean. Allowing
dirt, dust, water, or foreign material to enter the system is a
major cause of hydraulic system damage. Do NOT attempt
to service hydraulic systems in the field. Overhauls must be
performed in an environment completely free of dust and
dirt, or else damage to the hydraulic system may result.
5. Remove two 10 mm shoulder bolts (B).
6. Pull hydraulic motor (C) from the roller shaft.
Installing Rear Hydraulic Motor
The rear hydraulic motor is meant to move slightly during operation. Be sure not to overtighten the nuts securing the
motor to the header.
Figure 5.35: Rear Hydraulic Motor – Left Side
1. Apply grease to the splines of hydraulic motor shaft (A).
2. Install hydraulic motor (B) onto roller shaft, and secure it
with two 10 mm shoulder bolts (C).
3. Torque bolts to 50 Nm (37 lbf∙ft).
IMPORTANT:
The hydraulic motor must be able to move slightly during
operation. Tighten nuts (A) to the required torque only; do
NOT use any washers or shims between the nut and the
motor mount. It is normal for the motor and the hardware
to feel somewhat loose after torquing.
4. If you are installing a new motor, reuse hydraulic fittings (D)
from the original motor.
Figure 5.36: Rear Hydraulic Motor – Left Side
5. Reconnect hydraulic hoses (A) to the motor.
6. Install the previously removed cinch straps.
7. Close the endshield. For instructions, refer to 3.3.2 Closing
Left Endshield, page 26.
MAINTENANCE AND SERVICING