215575 245 Revision B
Auger Drive Sprockets
The ratio between the number of teeth in the auger drive sprocket and those in the driven sprocket determines the base
speed of the auger. The sprockets can be replaced to make the the pick-up header compatible with a different make and
model of combine.
Removing Driven Sprocket
Install bolts in the threaded holes in the sprocket’s bushing to push the sprocket off of the driveshaft.
WARNING
To avoid bodily injury or death from unexpected startup of machine, always stop the engine and remove the key from
the ignition before leaving the operator’s seat for any reason.
1. Lower the header to the ground.
2. Shut down the combine, and remove the key from the ignition.
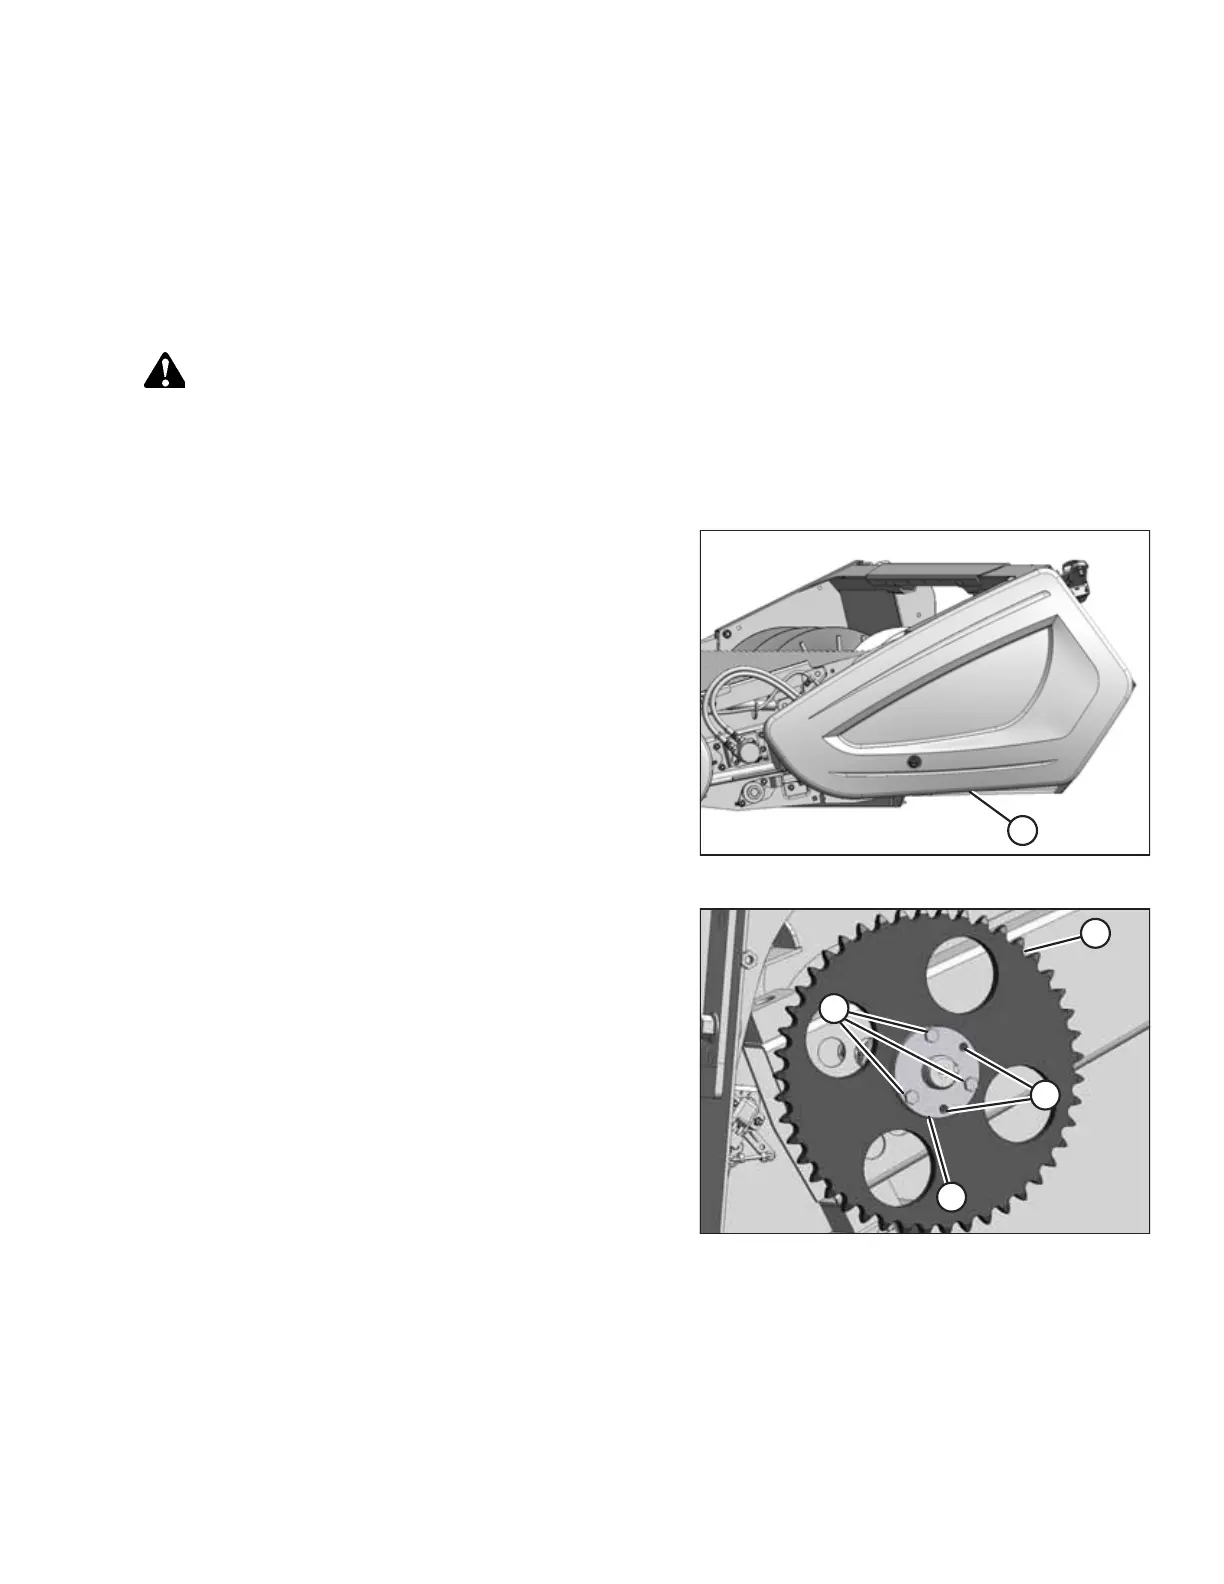
Figure 5.56: Left Endshield
3. Open left endshield (A). For instructions, refer to 3.3.1
Opening Left Endshield, page 25. If more access is required,
remove the endshield. For instructions, refer to 3.3.3
Removing Left Endshield, page 27.
4. Remove the drive chain. For instructions, refer to Removing
Auger Drive Chain, page 242.
Figure 5.57: Driven Sprocket
5. Remove three M10 hex bolts (A) from tapered bushing (D)
in sprocket (C).
6. Reinstall two M10 hex bolts (A) into threaded holes (B) in
tapered bushing (D).
7. Alternately tighten each of the bolts one half-turn at a time.
Do this until tapered bushing (D) is loosened.
8. Remove tapered bushing (D) and sprocket (C) from
the shaft.
9. Retain the keys from the driveshaft and the tapered
bushing.
10. Clean and inspect the components. Replace any worn or
damaged parts.
MAINTENANCE AND SERVICING