15-2
15-1-1. Add a welder
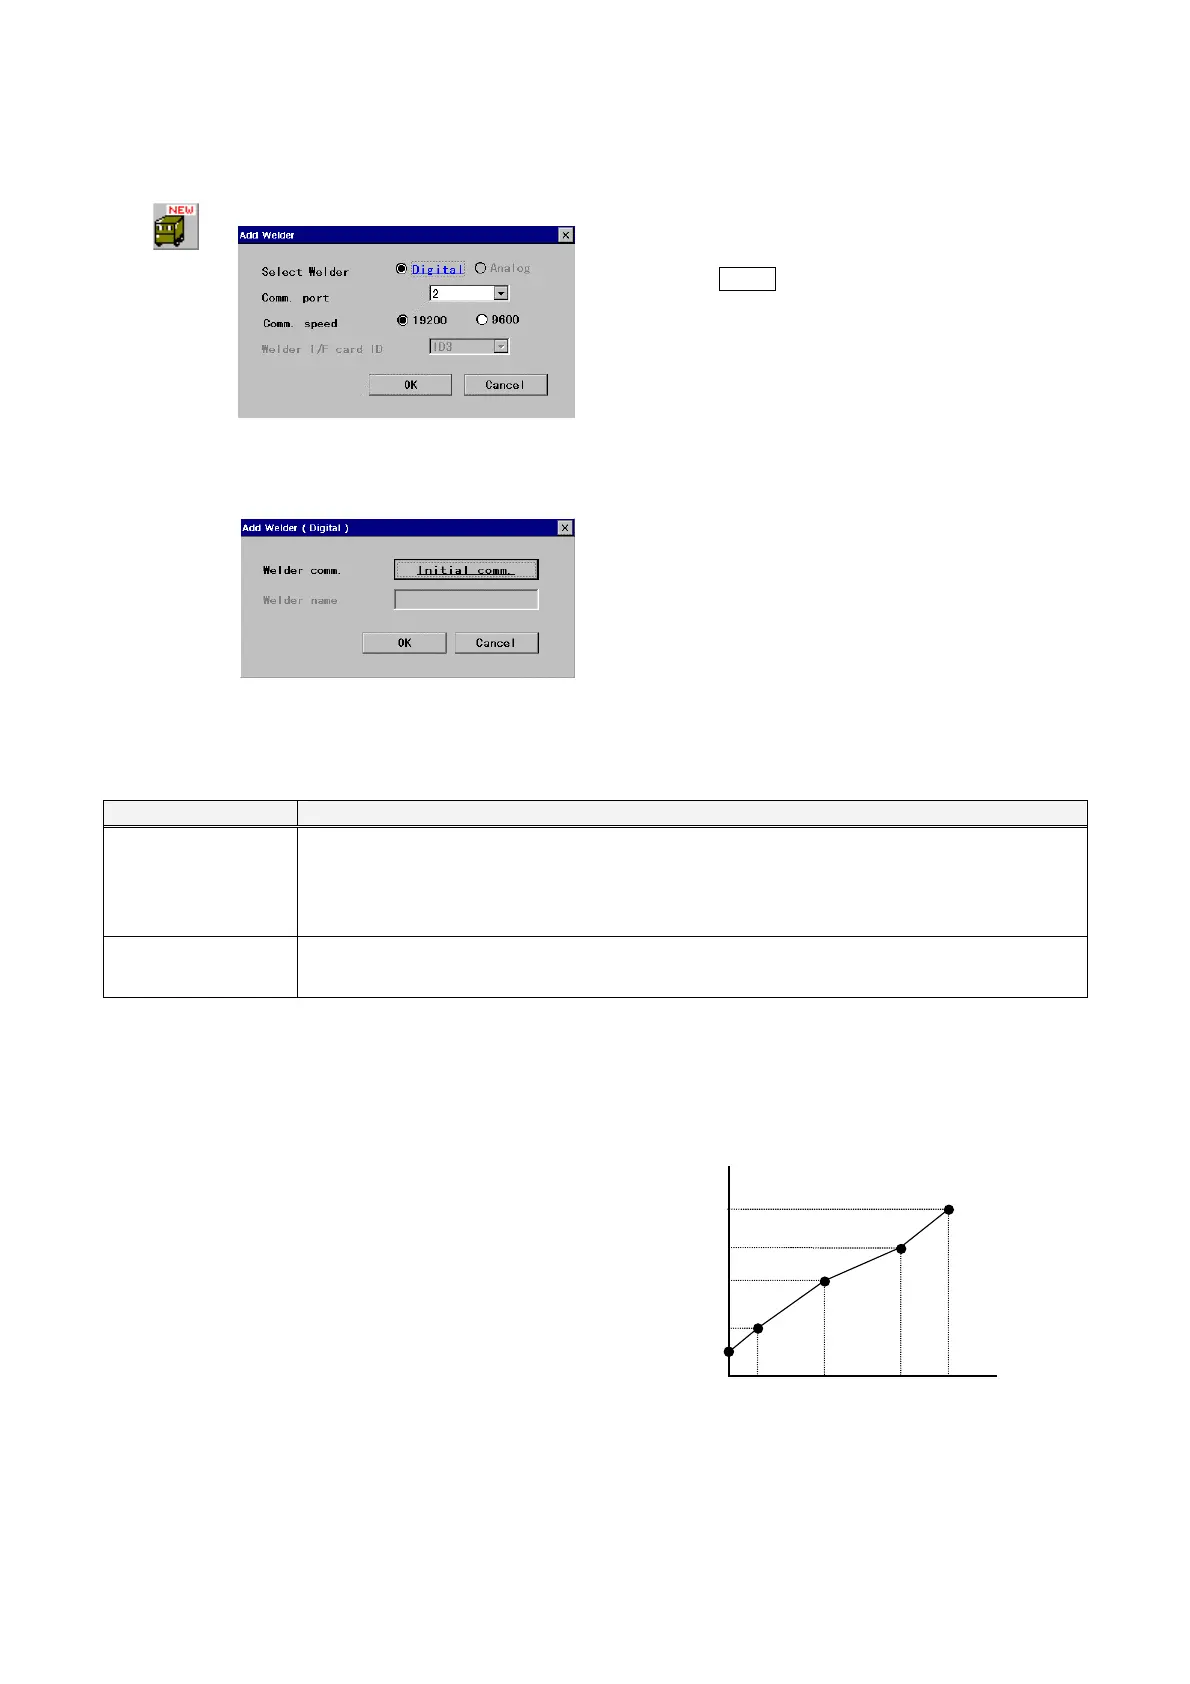
(1) Digital type welders
Î
[Select Welder]
Specify communication type of the
welder.
· Select Digital.
[Comm. port] Specify the port number the welder is
connected to.
[Comm. speed] Specify communication speed between
the controller and welding machine.
· Select 19200 if you use Panasonic welding
machine YD-350GB1/YD-350GB2.
· Select 9600 for other welding machines.
Click the
Initial comm. button.
(2) Analog type welders (User welding machine)
It is possible to add MIG/TIG welders not in the list as analog type welders whose characteristics are editable by users.
Applicable welders Conditions
CO2/MIG welders Power adjustment is Current/Voltage separate setting type.
Power adjustment is ranging between 0 to 15 VDC.
Current command and voltage commands for power adjustment share the same grand level.
Maximum output is 999 A or less and 99.9 V or less.
TIG welders Current and pulse frequency are adjustable within 24 VDC.
Maximum current is 999 A or less and maximum pulse frequency is 25 Hz or less.
◎ How to create data for welder characteristics.
You can set a command voltage to the welder and an output current (or voltage) that responds to the command
voltage to create your own welder characteristics freely.
Perform welding operation and then record the outputs
(welding current and welding voltage) and command
voltages as data for welder characteristics. The data
are then used to adjust and create a characteristic
curve (sequential line) that matches the output and
command value.
15V
0
V
Command voltage
Measurement
Measured output
or V