4-15
4-10-6. Circular weaving interpolation
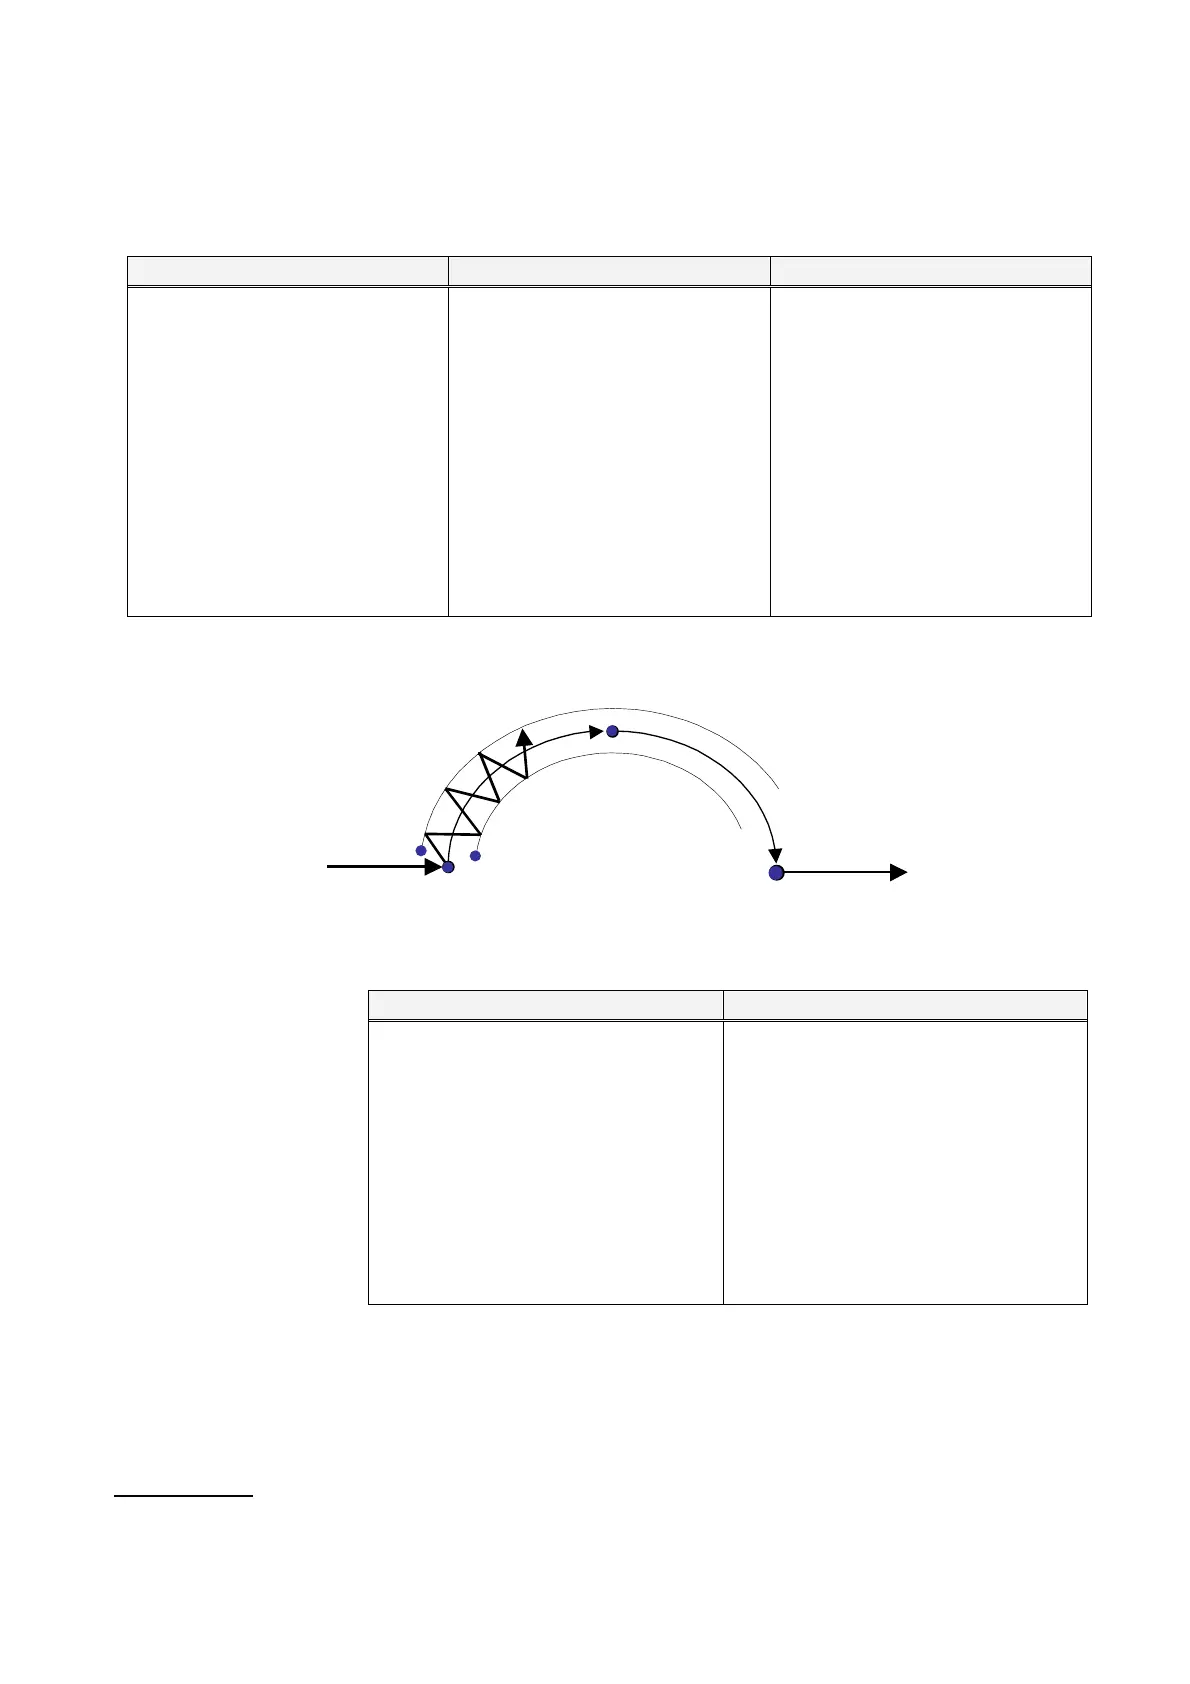
Teach three points to determine a circular line and two amplitude points (WEAVEP) to create circular weaving movement
of the robot.
Circular weaving start point Weaving amplitude 1 Weaving amplitude 2
1. Set the interpolation type to
“Circle-Weaving”.
2. Set the edit type to “Add”.
3. At the point you want to start
circular weaving, press the Enter
key. Then the dialog box to set
the teaching point appears.
4. Set parameters in the box, and
then click the OK button to save
the point as a circular start point.
1. Next, move the robot to one of
points to determine the weaving
amplitude (Amplitude point 1).
2. Press the Enter key, and then
the dialog box to set the teaching
point appears.
3. Switch the interpolation type to
“WEAVEP” and set other
parameters in the box.
4. Press the click the OK button to
save the point as Amplitude point
1.
1. Then, move the robot to the other
points to determine the weaving
amplitude (Amplitude point 2).
2. In the same manner of Amplitude
point 1, save this point as
Amplitude point 2.
Circular weaving intermediate point
MOVECW
(intermediate)
Amplitude point 1
WEAVEP Amplitude point 2
WEAVEP
Linear
Circular weaving start point Circular weaving end point
Interpolation
MOVECW
(start)
MOVECW
Circular weaving intermediate point Circular weaving end point
1. Move the robot to a point on and
within the circular weaving path
you want.
2. Press the Enter key.
The dialog box to set teaching
point appears.
3. Set parameters in the box and then
click the OK button to save the
point as a circular intermediate
point.
1. Move the robot to the point you want
to end circular weaving, and then
press the Enter key. The dialog
box to set teaching point appears.
2. Set parameters in the box and then
click the OK button to save the
point.
• Incomplete teaching of circular weaving interpolation
Five (or seven for pattern 4 and 5) teaching points to determine circular weaving movement must be taught and saved
to complete a circular weaving interpolation. If any one of those points is not saved, although those teaching points
are saved as weaving points, in trace operation and operation, the robot travels over those points with linear
interpolation.
Weaving pattern
Six patterns are available. (See weaving patterns of linear weaving interpolation.)