4.Replacement and Adjustment
126
Fusing
Start work only when the fusing unit has dropped to a low temperature. Otherwise you may suffer burns from
contact with hot parts of the fusing unit,
Turn OFF the main power switch and disconnect the power cord before you start any of the procedures in this
section. (General Cautions)
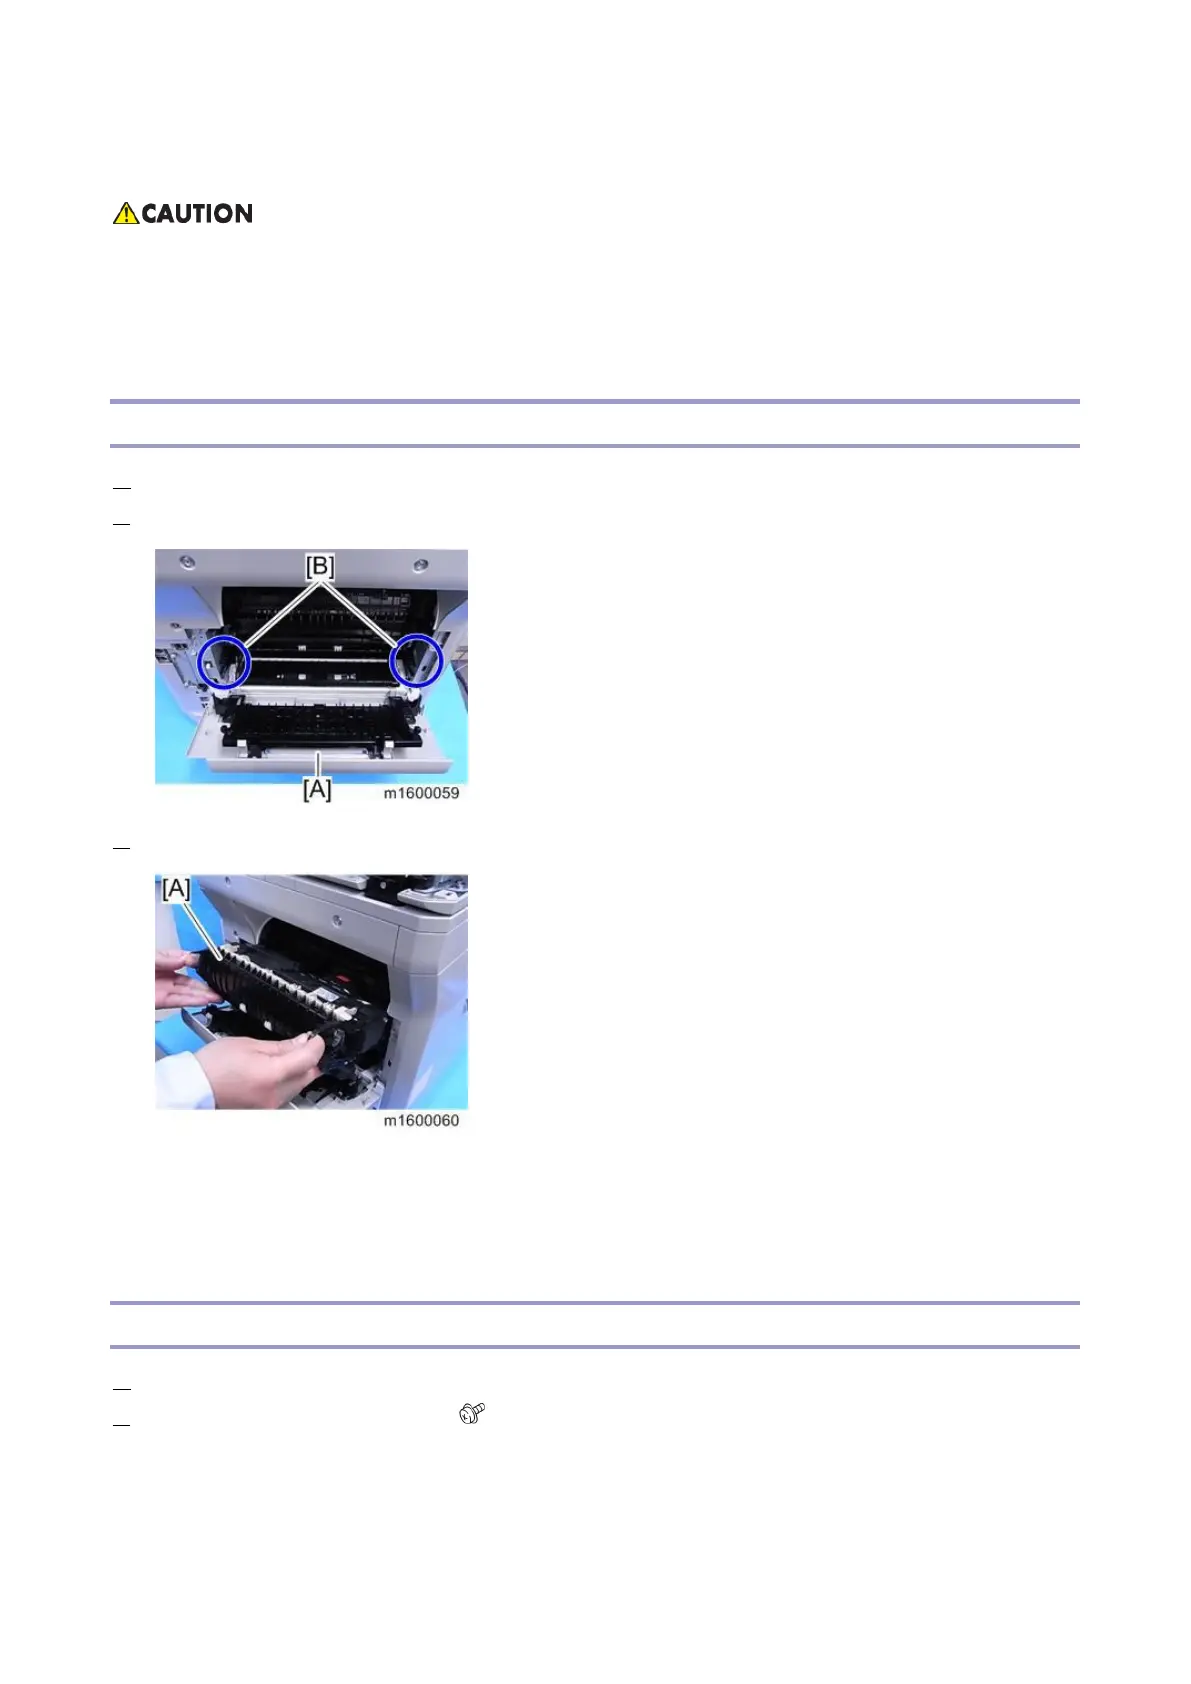
Fusing Unit
1. Open the rear cover [A].
2. Release the lock levers [B].
3. Remove the fusing unit [A]
Adjustment after Replacement
For PM: Install a fusing unit without new product detection capability and reset PM Counter Fuser setting (engine SP 7-
804-003) after replacement.
Upper Fusing Unit, Lower Fusing Unit
1. Remove the fusing unit. (Fusing Unit)
2. Remove the screws of the fusing unit. ( x5)