4.Replacement and Adjustment
128
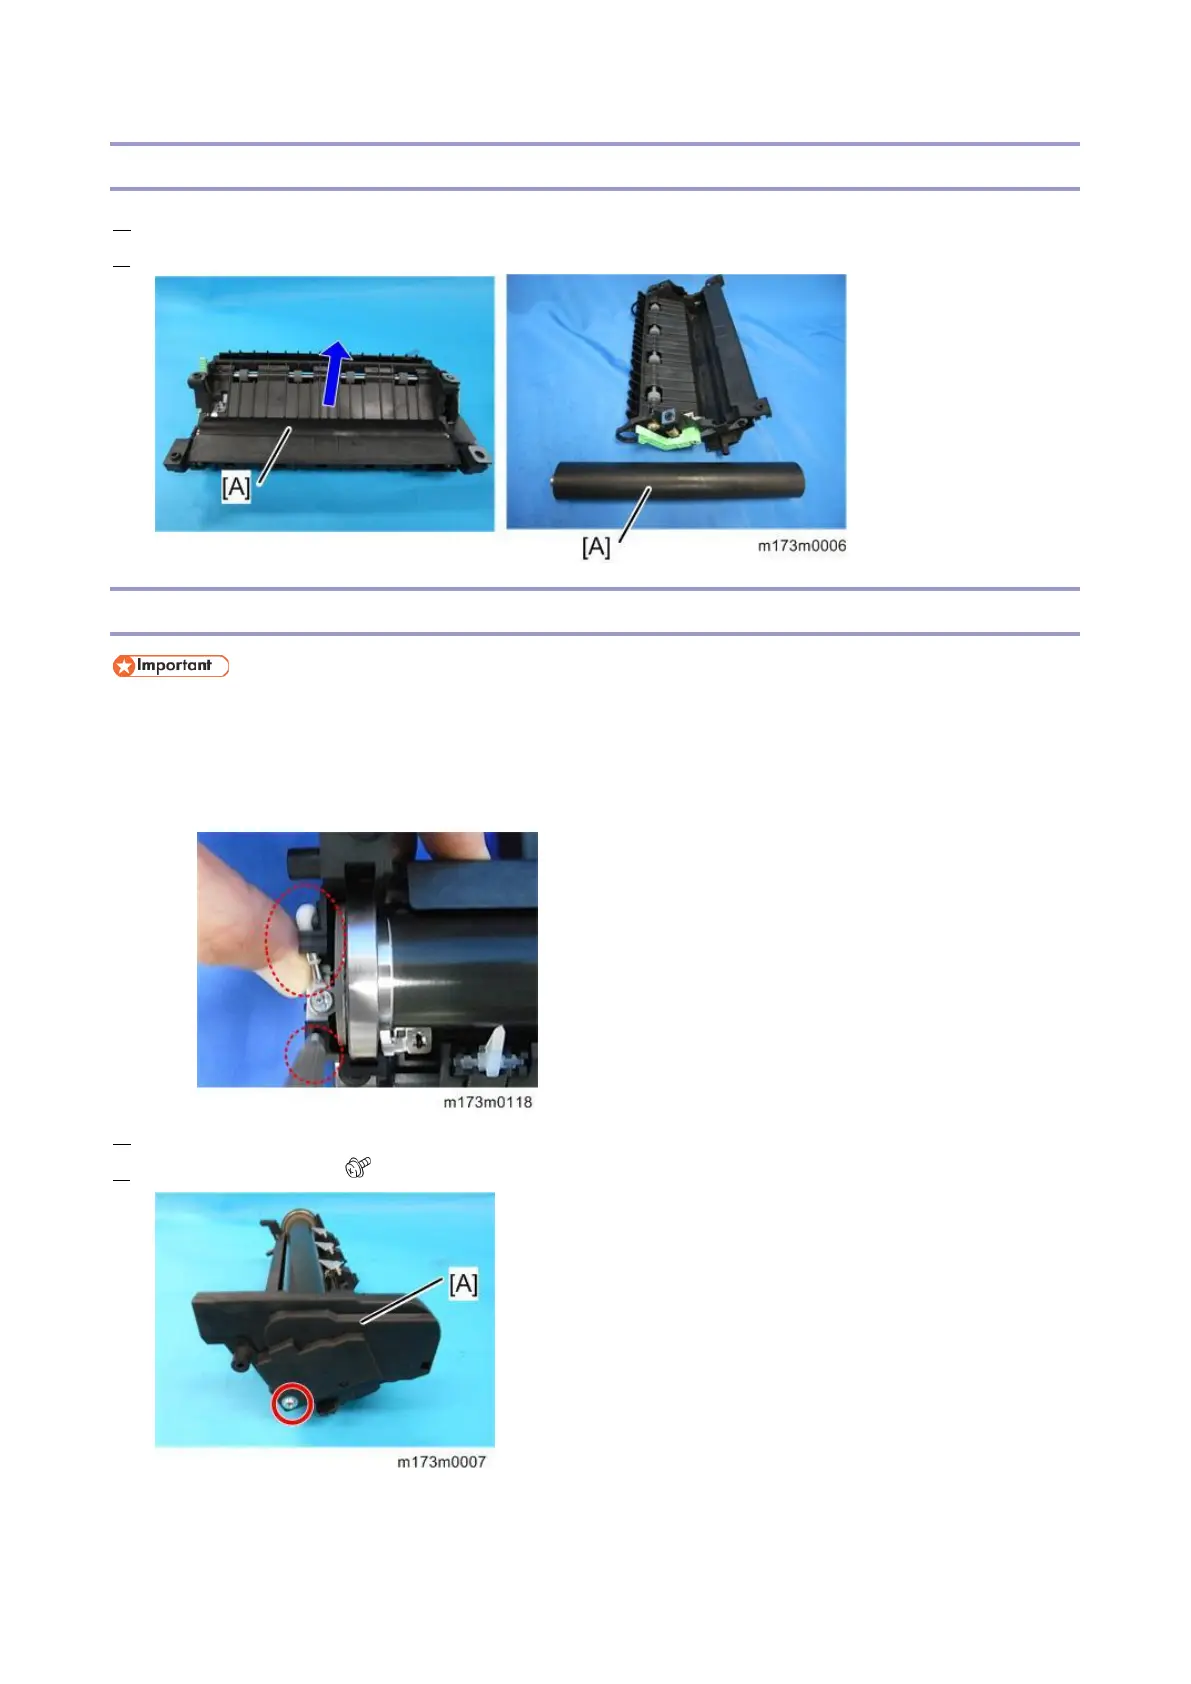
Fusing Pressure Roller
1. Separate the fusing unit into the upper and lower fusing units. (Upper Fusing Unit, Lower Fusing Unit)
2. Remove the fusing pressure roller [A]
Fusing Lamp, Hot Roller
Be careful not to break the fusing lamp when removing/attaching screws.
Insert a pin or jeweller’s screwdriver into the service hole (see the lower red circle in the photo below), and
hold the flat nut with your finger (see the upper red circle in the photo). Otherwise, the lamp secured to the
flat nut will move together with the rotation of the screw, and the lamp will break.
1. Separate the fusing unit into the upper and lower fusing units. (Upper Fusing Unit, Lower Fusing Unit)
2. Remove the cover [A]. ( x1)