Installation & Configuration Manual
2. Secure each battery using the battery straps provided, ensuring the strap is
threaded through the battery strap holes at the back of the battery and around
the battery.
3. Secure the two ends of the battery strap at the front of the battery, ensuring the
battery strap is firmly tightened.
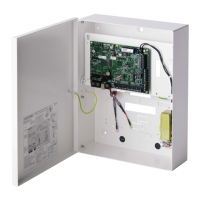
4. Connect the leads from the SPCP355.300 Smart PSU to the batteries in the
following order:
- Connect the positive (red) wire first.
- Connect the negative (black) wire second.
When removing the battery leads, always disconnect the negative (black) lead
before disconnecting the positive (red) lead.
7.1.2.2 Testing Battery Voltage
The SPCP355.300 Smart PSU performs a load test on each battery by placing a
load resistor across the battery terminals and measuring the resultant voltage. This
battery test is performed every five seconds.
7.1.2.3 Deep Discharge Protection
If mains power to the SPCP355.300 Smart PSU fails for a prolonged period, each
battery supplies power to the PSU 12V DC power outputs for a finite time. The
batteries eventually discharge. To prevent a battery discharging beyond recovery,
the SPCP355.300 Smart PSU disconnects the battery if the measured voltage
drops below 10.5V DC. The battery can then be recharged after the mains power is
restored.
7.1.2.4 Battery Stand-By Times
See Calculating the battery power requirements [➙ 334] for the battery stand-by
information.
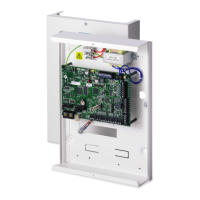
7.1.3 Wiring the X-BUS Interface
The X-BUS interface connects expanders and keypads to the SPC controller. The
X-BUS can be wired in a number of different configurations, depending on the
installation requirements.
The following table lists the cable types and distances recommended:
Maximum cable length = (number of expanders and keypads in the system) x
(maximum cable distance for each cable type)
 Loading...