Engineer programming via the browser
Installation & Configuration Manual
The physical input is displayed for reference and is not programmable.
Select a type of zone from the drop down menu (see page [➙ 347]).
Only if (multiple) Areas is activated. Select an area to which the zone is assigned
from the drop down menu.
Select if necessary the desired calendar (see page [➙ 251]).
For Security Grade 2 / 3 a calendar can be assigned only to zones of type Exit
Terminator, Technical, Key Arm, Shunt and X-Shunt. For Security Grade
Unrestricted a zone of any type can be associated with a calendar.
Tick the relevant checkbox for the zone. Only attributes that apply that type of
zone will be presented (see Zone Attributes [➙ 350])
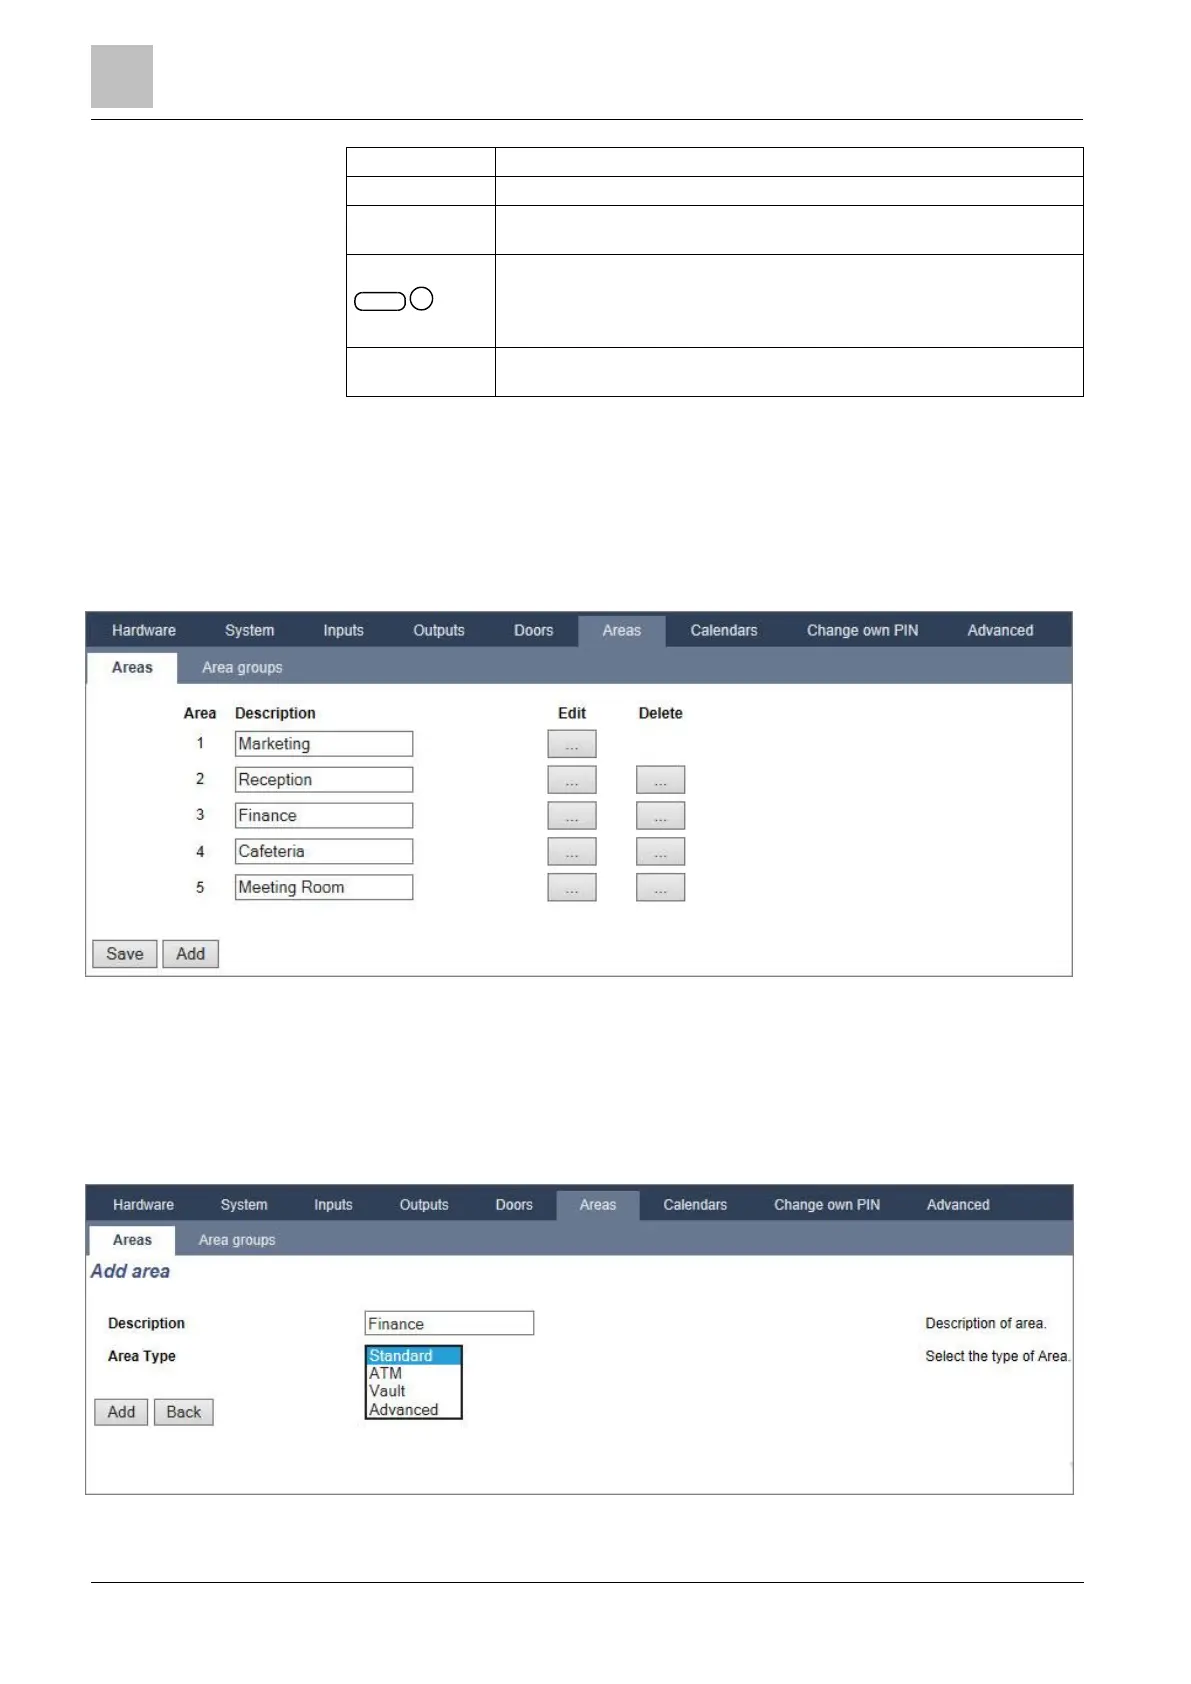
17.9.5.2 Adding / Editing an area
Only if (multiple) Areas is activated.
1. Select Configuration > Areas > Areas.
The following window will be displayed:
2. Press Edit to edit an existing area.
3. Press Add to add a new area. If the Installation Type is
Domestic
or
Commercial
, an area is automatically added and the Edit Area Settings window
is displayed.
Note that the area type for the new area is automatically set to Standard.
If the Installation Type is
Financial
, the following window is displayed and the
area must be added manually.
 Loading...