HYDRAULIC SYSTEM
M6040, M7040, WSM
8-S26
[4] CONTROL VALVE
Removing Control Valve
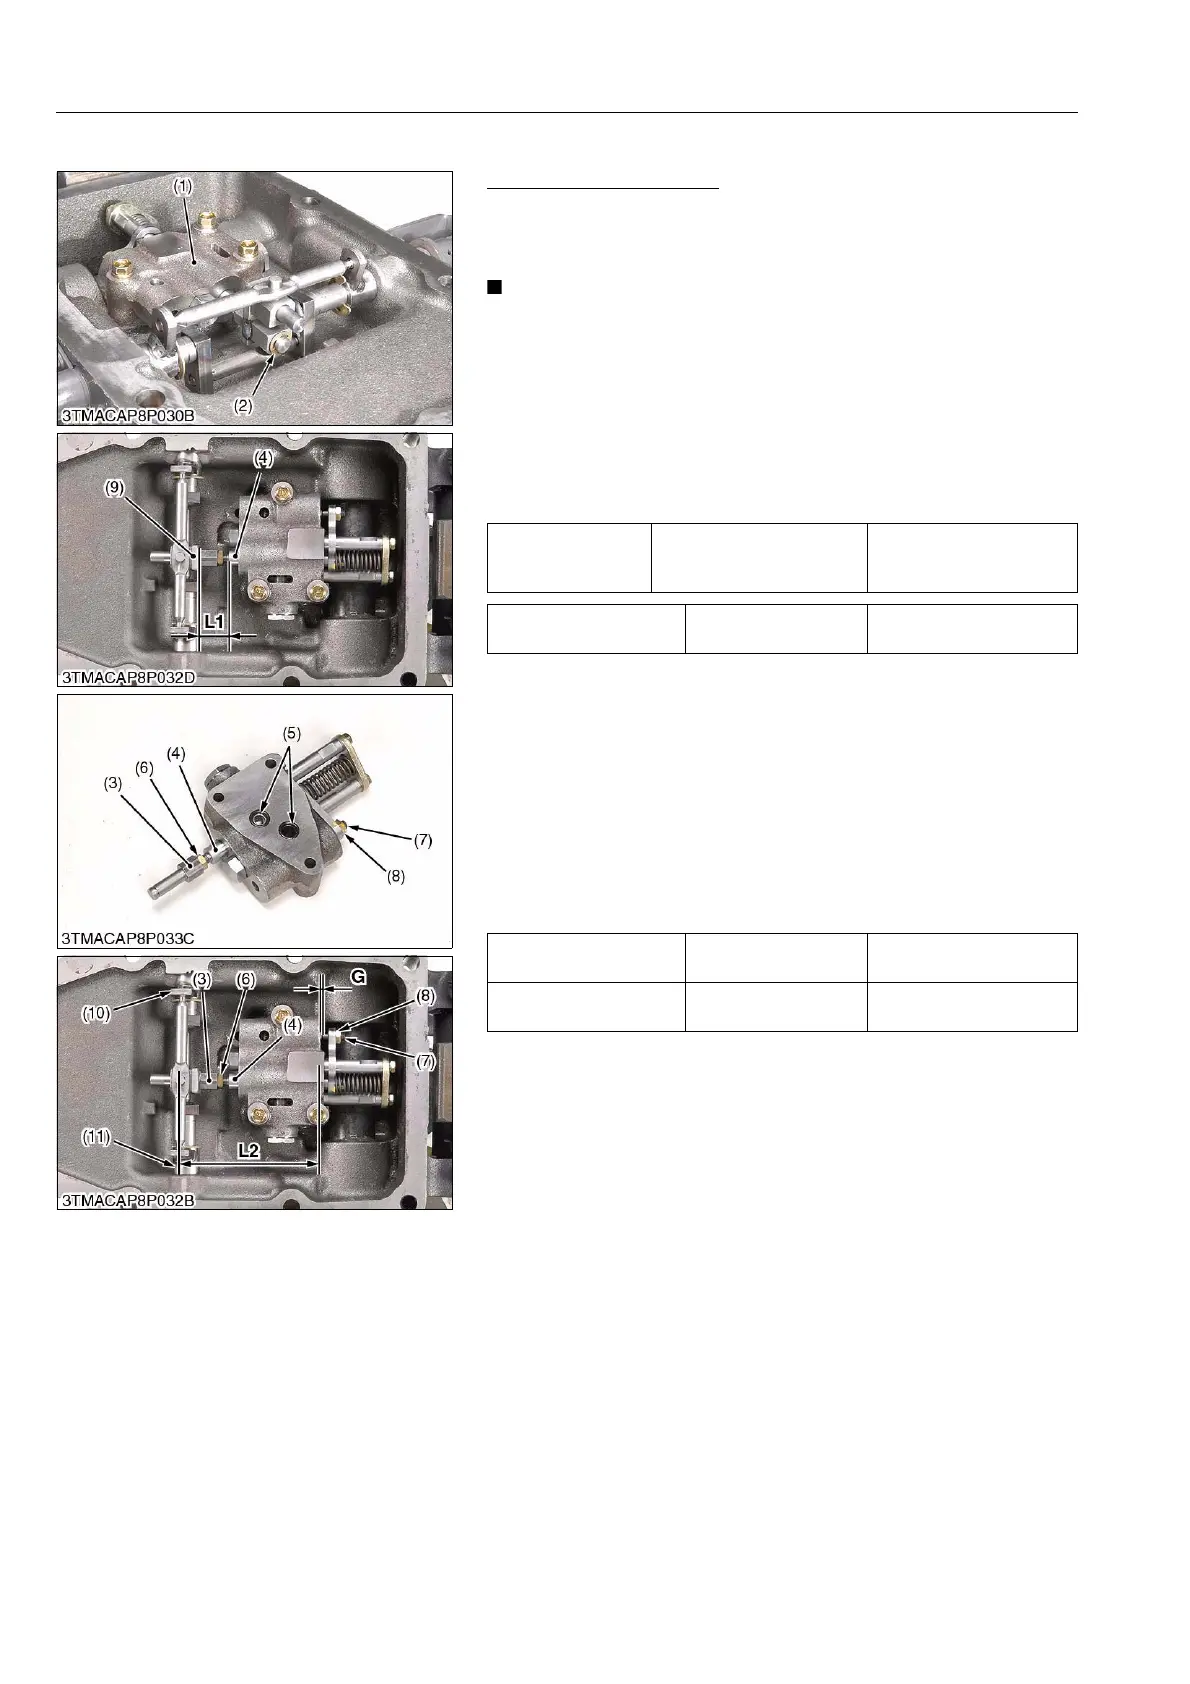
1. Remove the E-shaped stopper (2).
2. Remove the control valve mounting screws.
3. Remove the control valve (1).
• Do not disassemble the spool joint 1 (3) from the spool (4)
unless necessary.
If disassembled due to unavoidable reasons, record the
installation length "L1" between the spool joint 3 (9) and
spool (4).
WHen reassembling, be sure to make a former length.
• Do not loosen the adjusting screw (7) unless necessary.
(When reassembling)
• Be sure to fit the O-rings (5).
Adjusting Spool Joint
1. Set the length "L1" to the reference value or recorded value.
2. Set the length "L2" to the factory specification (neutral state),
with operate the draft feedback lever (10) and position link lever
(11).
3. Check the gap "G" between the lowering poppet and adjusting
screw (7).
4. If the gap "G" is not within the reference value, recheck length
"L2" at the neutral state of spool.
If necessary to adjust the gap "G", loosen the lock nut (8) and
adjust by the adjusting screw.
9Y1210143HYS0030US0
Tightening torque
Control valve mounting
screw
19.6 to 23.5 N·m
2.0 to 2.4 kgf·m
14.5 to 17.4 lbf·ft
Length "L1" Reference value
24.5 to 25.0 mm
0.9646 to 0.9842 in.
Length "L2" Factory specification
113.8 to 114.2 mm
4.481 to 4.496 in.
Gap "G" Reference value
0.2 to 0.3 mm
0.008 to 0.011 in.
(1) Control Valve
(2) E-shaped Stopper
(3) Spool Joint 1
(4) Spool
(5) O-ring
(6) Lock Nut
(7) Adjusting Screw
(8) Lock Nut
(9) Spool Joint 3
(10) Draft Feedback Lever
(11) Position Link Lever



 To Next Page