7-77
Crankcase
0
1
2
3
4
5
6
7
8
9
10
A
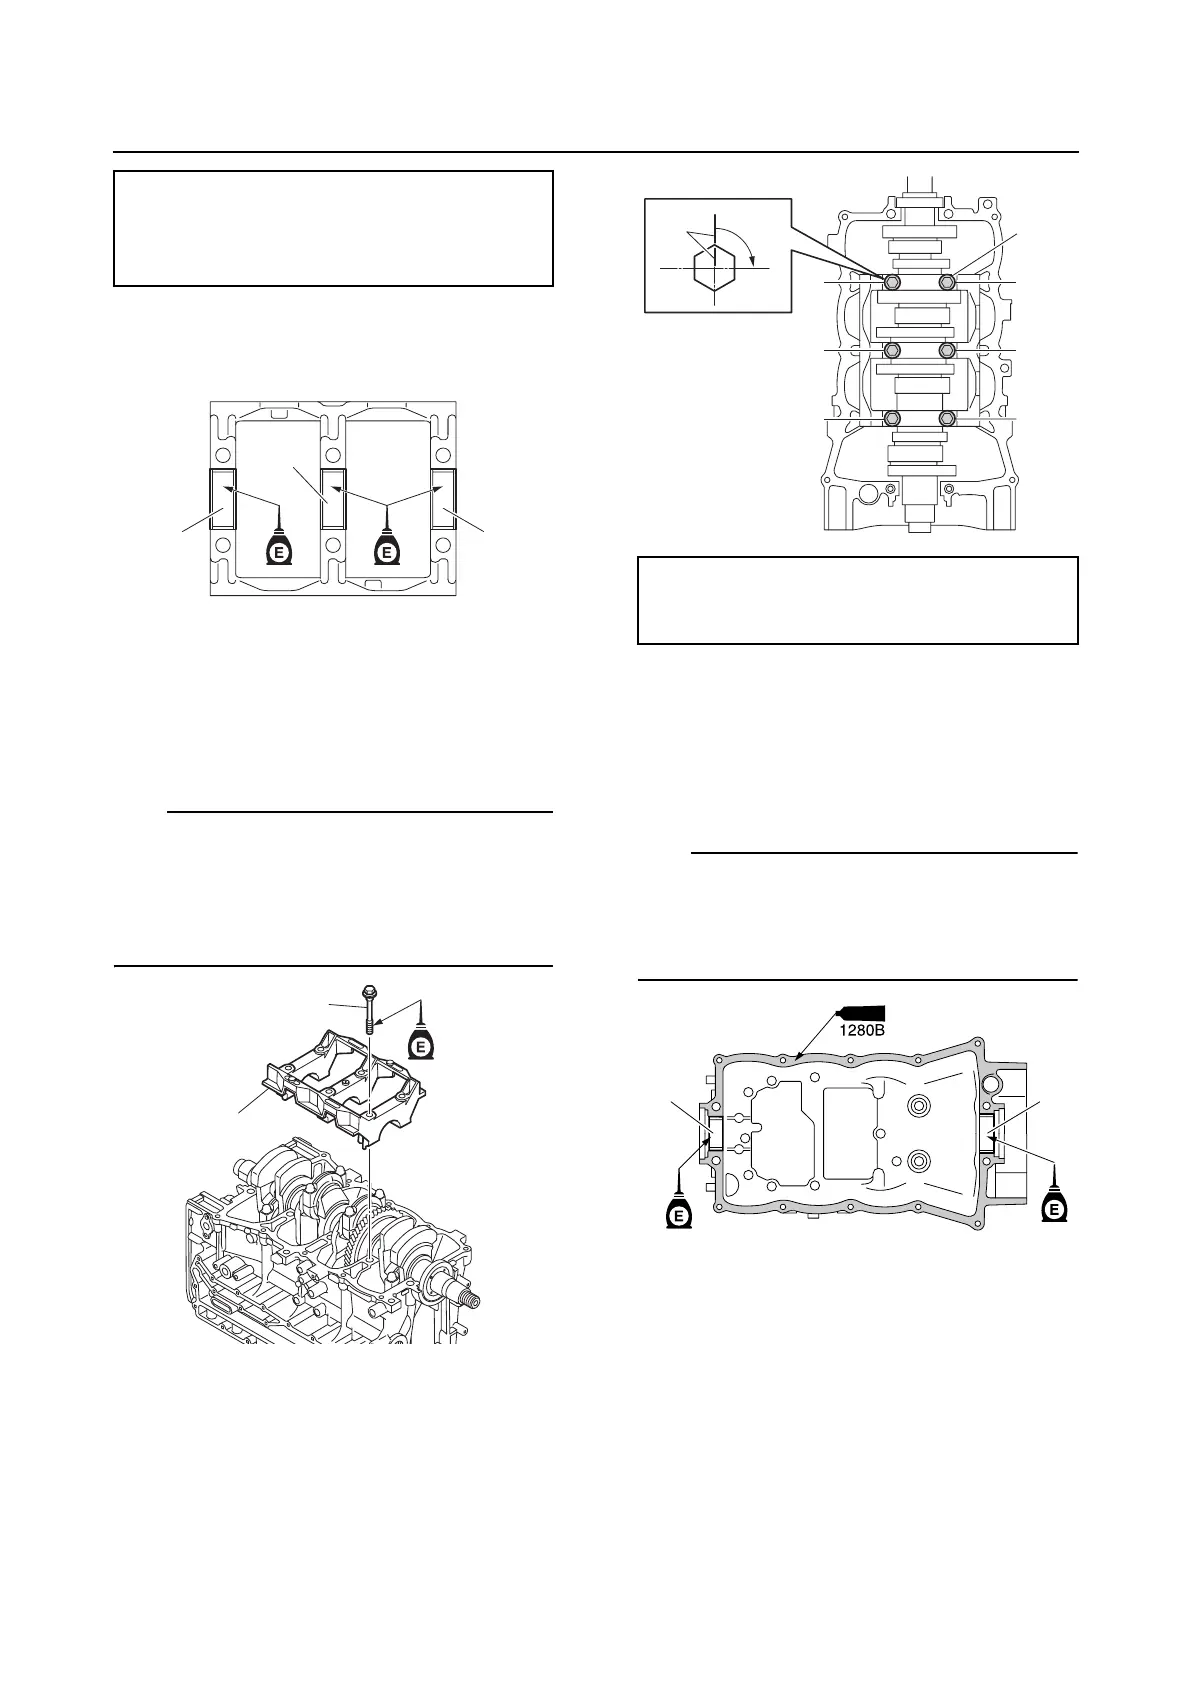
10. Install the crankshaft journal bearings “1”
into the main bearing cap.
11. Install the main bearing cap “1”, and then
tighten the main bearing cap bolts “2” to
the specified torques in 2 stages and in
the order [1], [2], and so on.
TIP:
In the second tightening stage for the main
bearing cap bolts “2”, mark the main bearing
cap bolts and the main bearing cap with iden-
tification marks “a”, and then tighten the bolts
90° from the marks on the main bearing cap.
12. Install the crankshaft journal bearings “1”
into the crankcase.
13. Apply a thin, even layer of sealant onto
the mating surface of the crankcase.
TIP:
• Install the crankshaft journal bearings “1” in
the original positions.
• Do not apply any sealant to the crankshaft
journal bearings “1”.
14. Install a new O-ring “1” and the crank-
case “2”, and then tighten the crankcase
bolts “3” and “4” to the specified torques
in 2 stages and in the order [1], [2], and
so on.
Connecting rod bolt “2”:
1st: 13 N·m (1.3 kgf·m, 9.6 ft·lb)
2nd: 23 N·m (2.3 kgf·m, 17.0 ft·lb)
3rd: 90°
1
1
1
1
2
Main bearing cap bolts “2”:
1st: 30 N·m (3.0 kgf·m, 22.1 ft·lb)
2nd: 90°
90q
[1]
[5]
[4]
[2]
[6]
[3]
2
a
11
 Loading...


