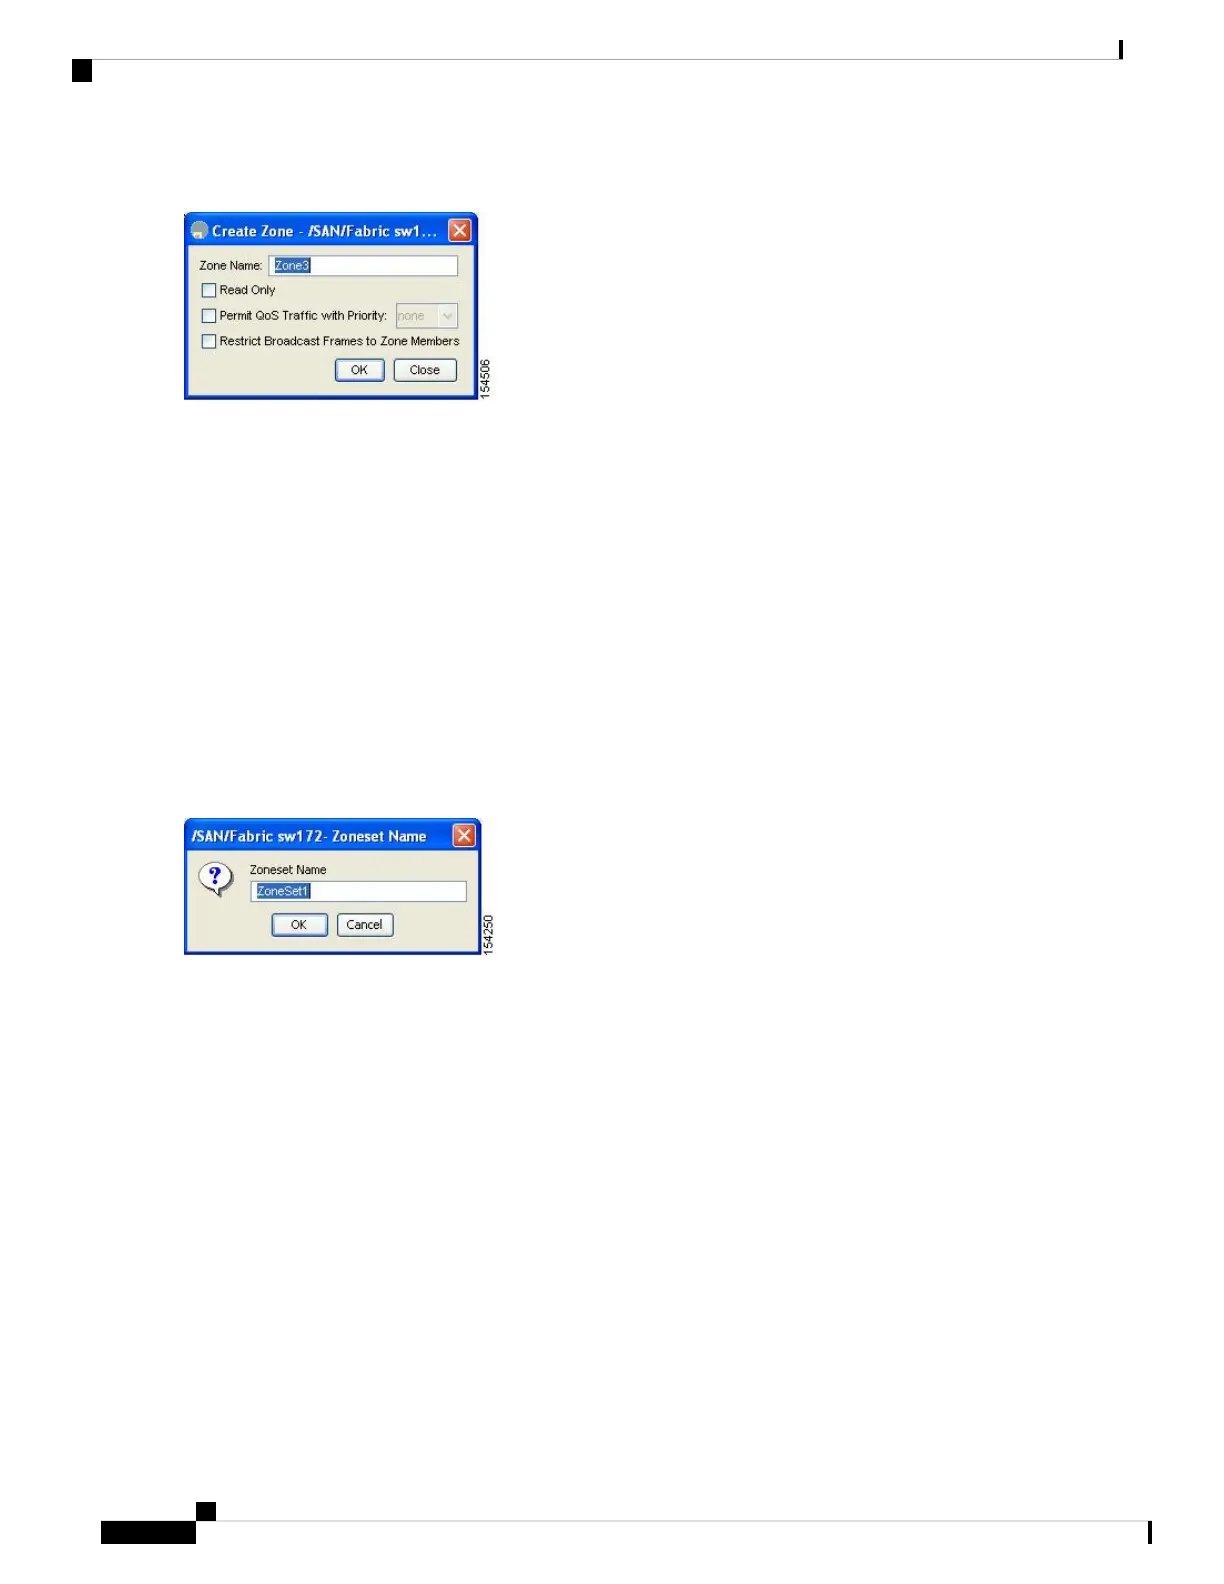
Figure 14: Create Zone Dialog Box
Step 4 Enter a zone name.
Step 5 Check one of the following check boxes:
1. Read Only—The zone permits read and denies write.
2. Permit QoS traffic with Priority—You set the priority from the drop-down menu.
3. Restrict Broadcast Frames to Zone Members
Step 6 Click OK to create the zone.
If you want to move this zone into an existing zone set, skip to Step 8.
Step 7 Click Zoneset in the left pane and click the Insert icon to create a zone set.
You see the Zoneset Name dialog box (see Figure 15: Zoneset Name Dialog Box, on page 58).
Figure 15: Zoneset Name Dialog Box
Step 8 Enter a zone set name and click OK .
One of these symbols ($, -, ^, _) or all alphanumeric characters are supported. In interop mode 2 and 3, this
symbol (_) or all alphanumeric characters are supported.
Note
Step 9 Select the zone set where you want to add a zone and click the Insert icon or you can drag and drop Zone3 over
Zoneset1.
You see the Select Zone dialog box (see Figure 16: Select Zone Dialog Box, on page 59).
Cisco MDS 9000 Series Fabric Configuration Guide, Release 8.x
58
Configuring and Managing Zones
Configuring a Zone Using the Zone Configuration Tool

 Loading...