C
HAPTER
5
| Interface Configuration
Trunk Configuration
– 146 –
note that the static trunks on this switch are Cisco EtherChannel
compatible.
◆ To avoid creating a loop in the network, be sure you add a static trunk
via the configuration interface before connecting the ports, and also
disconnect the ports before removing a static trunk via the
configuration interface.
PARAMETERS
These parameters are displayed:
◆ Trunk ID – Trunk identifier. (Range: 1-12)
◆ Trunk Member Port List – The ports assigned to a trunk.
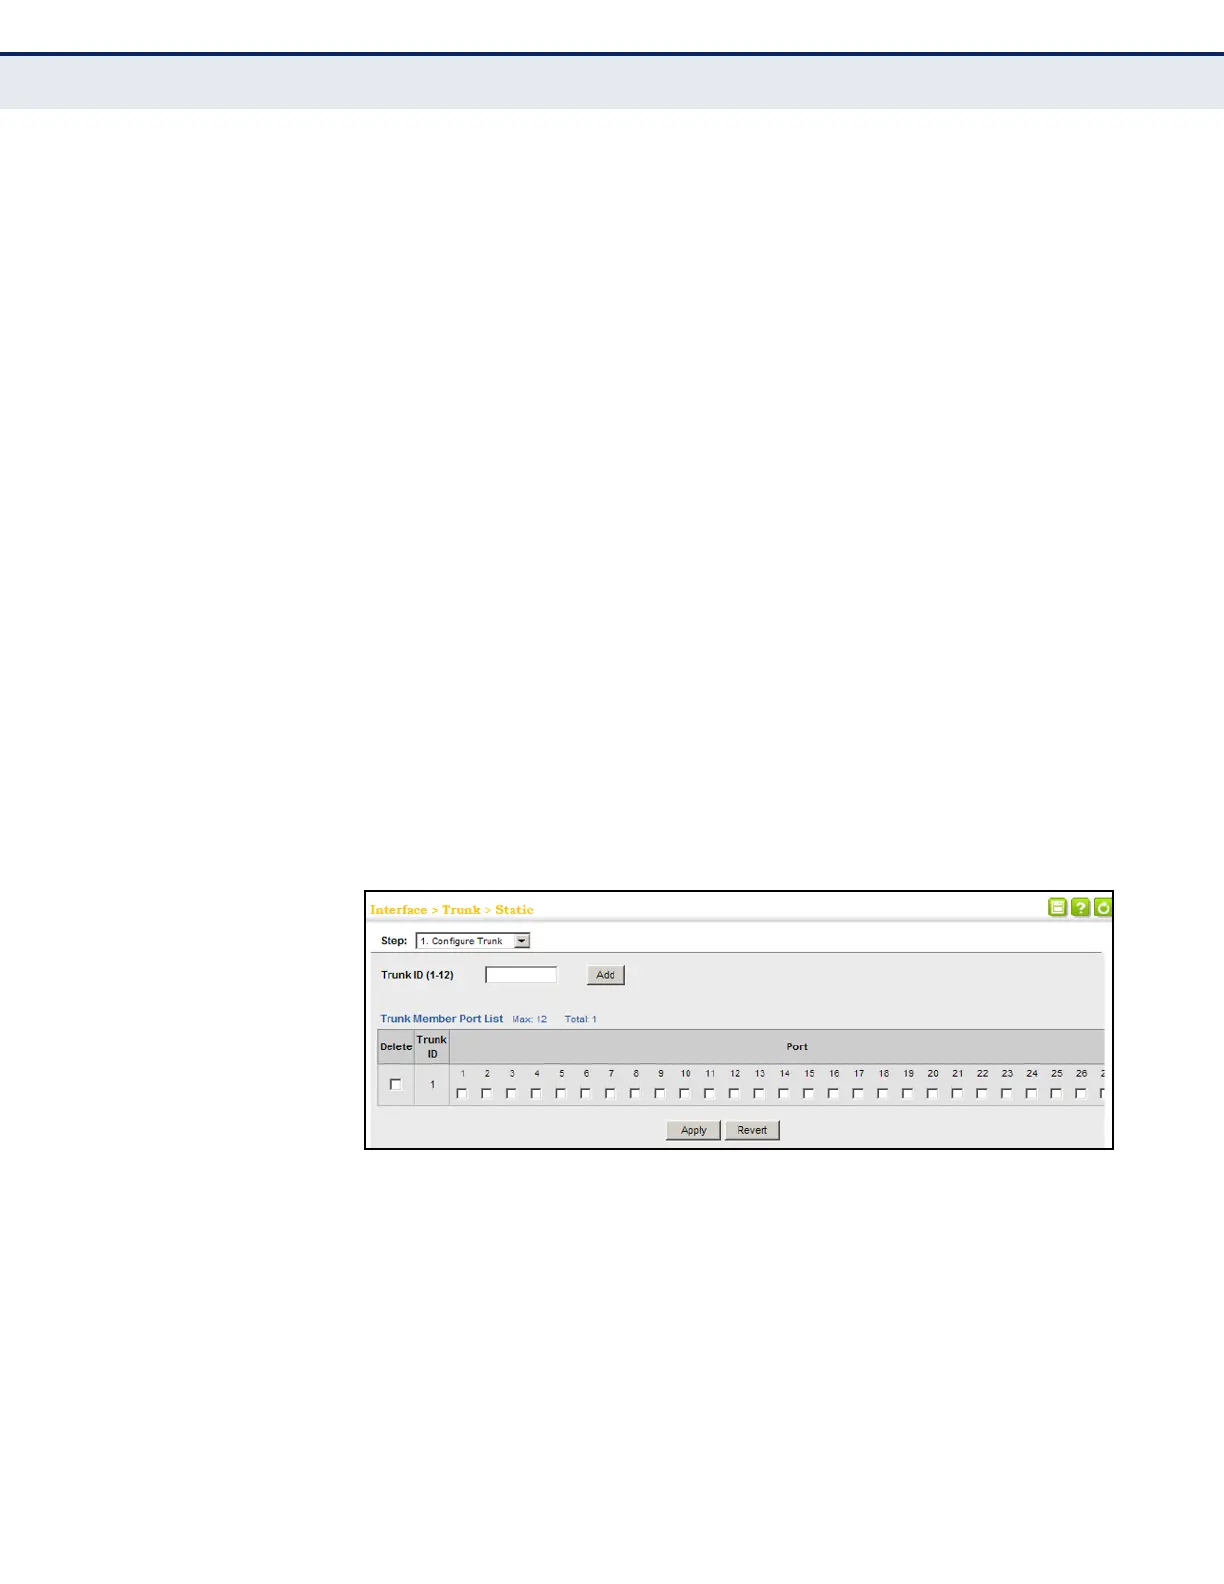
WEB INTERFACE
To create a static trunk:
1. Click Interface, Trunk, Static.
2. Select Configure Trunk from the Step list.
3. Enter a trunk identifier, and click Add.
4. Mark the ports assigned to each trunk.
5. Click Apply.
Figure 39: Creating Static Trunks
To configure connection parameters for a static trunk:
1. Click Interface, Trunk, Static.
2. Select Configure General from the Step list.
3. Select Configure from the Action list.
4. Modify the required interface settings. (Refer to "Configuring by Port
List" on page 127 for a description of the parameters.)
5. Click Apply.
 Loading...