Section 2: Getting Started
2 - 10 Euphonix CS3000/2000 Operation Manual
A prompt on the monitor screen will allow you to type in a new name (up to
eight characters for a project). When done you can press the keyboard [Enter]
key or [F3] (Yes). Pressing [F4] ([No]) will abort the renaming of the project.
Note that you cannot rename a project that contains titles currently in use.
To delete a project, go to the Project menu and press [F3] (Del?). You will be
prompted for confirmation in the SmartDisplay:
F3F1 F2 F4
!! Danger !! This will delete all enclosed titles as well as associated
SnapShots and mixes within the project file. To prevent accidental
deletion, the screen prompt requires you to press the QWERTY key-
board [Enter] key or [F3] (Yes) in the SmartDisplay for confirmation.
Copying a project will copy every title within that project. Since the number of
titles is limited only by available disk space, and each may contain up to 200
mixes, a project’s size can be very large. If you try to copy a project to a disk
with insufficient space, an error message will tell you that the copy was
aborted. You may want to limit the size of your project to avoid potential file
management problems, since DOS limits how large a single directory can get.
From the Project menu, press [F4] (Copy?) to copy a project:
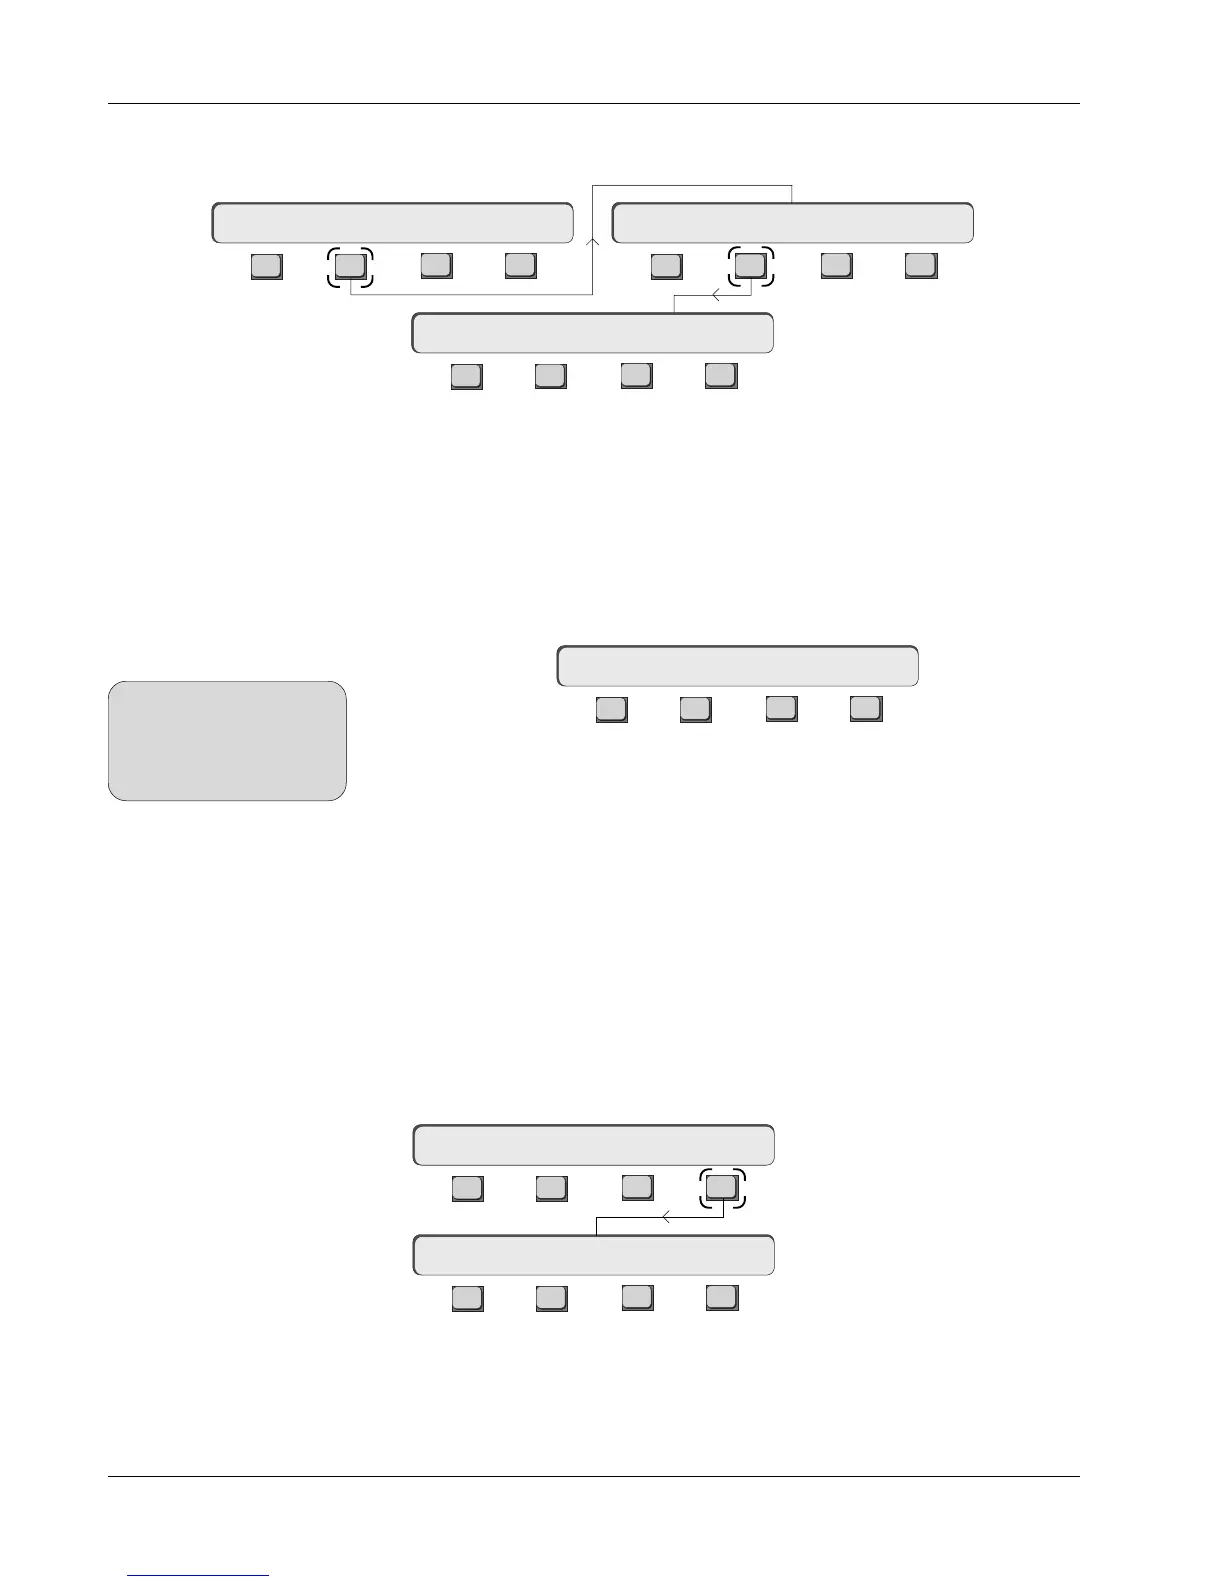
You can rename a project from the File menu by pressing [F2] (Project), [F2]
(ReNm?) and then [F3] (Yes) to confirm:
Copy Project
Rename Project
Delete Project
Delete Proj? Yes [No]
F3F1 F2 F4
F3F1 F2 F4
F3F1 F2 F4
New? ReNm? Del? Copy?
Disk Project Title Mix
Rename Proj? Yes [No]
Project MenuFile Menu
F3F1 F2 F4
F3F1 F2 F4
Copy to Disk ? [OK]
New? ReNm? Del? Copy?
Project Menu
You now have to select a disk drive on which to copy the currently selected
project. Notice that the Disk list header is highlighted in blue and that the
current drive is selected. If you want to copy the entire project to the same
drive, press [F4] ([OK]). If you want to copy to a different drive, select the drive
in the Disk list using the SpinKnob or DSC [+]/[–] keys and then press [F4].
SIDE NOTE:
As with renaming projects, a
project containing titles
currently in use cannot be
deleted.