Section 4: Tutorial
4 - 52 Euphonix CS3000/2000 Operation Manual
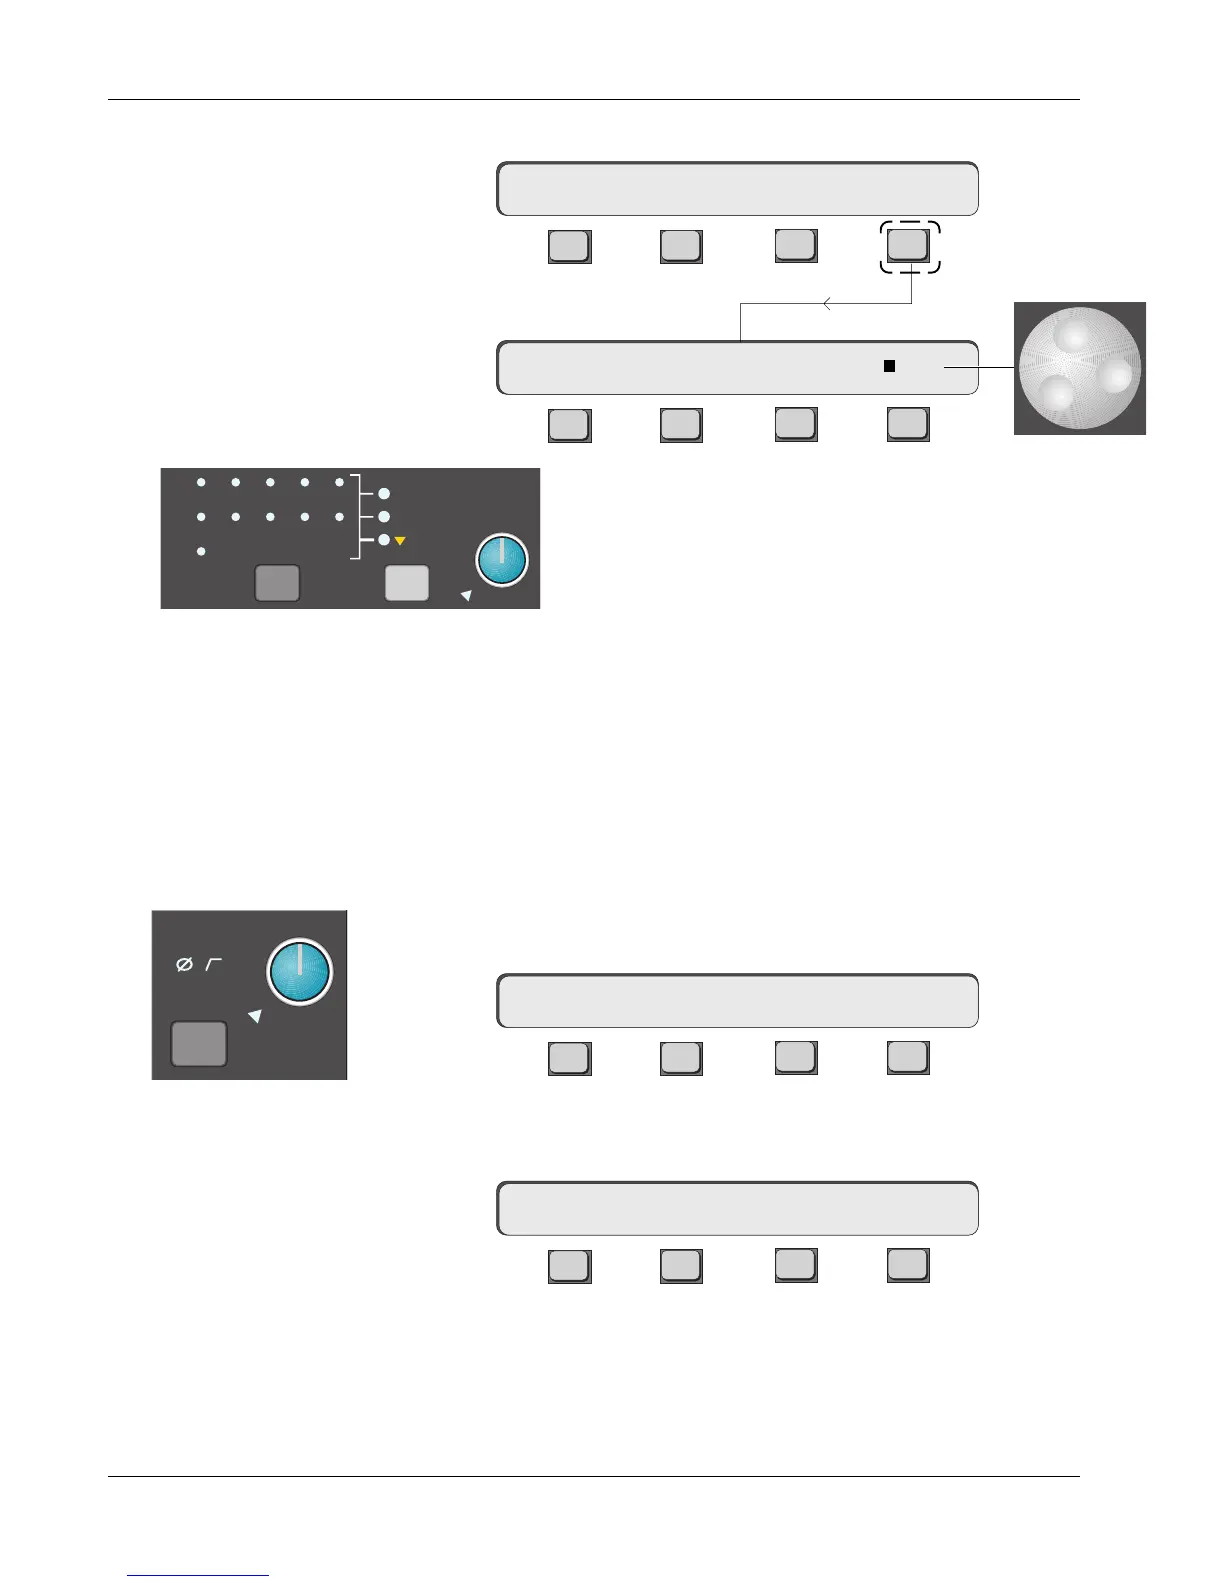
From the Talkback menu, press [F4] (ASGN):
F3F1 F2 F4
F3F1 F2 F4
The SpinKnob will select the various destinations for the
selected talkback sources. To select an individual source,
press [F4]. A square appears next to the source in the
SmartDisplay and an indication of the destination is shown
on the Master Control Panel in the talkback block area.
When the Talkback key is pressed the mic signal is sent to the selected
destinations. Any of the three monitors can be dimmed when the Talkback key
is pressed by setting this feature from the individual Monitor menus.
Each block has a level detect circuit which will light the CLIP LED when a
preset level has been exceeded. The threshold above the +4dBu nominal level
at which the CLIP indicator lights can be set for between +10dB and +24dB.
Return to the Master menu, either by [Esc]aping back up or by pressing the
Master Module [MASTER] key.
F3F1 F2 F4
Above F4 is a row of dots showing that there are further menus available.
Press [F4] (…):
F3F1 F2 F4
Pressing [F1] (METER) allows the Master meters to be set. These options were
covered earlier in this section and the options available are detailed in Appen-
dix 9.
M1
ovld
Pwr
Pad
CLIP Indicator Options
mTB–> SRC OSC ASGN
TB EXT1 EXT2 …
METER CLIP …
mTB–> ASGN: A1
TB MIC
A1
A2
A3
A4
A5
A6
A7
A8
ST1
ST2
BUS
Oscillator
Patch
Assign (Destination) Menu
Talkback Menu