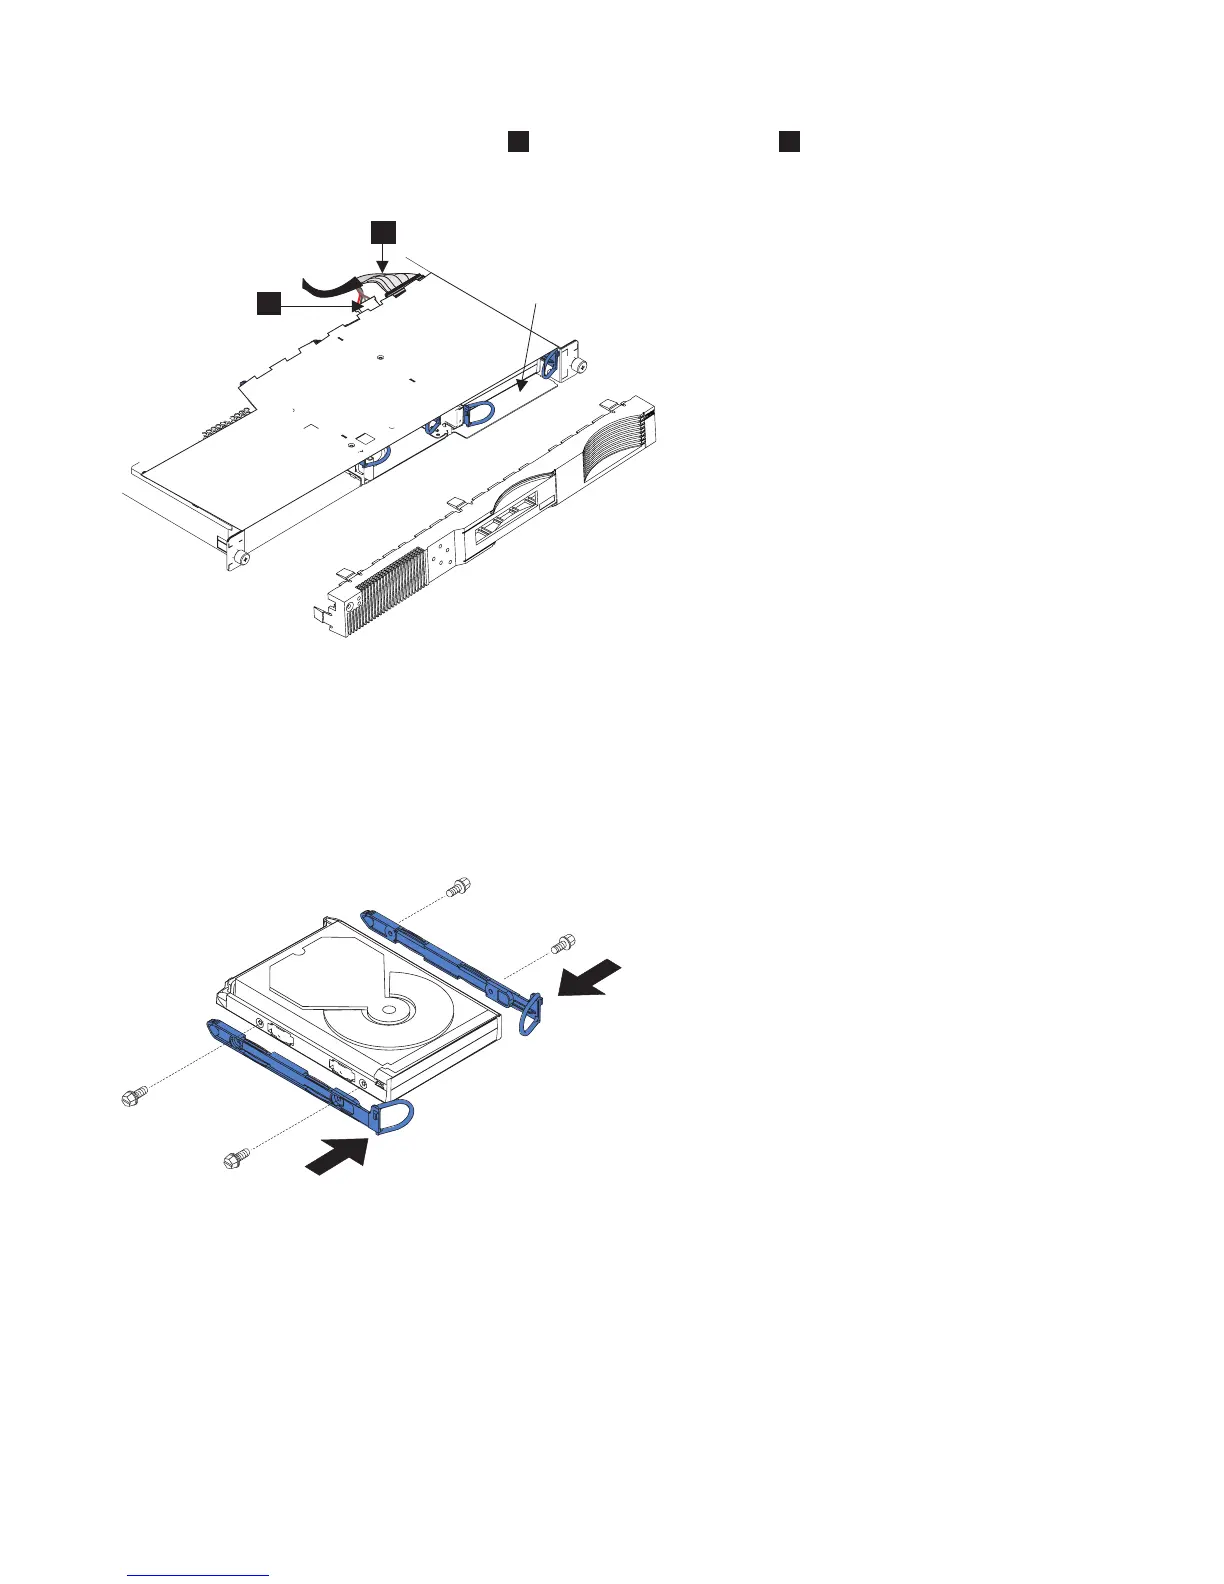
5. Disconnect the SCSI signal connector
1
and the power connector
2
from the back of the disk
drive.
6. Remove the front panel.
7. Remove the service controller. See “Removing the service controller” on page 75.
8. Pull the two handles to release the latches, and pull the disk drive forward and out of the node.
9. If you are exchanging the disk drive for another, locate the rails and screws that are shipped with
the new disk drive. Attach the rails to the disk drive, as shown in Figure 104.
10. Keep the disk drive that you removed if it has any jumpers installed, because you will need to set
the same jumpers on the replacement disk drive.
If you have any tasks that you need to perform while the service controller is removed, do them
now.
You can now replace the SAN Volume Controller 2145-4F2 disk drive.
Drive Bay 1
1
2
Figure 103. SAN Volume Controller 2145-4F2 disk drive and front panel
Figure 104. Attaching the rails to the SAN Volume Controller 2145-4F2 disk drive
102 IBM SAN Volume Controller Hardware Maintenance Guide